Even More Adventures with Winogradskies

It is time again for a Winogradsky column update! It has been three weeks since we last shared with you our Winograsky column progress. If in that time you’ve forgotten what a Winogradsky column is and our goals for them I urge you to visit: Adventures with Winogradskies and Further Adventures with Winogradskies to refresh your memory.

After 7 weeks:

IMG_20140821_140956

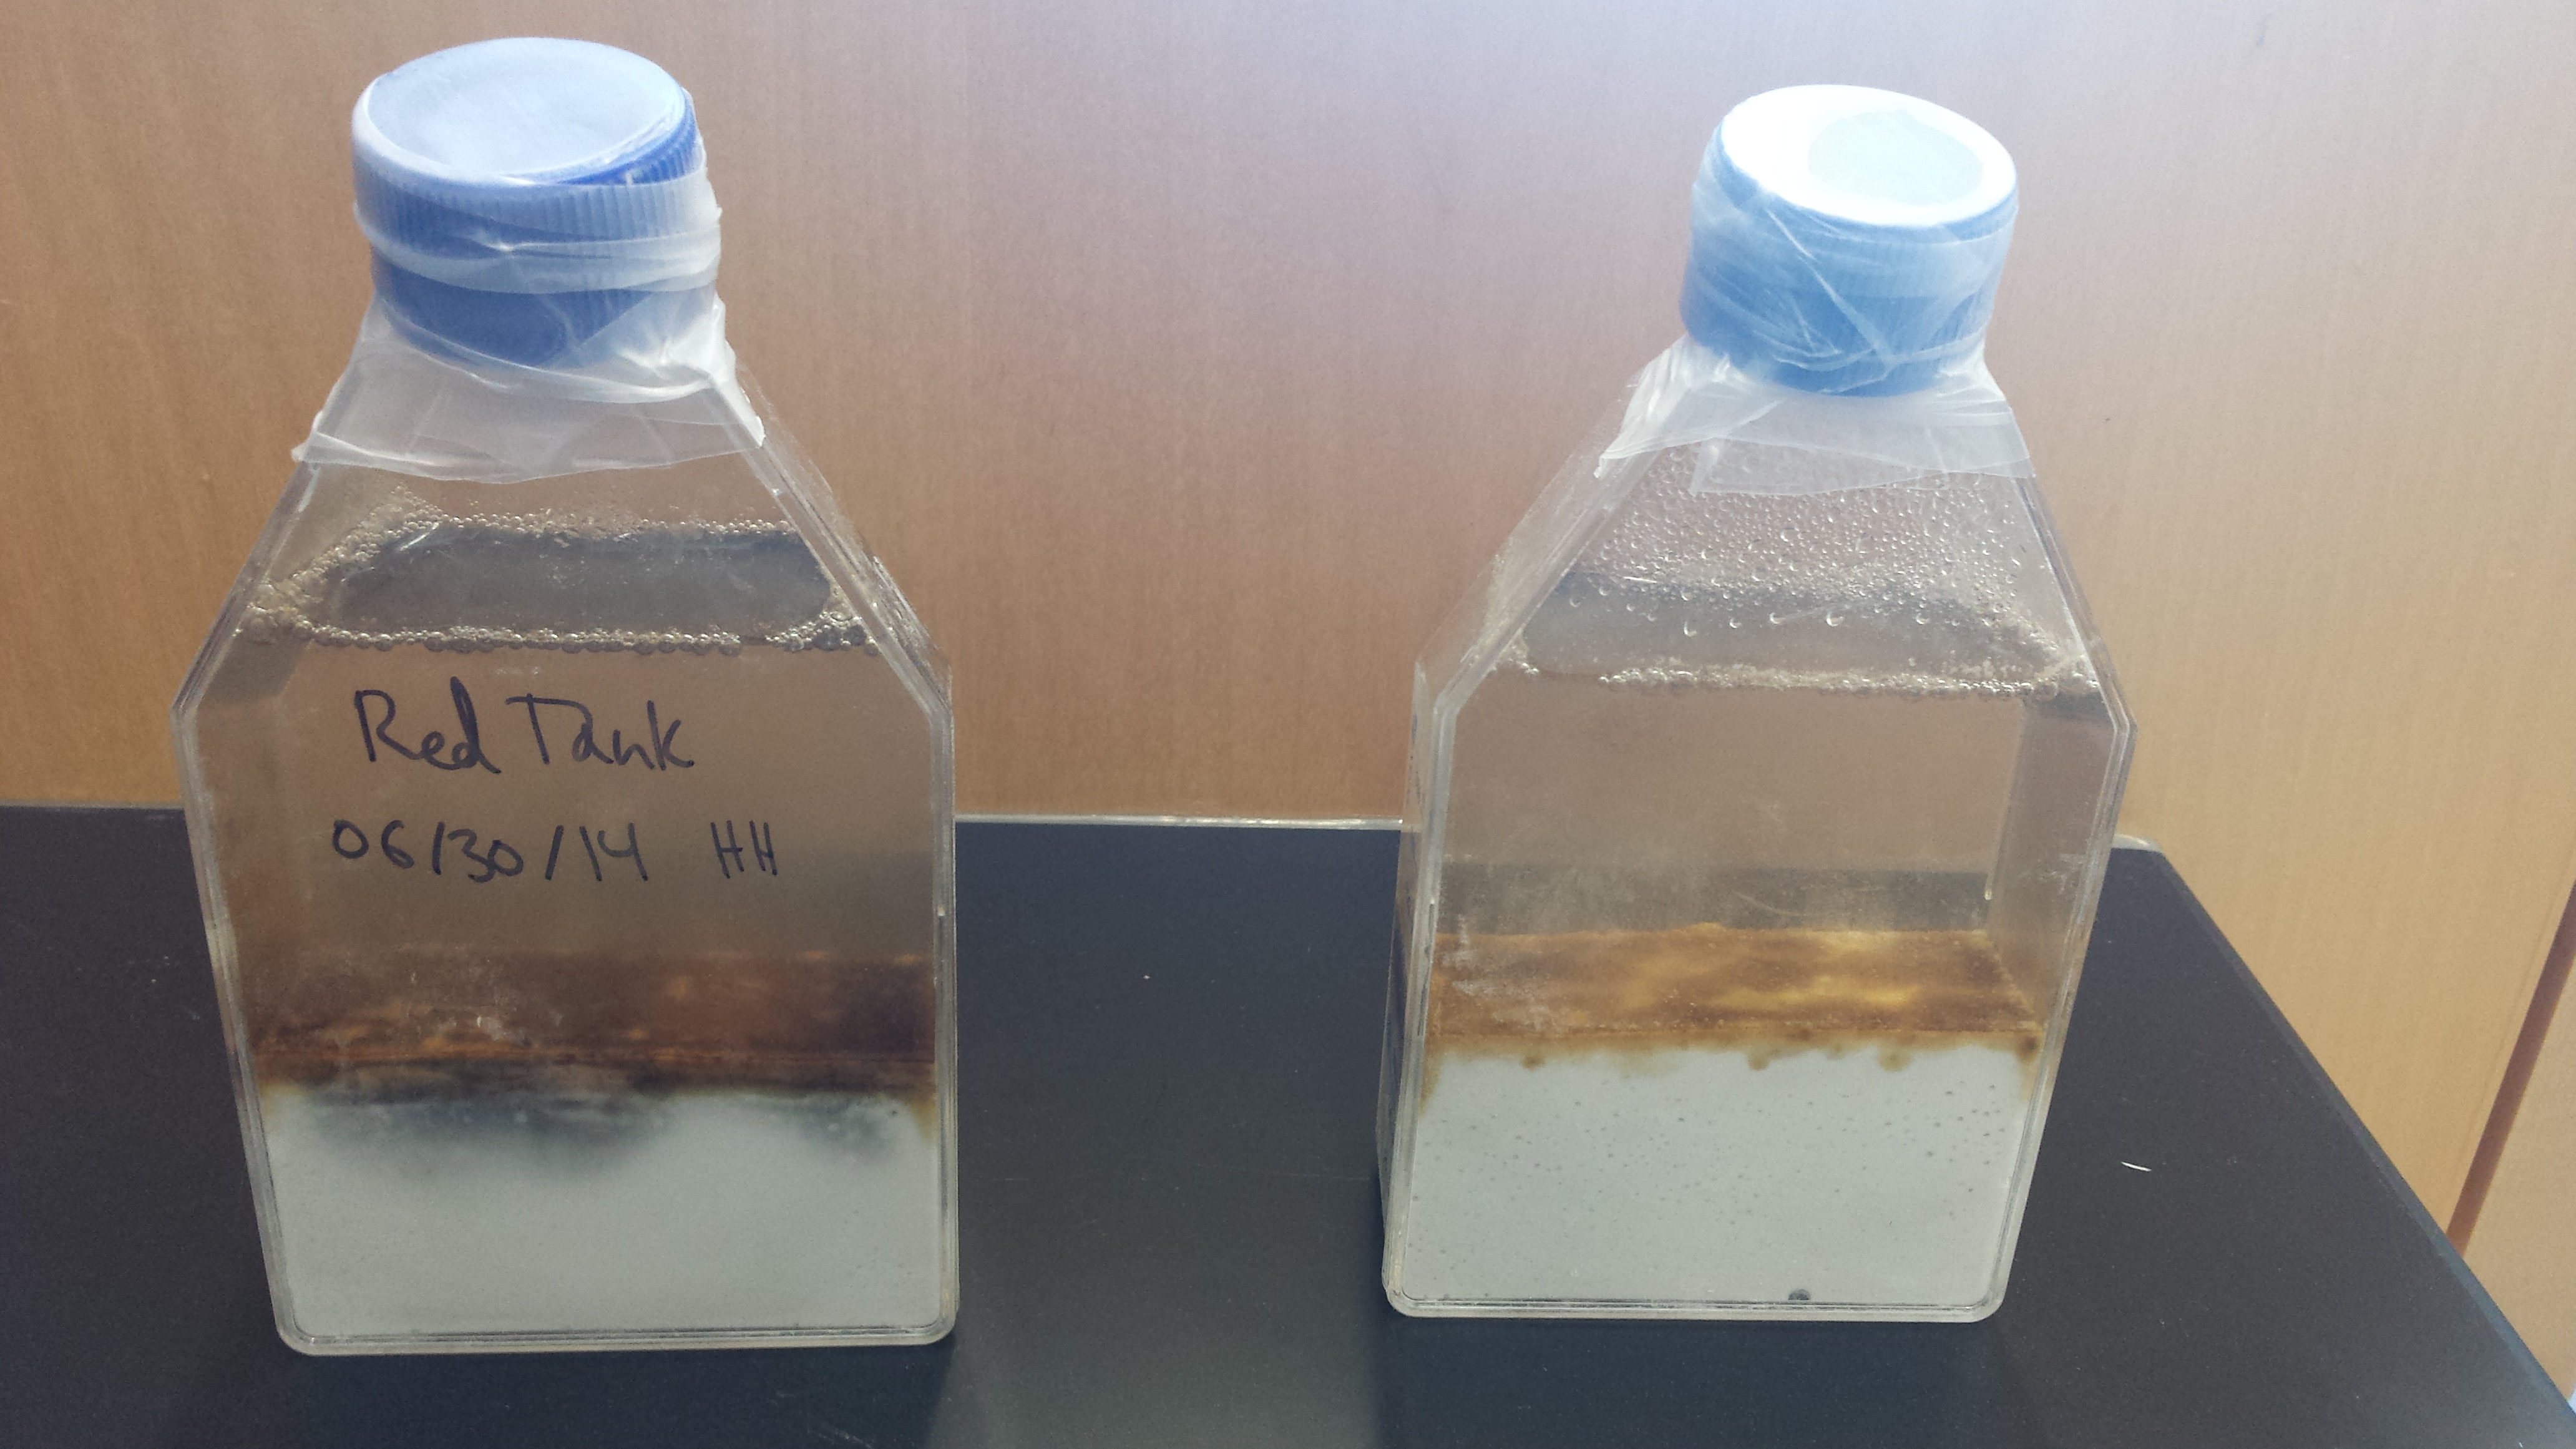
We are finally starting to see some pretty pink layers! Many of the darker colored bacteria from week 4 are gone from these columns… could it be that our columns are undergoing microbial succession?? Could Winograsky columns be a good model system for studying microbial succession?

IMG_20140821_141123IMG_20140821_141221IMG_20140821_141404

Strangely (or not so strangely?), it is our large containers that show the most variation between replicates from the same sample location. We have everything from green-as-grass and pretty-in-pink to black-as-coal microbes. The container above on the far right is the one that we’ve been simulating soil conditions in by covering the bottom half of the container – could the lack of pink and purple microbes be due to this?

IMG_20140821_141517IMG_20140821_141540

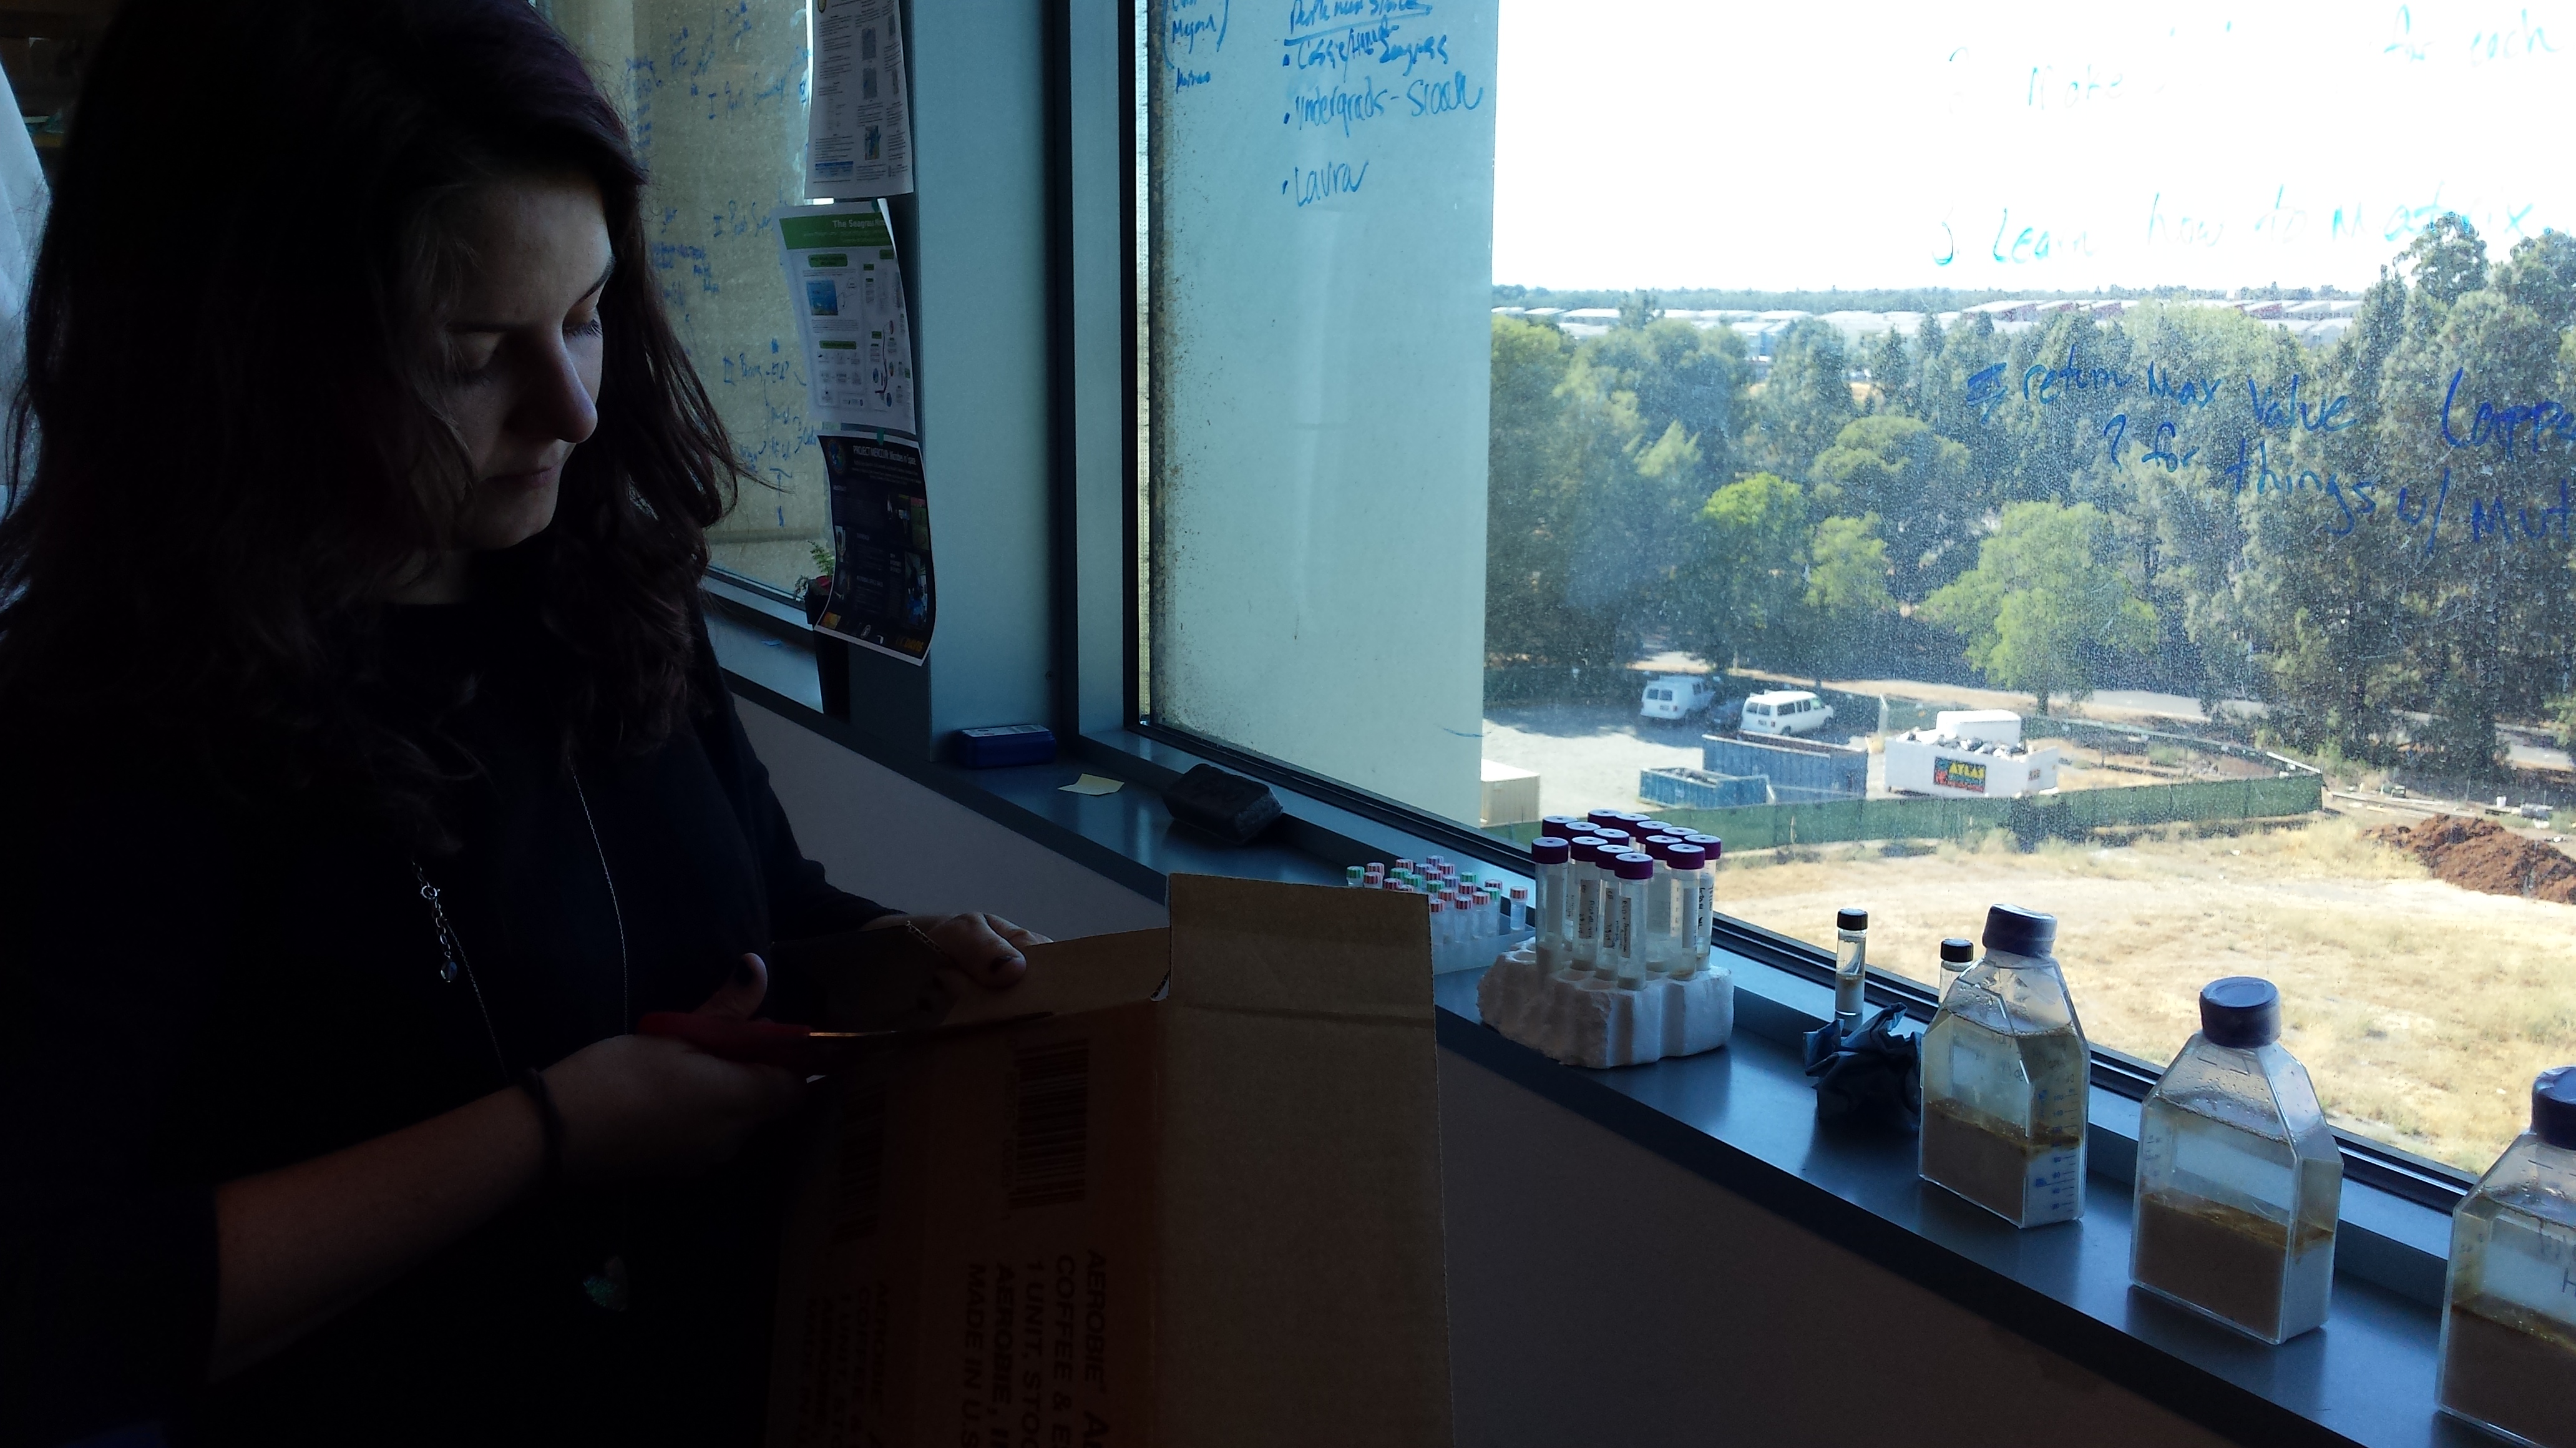
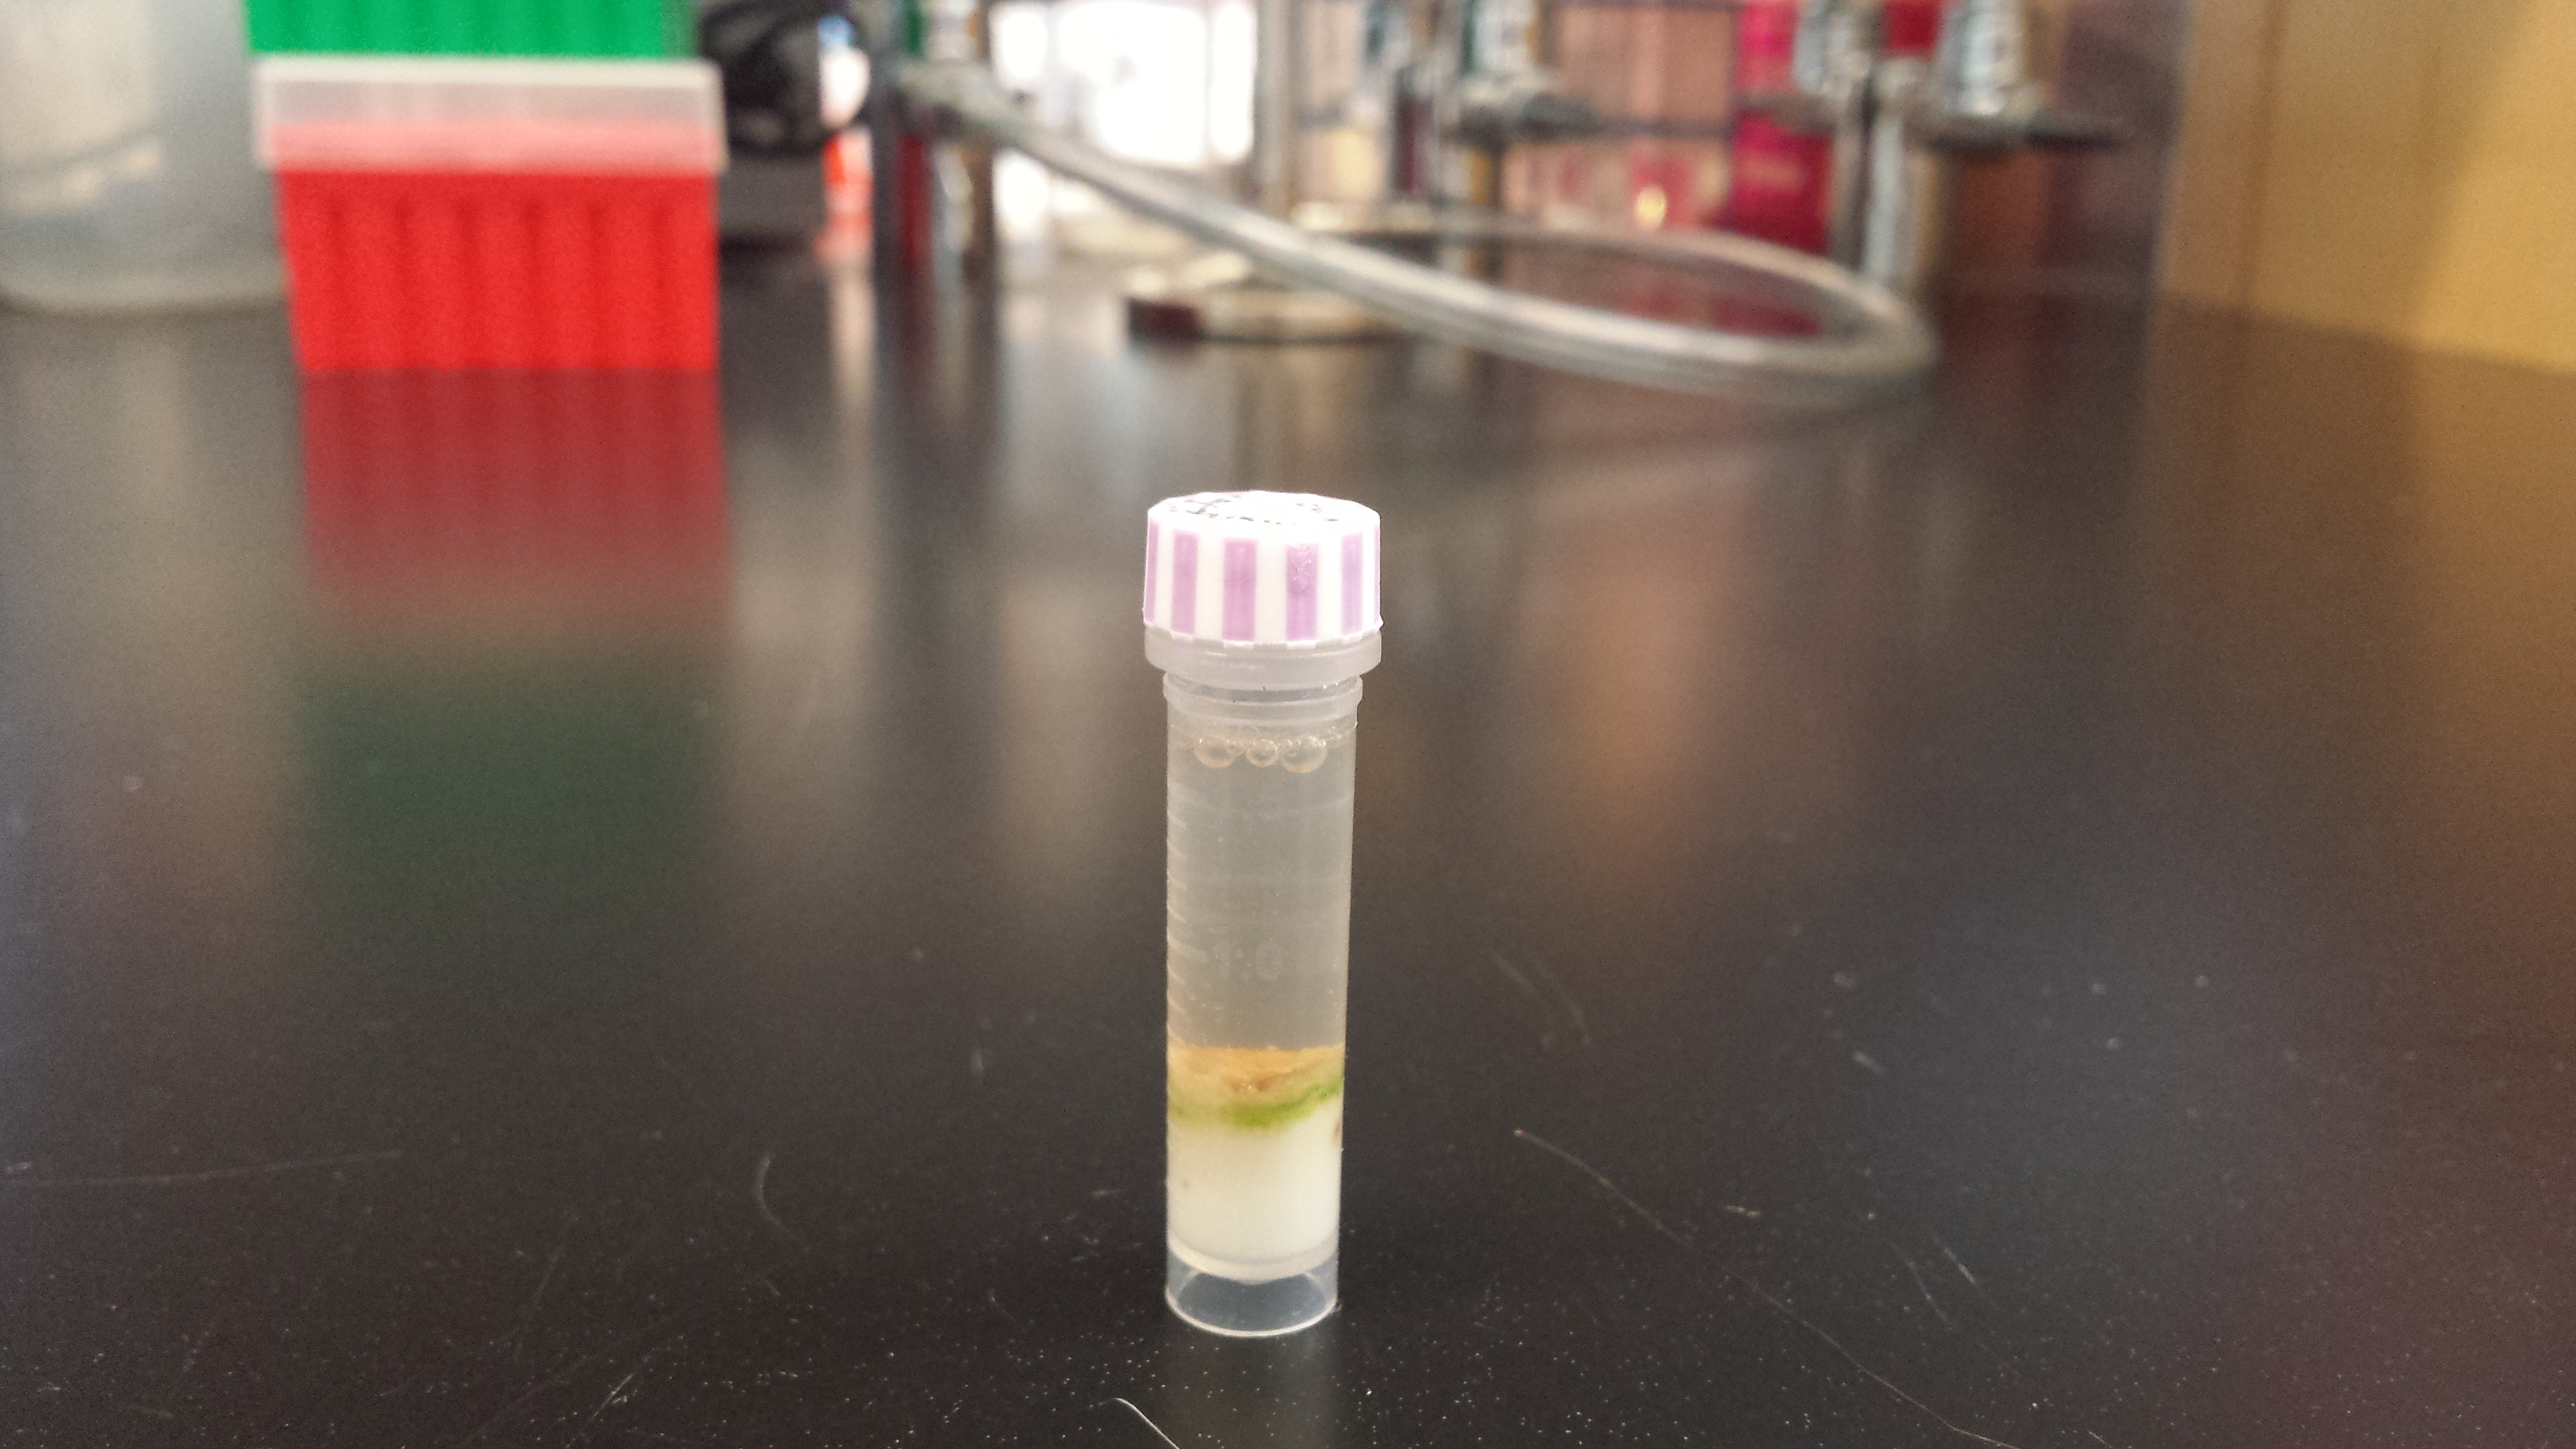
Above you can see the variation in vials taken from different sampling locations. The microbes in these vials seem to be growing at a slower pace than those in the large container – we also see this with our small micro-centrifuge tubes (not pictured) which haven’t changed significantly form week 4.

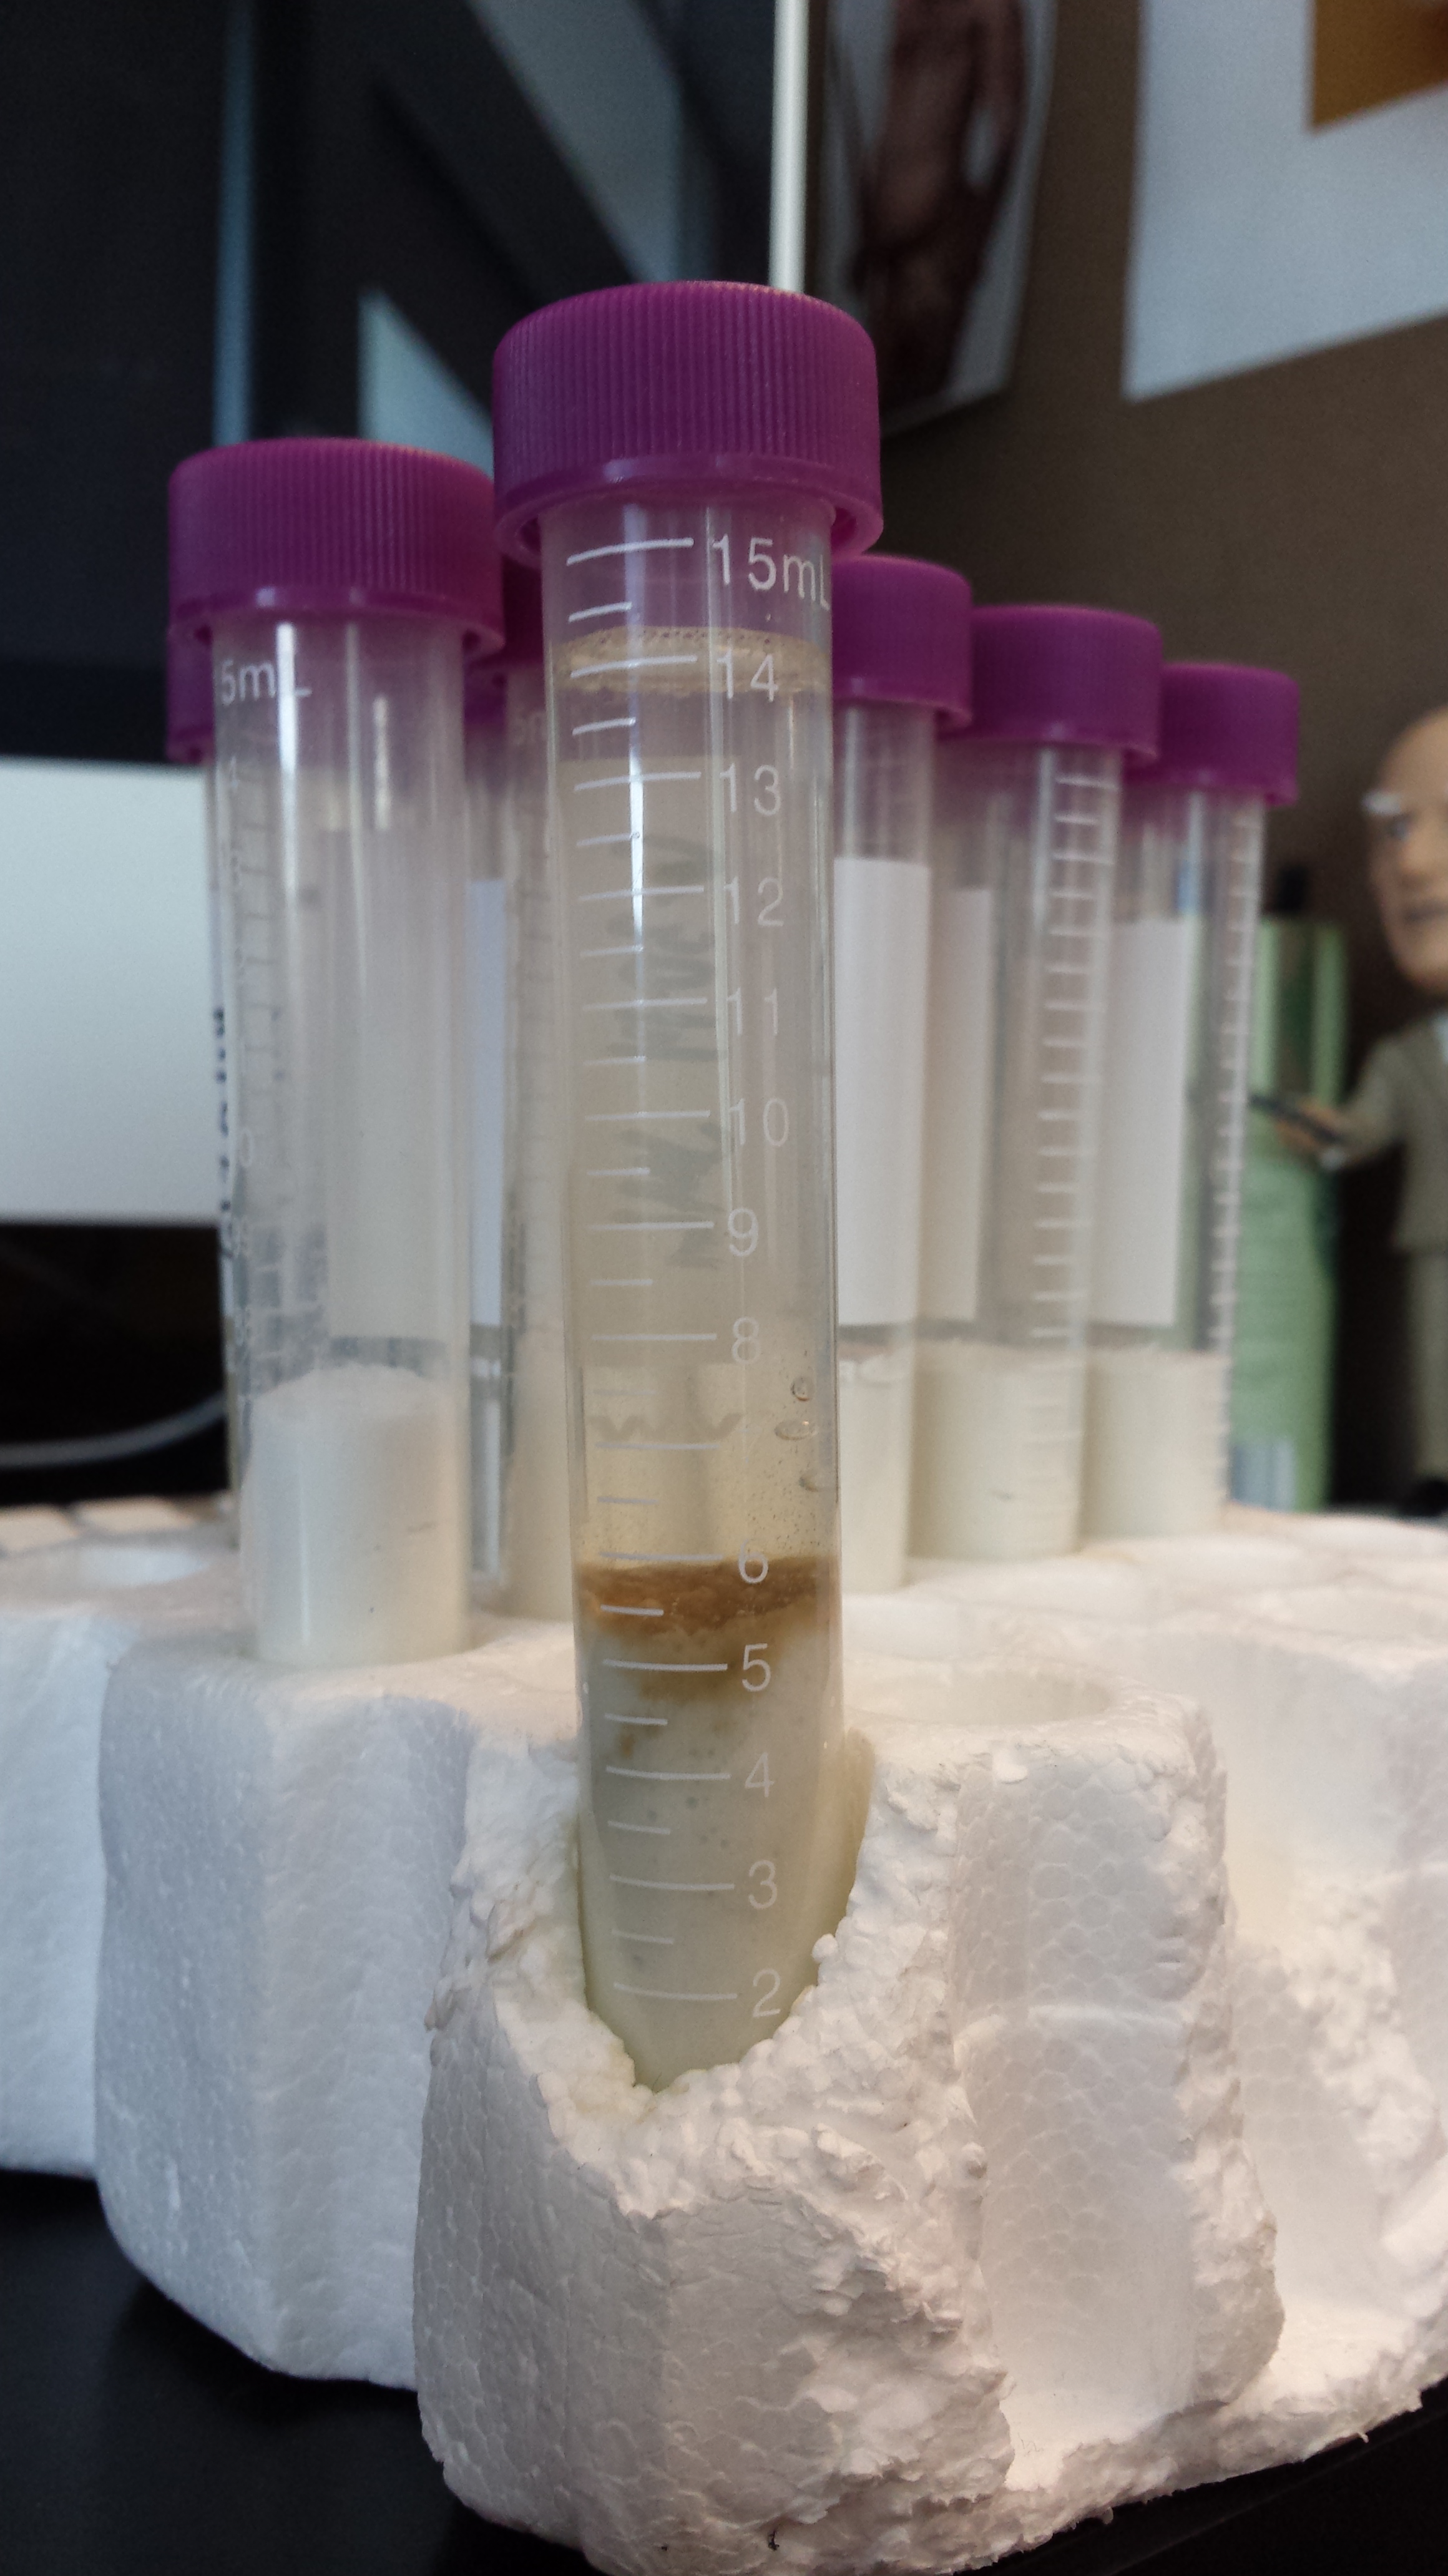
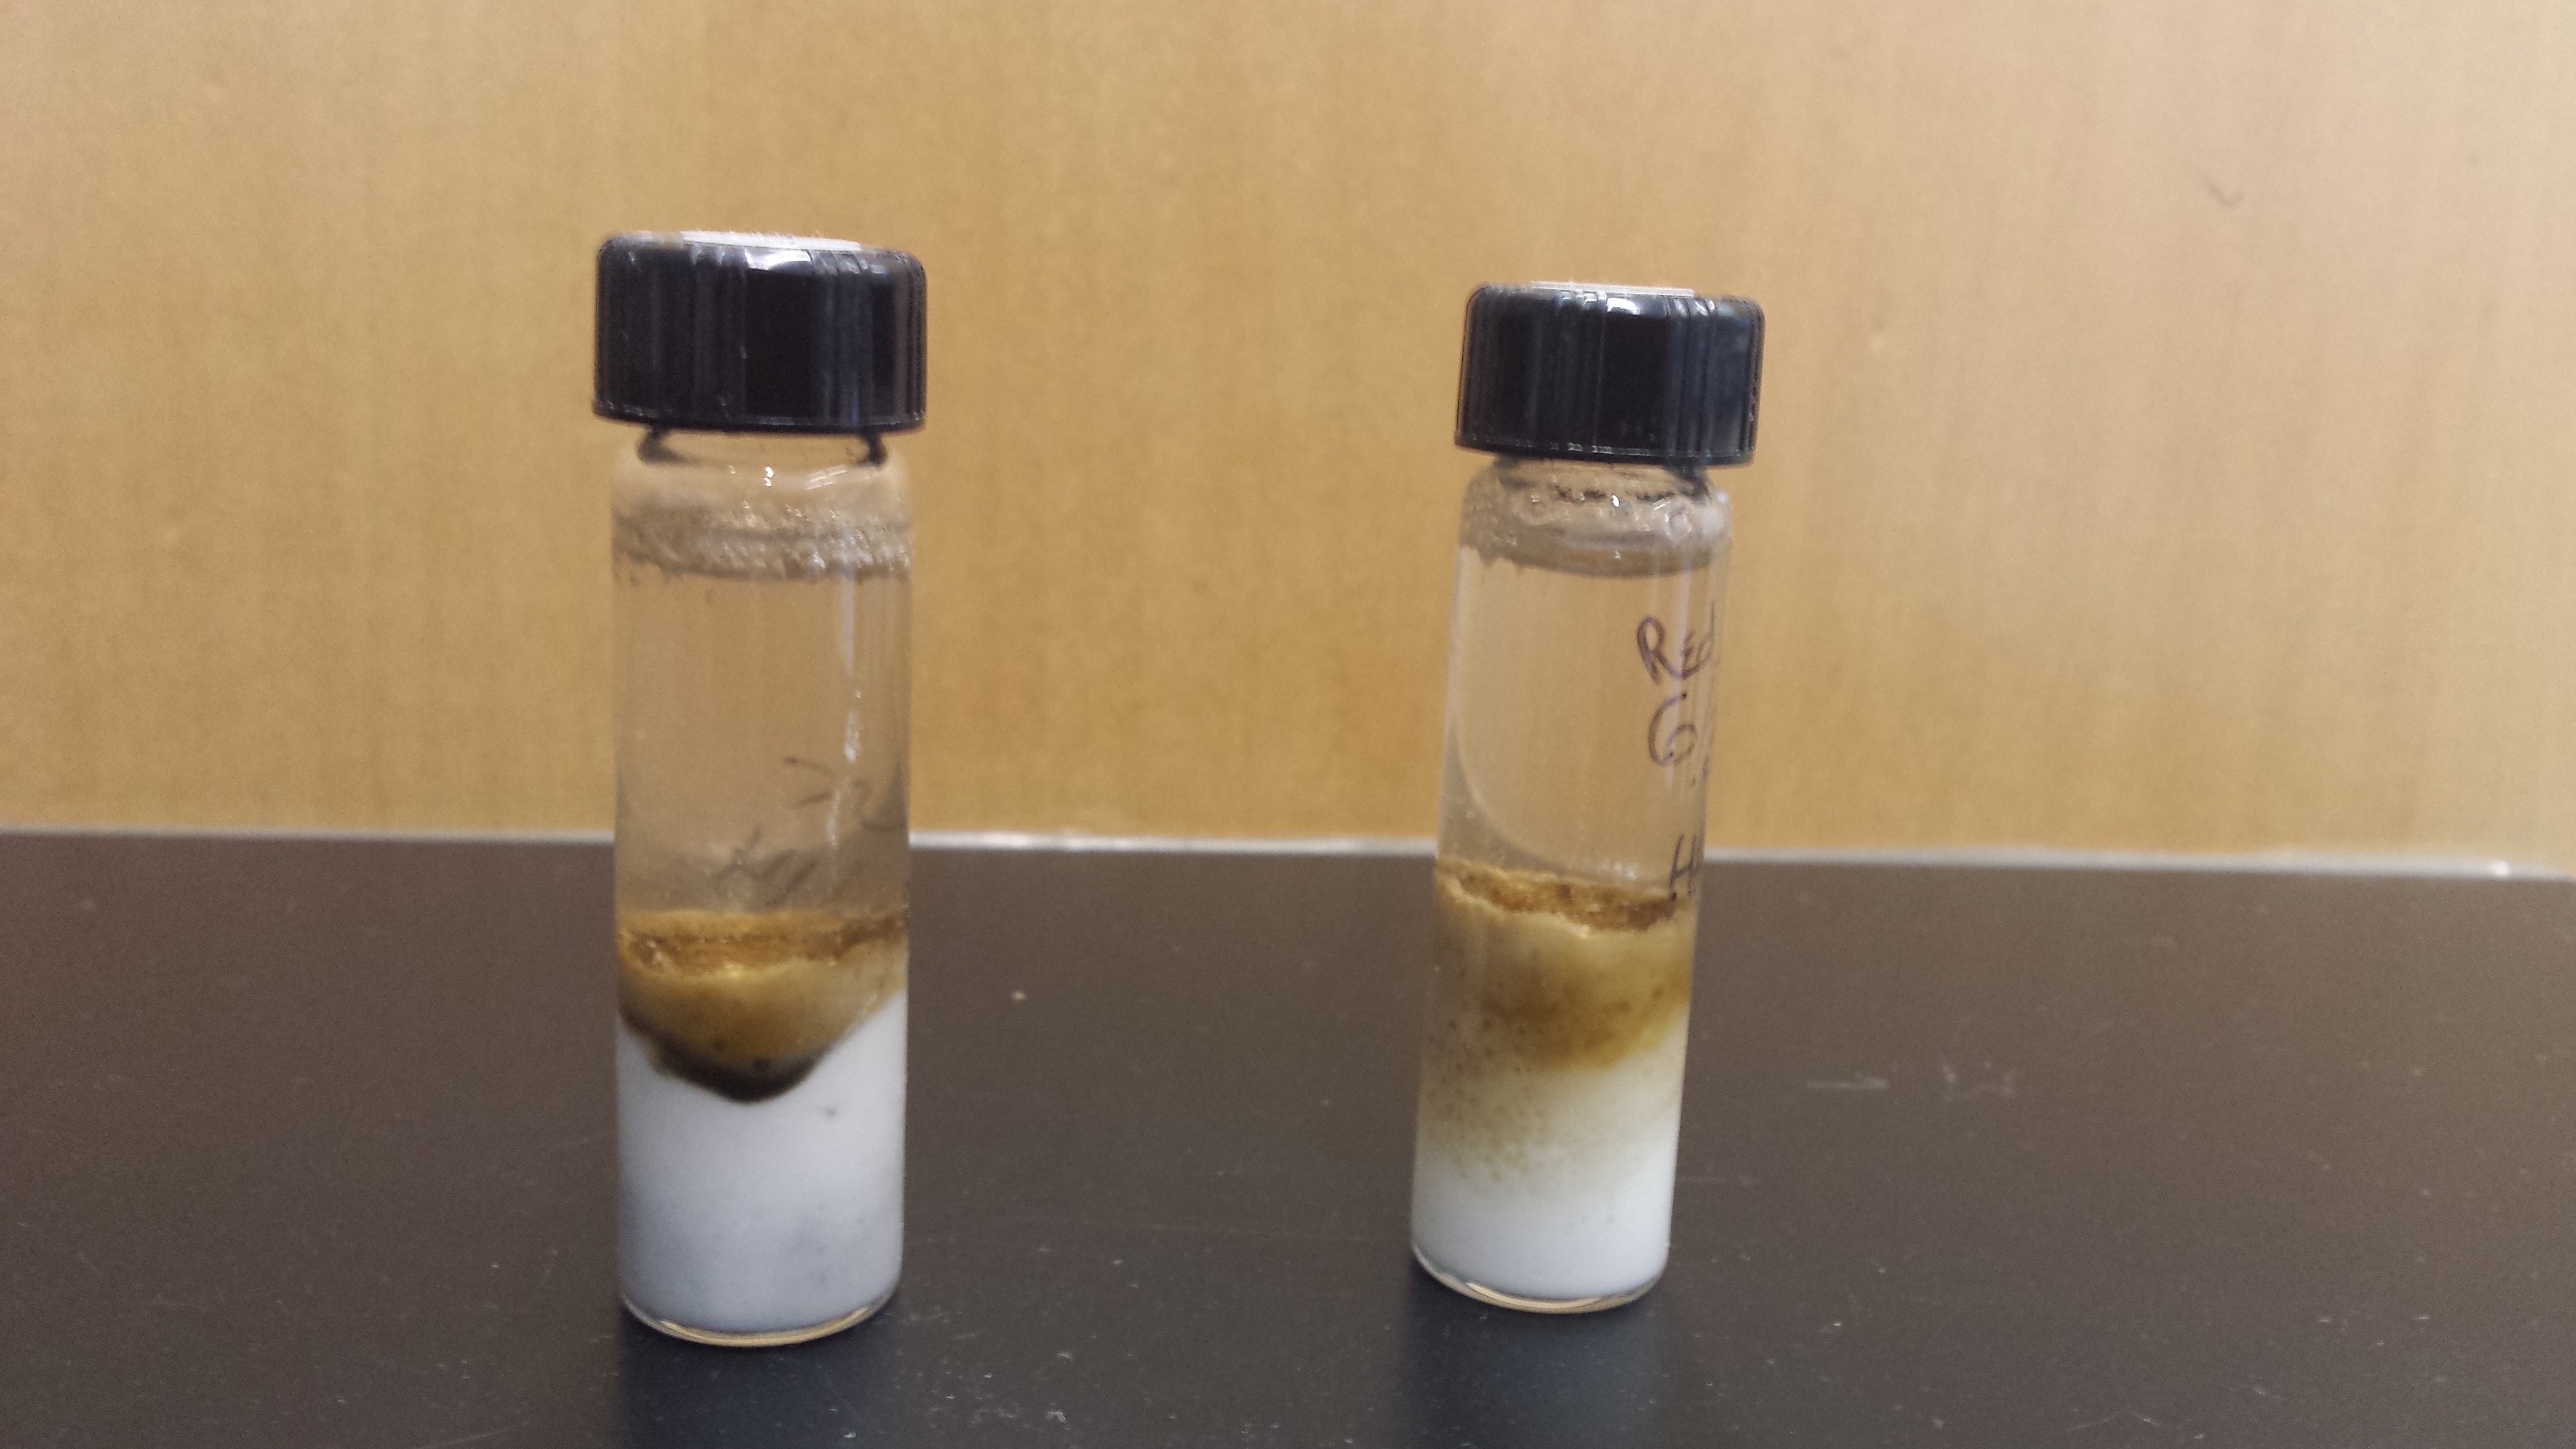
Experimental Tubes ( (where we added either Potassium Nitrate or Ammonium Acetate) – After 6 weeks:

IMG_20140821_141640IMG_20140821_141611

On the left are the tubes we added Potassium Nitrate too and on the right are the tubes we added Ammonium Acetate too. The Potassium Nitrate tubes have green microbes growing in firework like patterns up the sides of the tubes! The Ammonium Acetate tubes have pinkish-brown microbes clouding them up! It is amazing how different the Potassium Nitrate and Ammonium Acetate tubes are given that they came from the same original sample!

IMG_20140821_141751IMG_20140821_141840

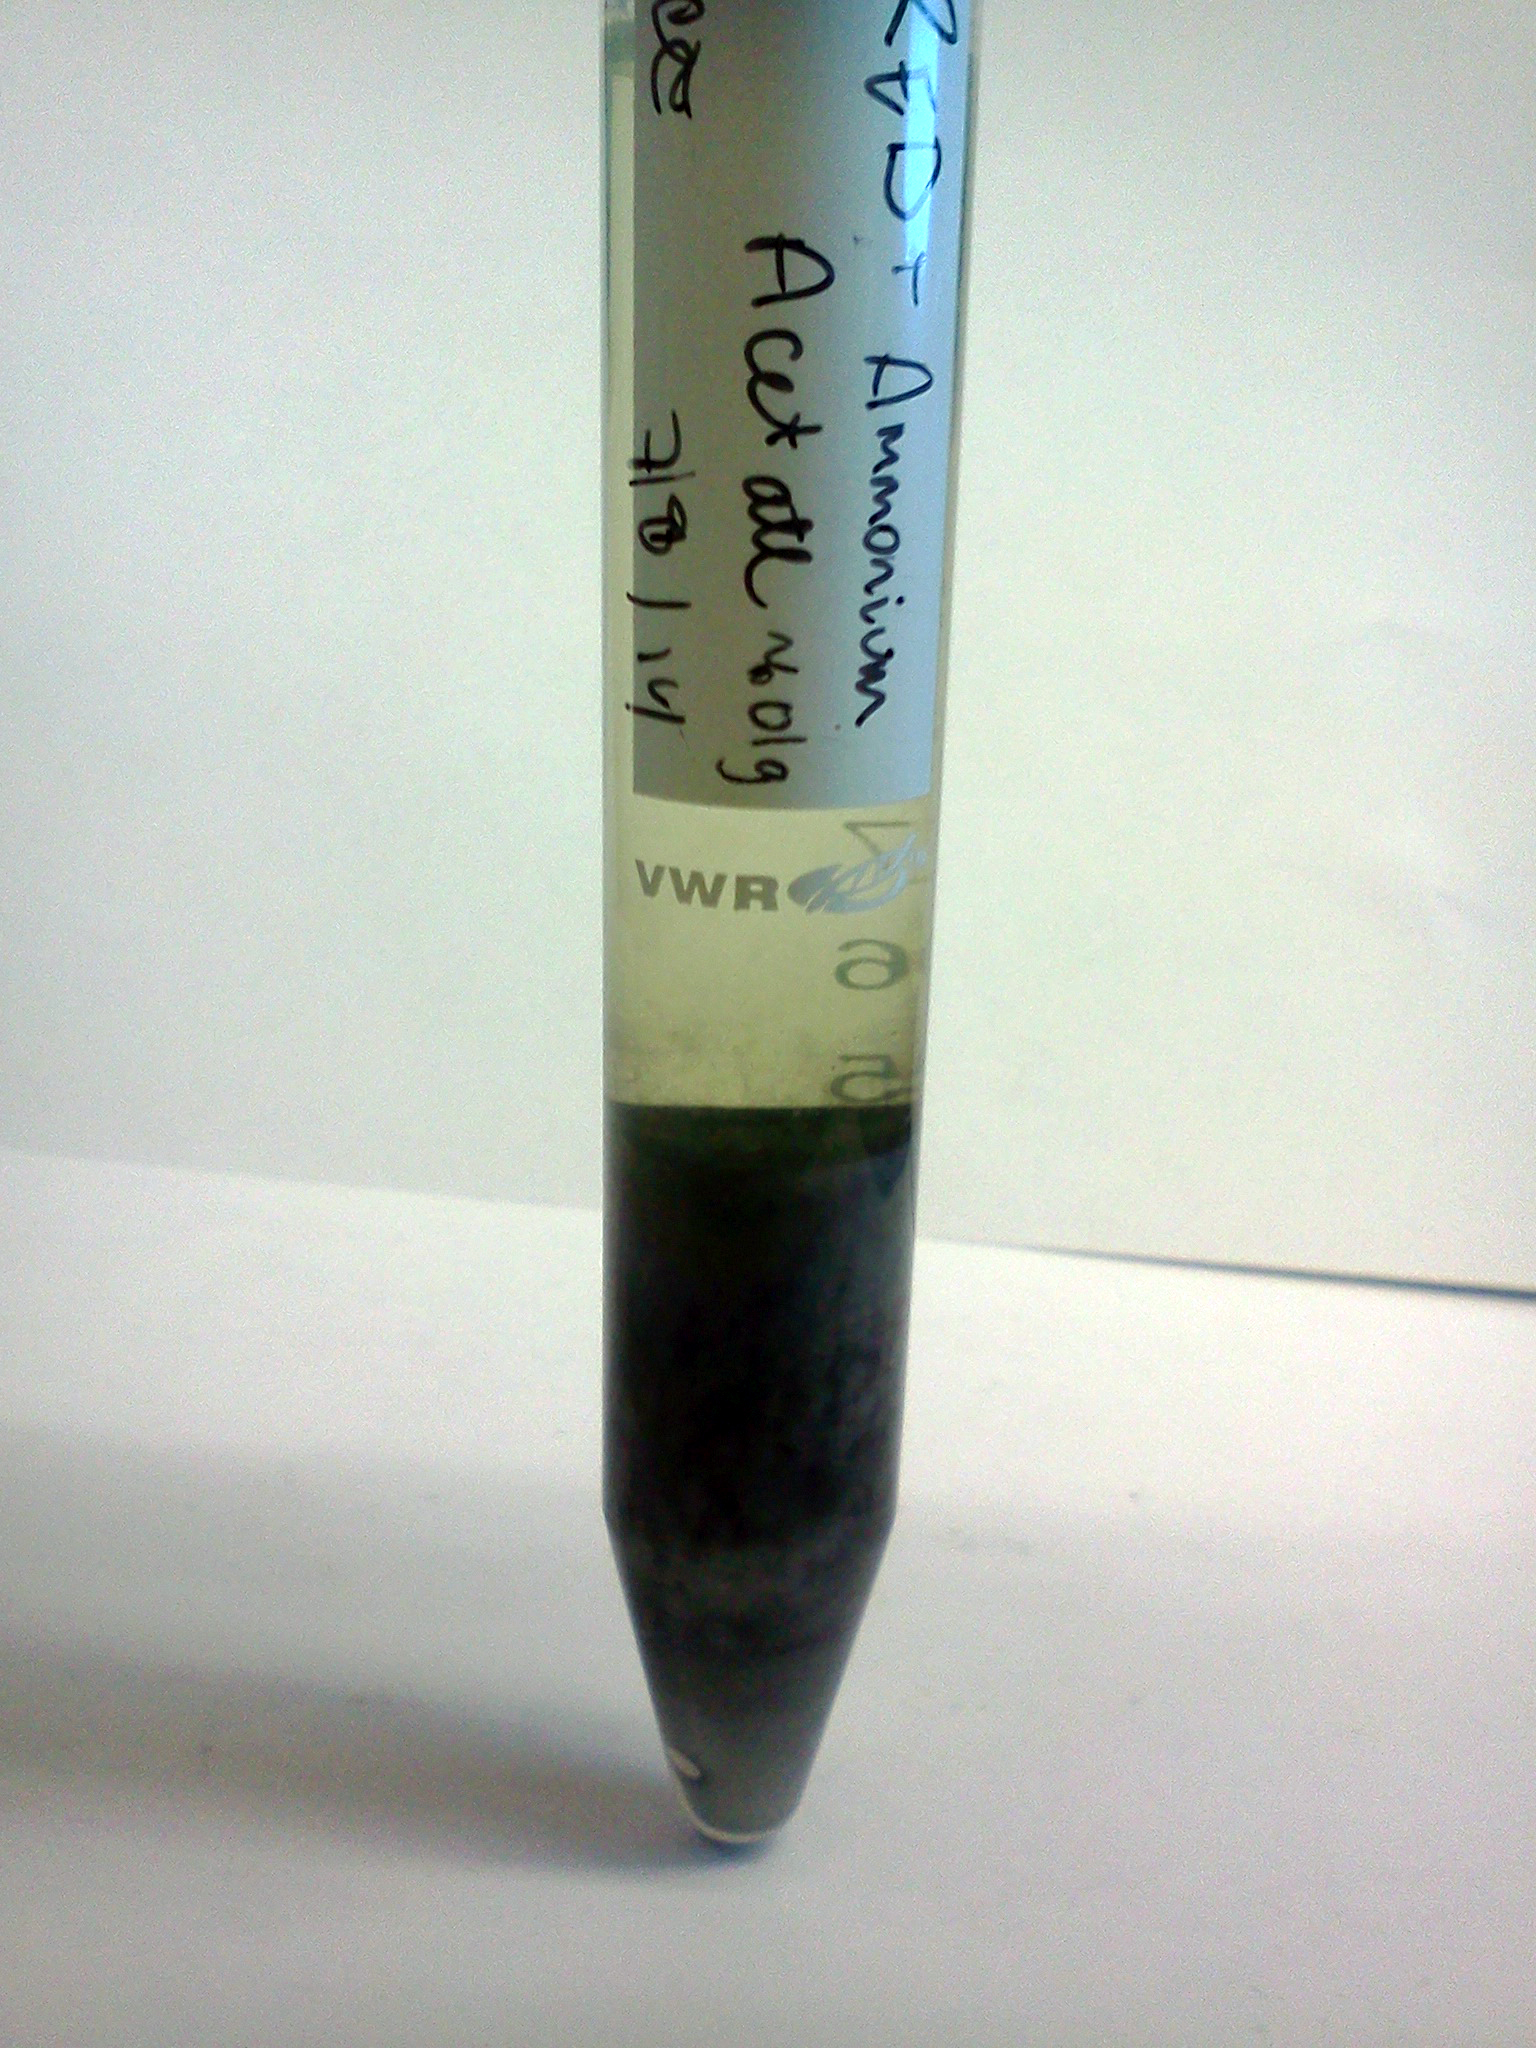
The two above tubes were kept in the dark via aluminum foil. The left tube has had Potassium Nitrate added to it and the right tube has had Ammonium Acetate added. It is hard to see but the Potassium Nitrate tube has a lot of gas bubbles in the diatomaceous earth in the bottom of the column.

 IMG_20140821_141935 IMG_20140821_141818

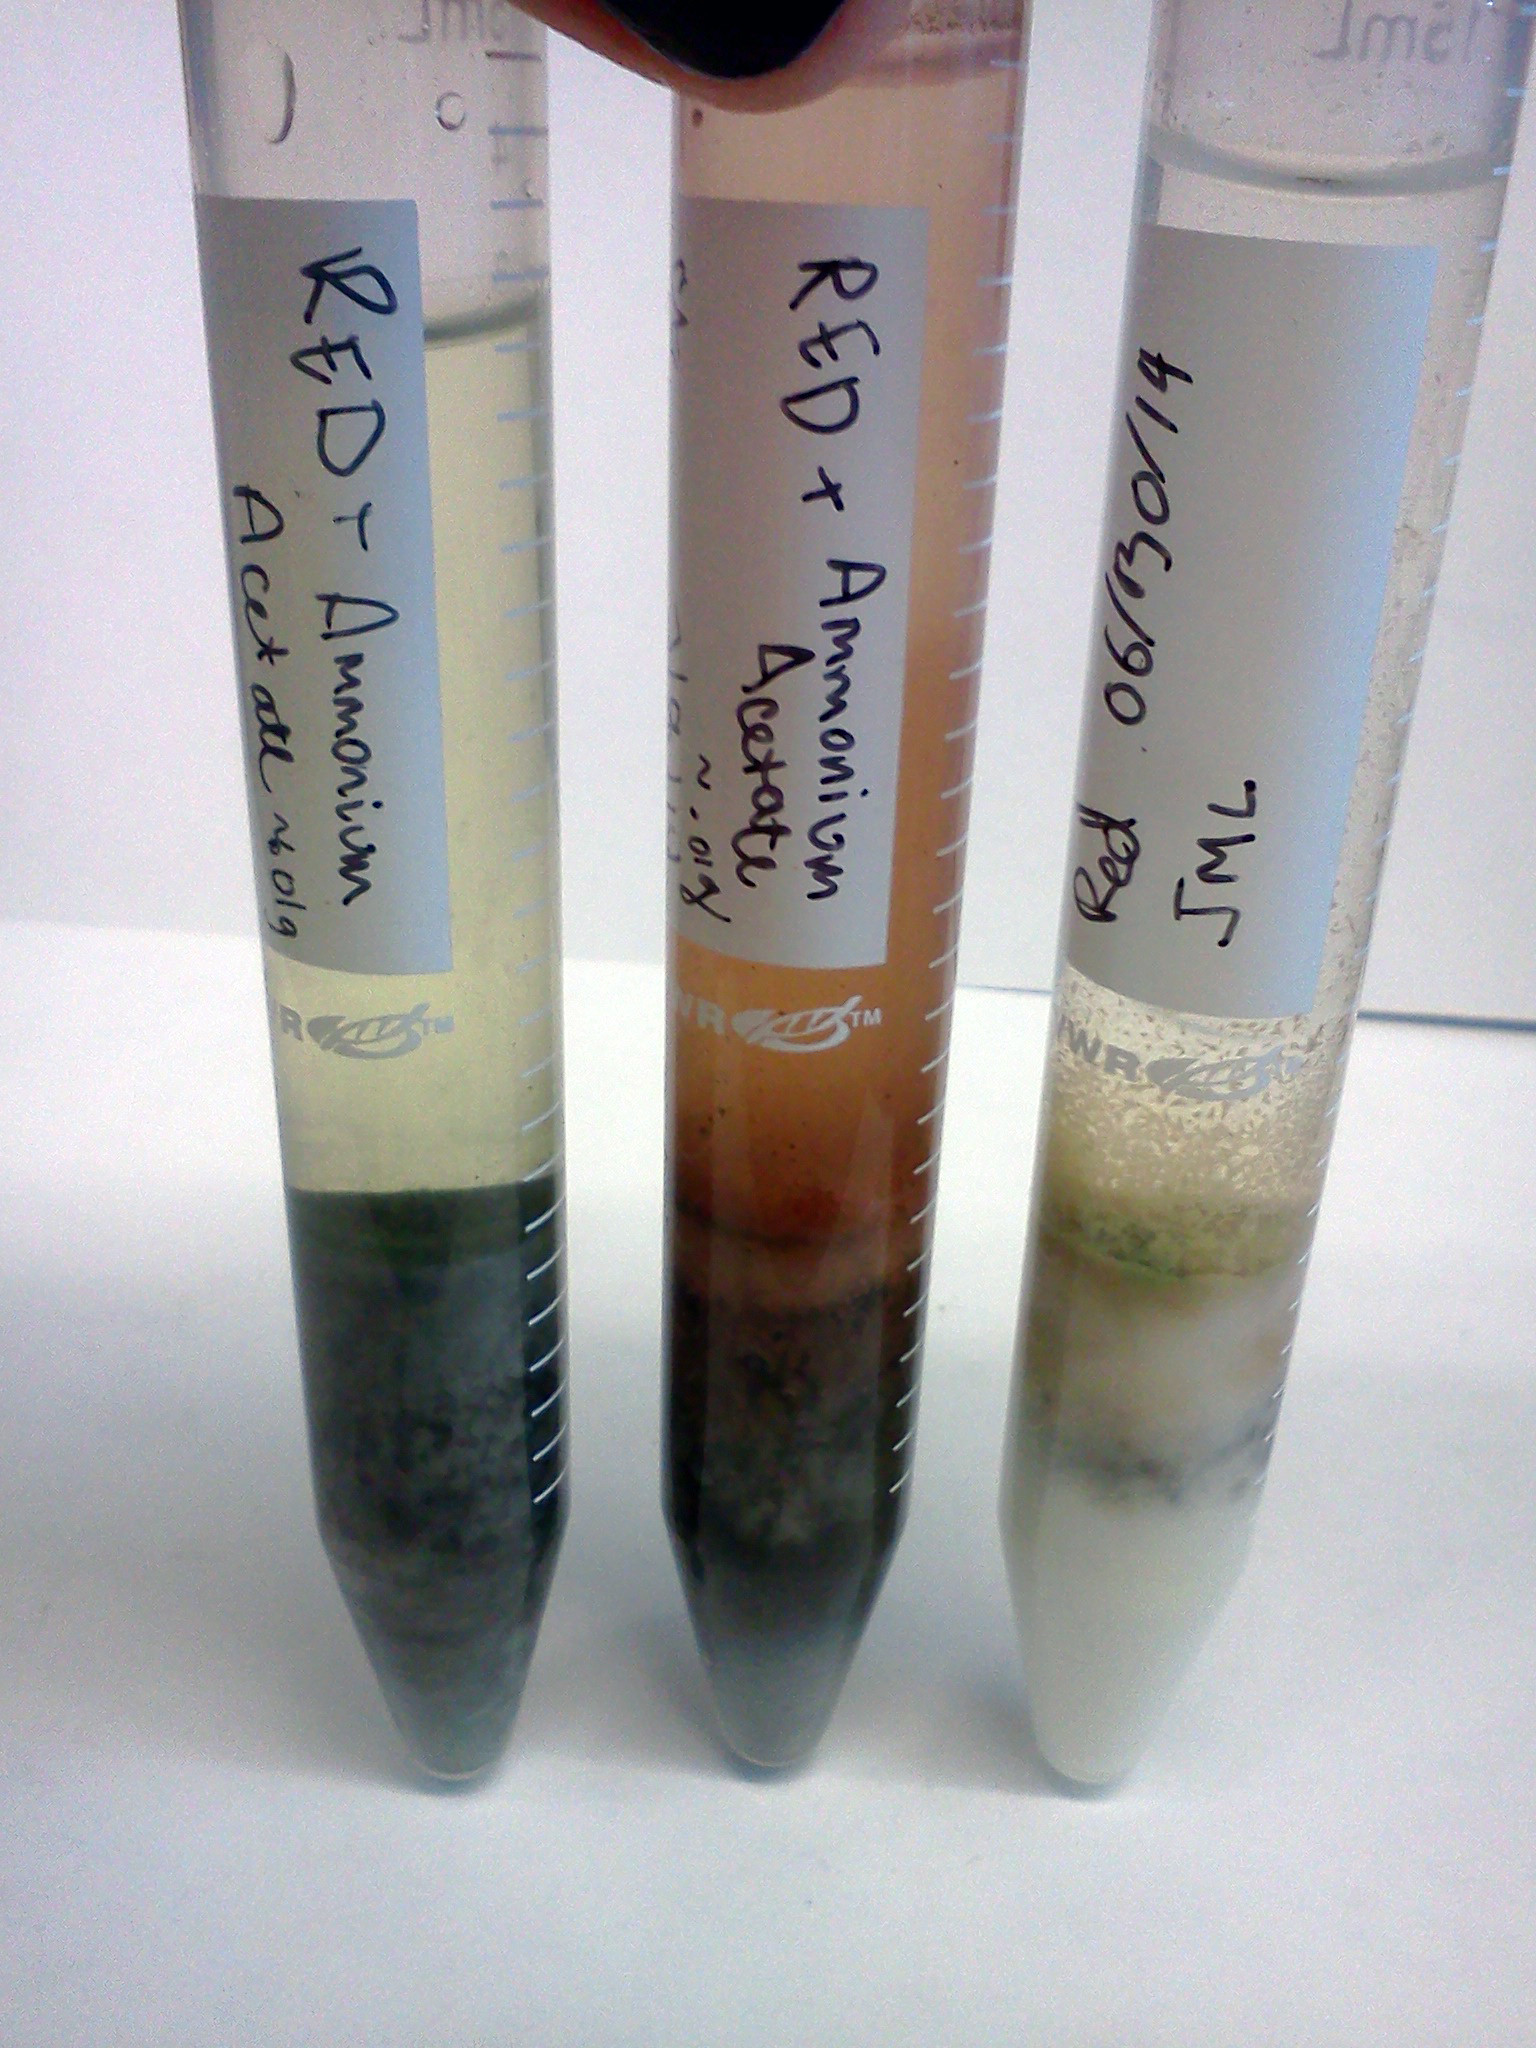
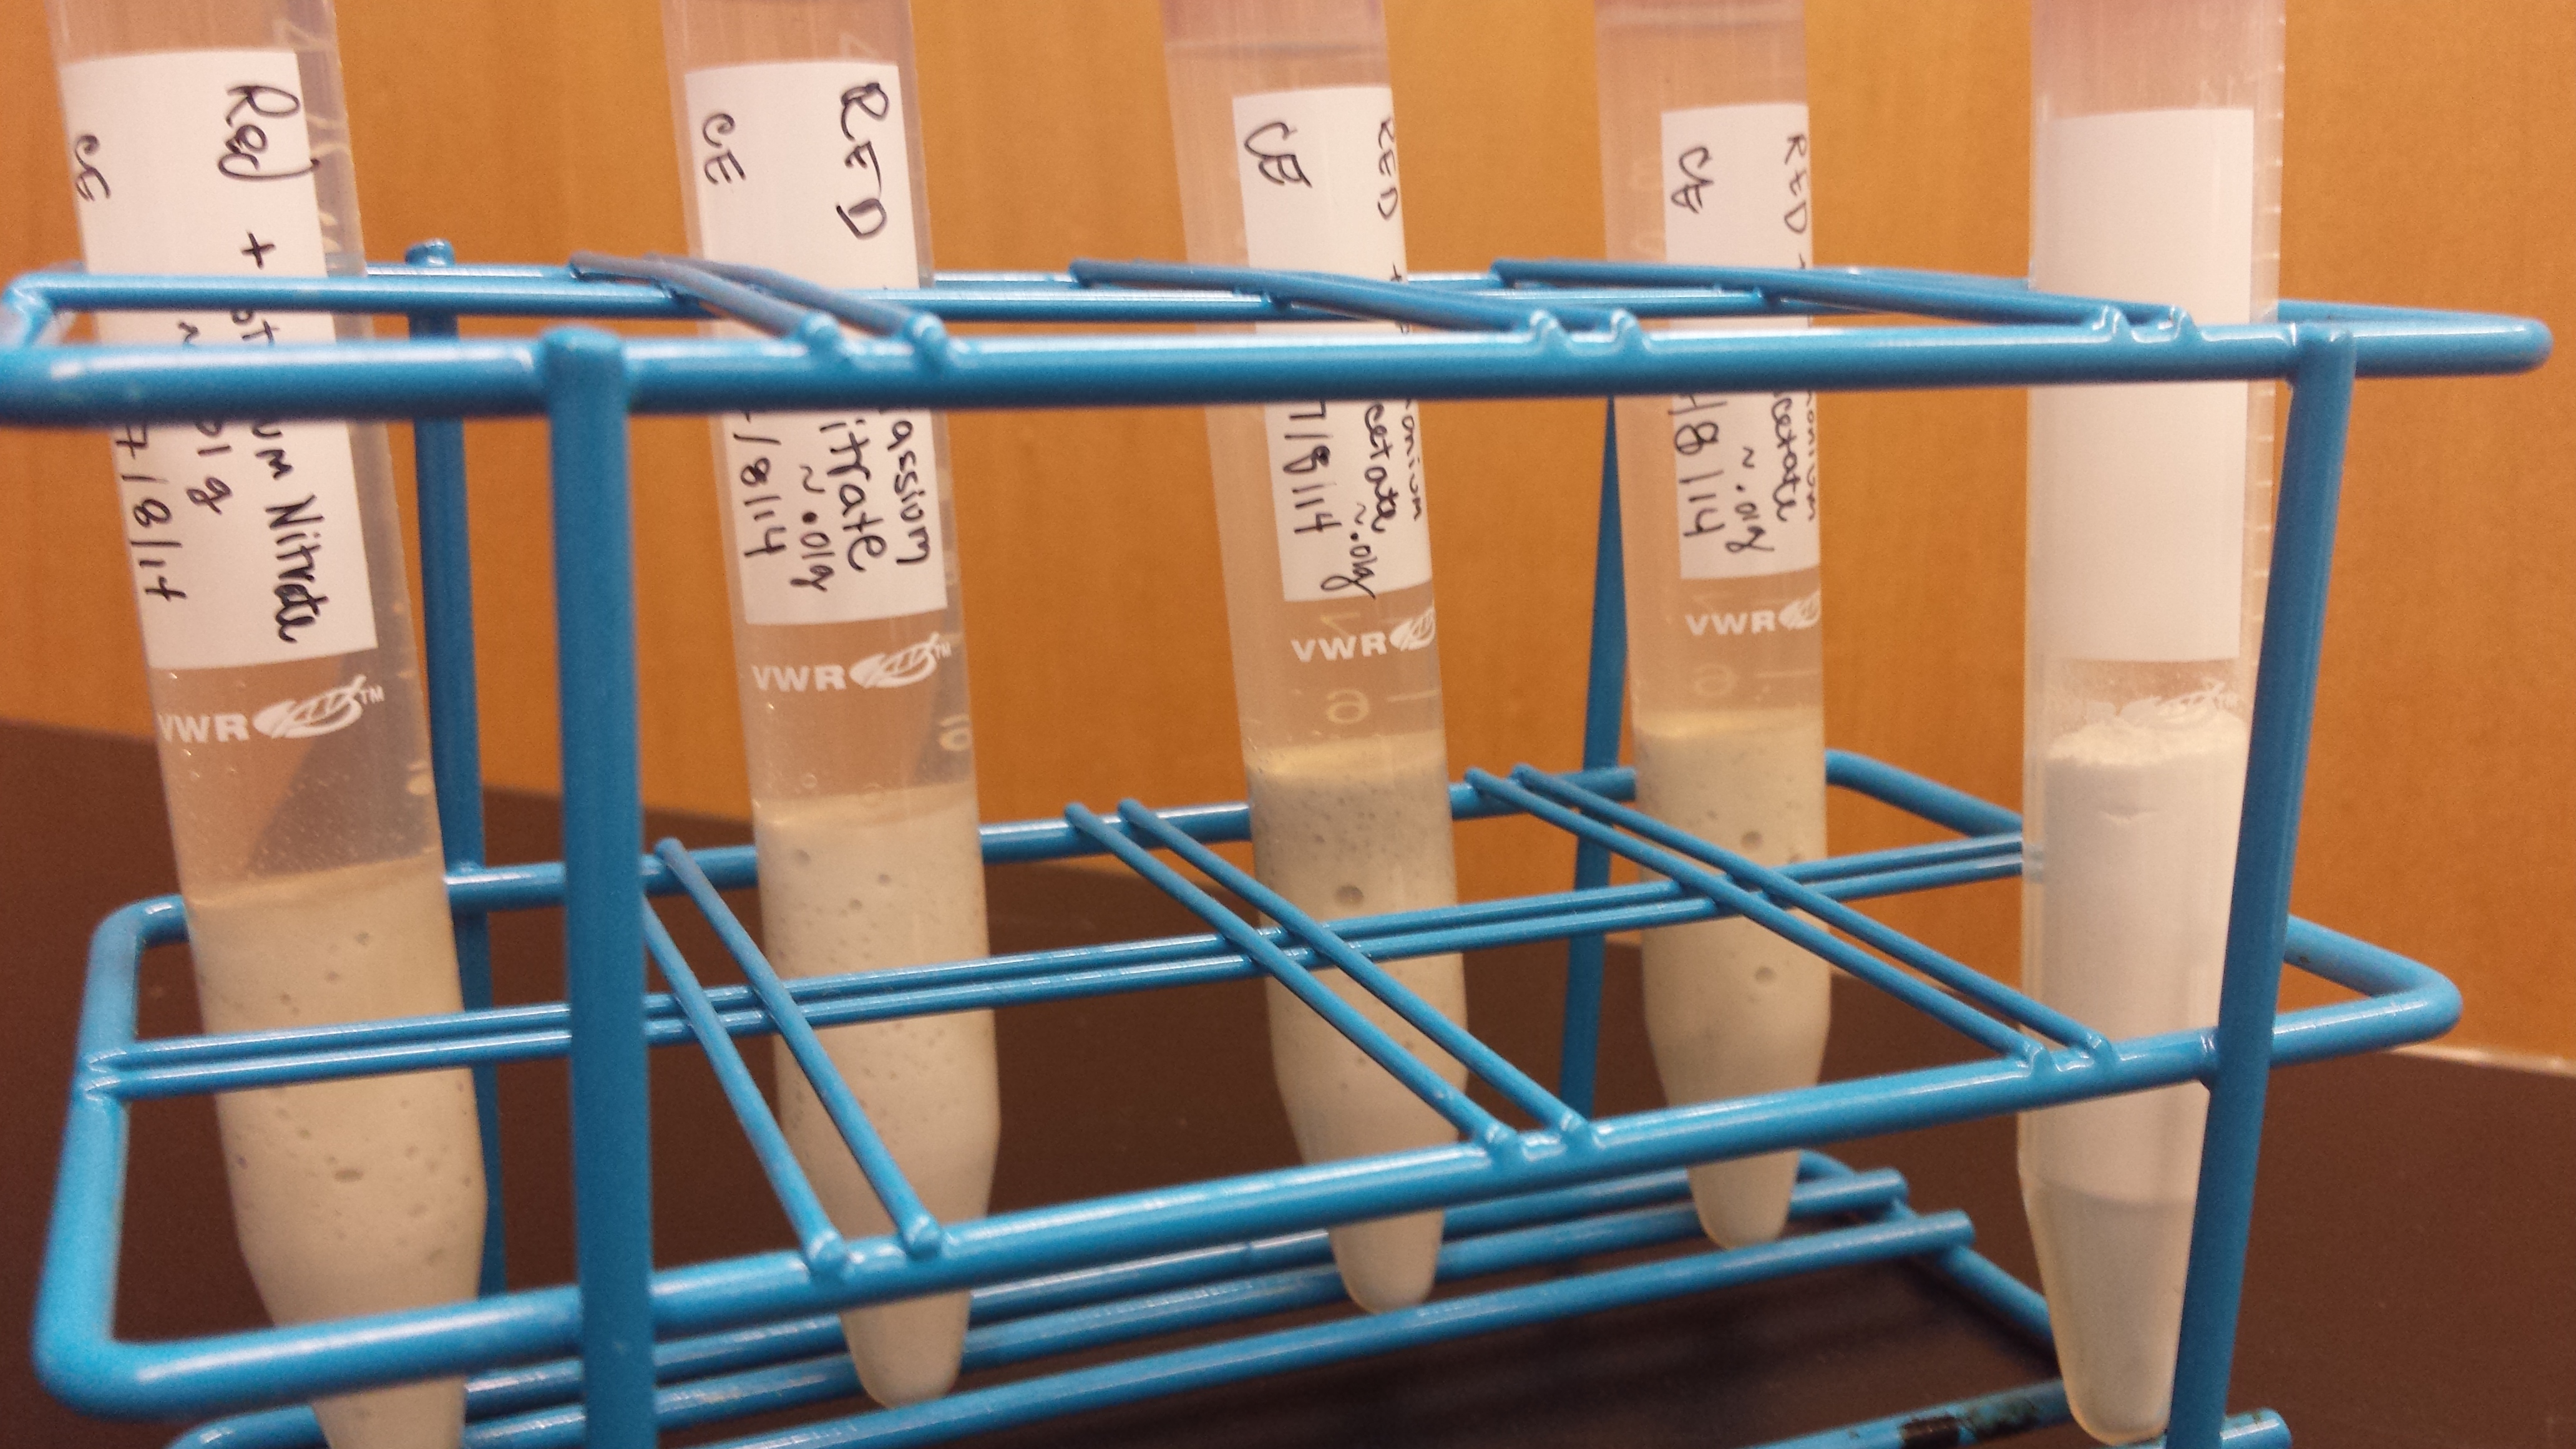
Left to Right: Ammonium Acetate Added (Kept in Dark), Ammonium Acetate Added, Nothing Added – Potassium Nitrate Added (Kept in Dark), Potassium Nitrate Added, Nothing Added

The differences between the different treatments (light with chemical vs. dark with chemical vs. no chemical ) is most significant when you observe the tubes right next to each other. It will be interesting to investigate the community composition differences between all these tubes! I wonder what types of communities we’d see with different pH’s, salt concentrations or other added chemicals… Until next time, stay tuned!

Congratulations Henna!

It has been the privilege for the Eisen lab to host Henna Hundal, a high school senior, radio show host and soon-to-be certified yoga instructor, on a six-week summer research project. Henna was part of UC Davis’ prestigious Young Scholars Program.

IMG_20140715_151631IMG_20140630_125443

For the wet lab portion of Henna’s project, she focused on the Seagrass Microbiome which involved growing and isolating microbes from seawater on LB that she helped collect from tanks of Zostera marina at Bodega Bay.

IMG_20140731_163823IMG_20140731_163908

As part of the Young Scholar’s Program, Henna had to make a scientific poster of her intended project, write a 10-30 page final paper and give a 10 minute presentation on her project. For extra credit (because Henna was magnificently studious) she also turned her powerpoint presentation into a makeshift poster.

The best explanation of Henna’s summer project was the one that Henna gave herself. As an experienced radio show host, Henna was a natural presenter. Henna’s final presentation was recorded and can be viewed: HERE.

As a whole, we are unbelievably proud of the work that Henna did while in the lab and would be happy to have her back anytime! She is an amazing young scientist and effective science communicator and we have no doubt about her future success! So congratulations Henna on being made of awesome!

Further Adventures with Winogradskies

Our Winograsky columns have come a long way from our previous post two weeks ago. To review what a Winogradsky column is and our goals for them please see: Adventures with Winogradskies.

After 4 weeks:

IMG_20140725_174355IMG_20140725_173643

Green layers have started to develop on the top of some of the tubes and to a less visible extent on some of the larger containers.

 IMG_20140725_174026 IMG_20140725_173721

In some tubes we are starting to see defined layers. Layers seem to vary between tubes containing seawater from different sample locations as well as between tubes with water from the same location.

IMG_20140725_174437

Unfortunately, our tiny microcentrifuge tubes haven’t changed much in the past two weeks.

4 Weeks vs. 1.5 Weeks:

IMG_20140725_17350420140709_115336

Definitive layers are less visible in our large containers (perhaps due to their non-cylindrical shape?), but there is significant visible growth compared to the containers at 1.5 weeks. Additionally, upon closer inspection both red and green splotches can be found in the container.

Simulating Soil Conditions – 4 weeks:

IMG_20140725_173547IMG_20140725_173556IMG_20140725_173609

At first glance, the container that we covered to simulate soil conditions looks similar to the uncovered columns. However, there is a small white strip at the top of sediment that we don’t see in the uncovered columns. There also appears to be a biofilm growing along the sides of the container.

  IMG_20140725_173615     

As well as the beginning of a layer floating on the top of the seawater in the container.

Experimental tubes at 3 weeks (where we added either Potassium Nitrate or Ammonium Acetate):

IMG_20140725_174116IMG_20140725_174052IMG_20140725_174128 

From left to right: Ammonium Acetate Added, Potassium Nitrate Added, Nothing Added

IMG_20140725_174155

We decided to keep one vial where Ammonium Acetate was added and one vial where Potassium Nitrate was added in complete darkness.

IMG_20140725_174250IMG_20140725_174332IMG_20140725_174344 

From left to right: Dark Potassium Nitrate Added, Light Potassium Nitrate Added, Light Nothing Added

Notice the difference in the amount of bubbles between the vials under different light and chemical conditions. All three of these vials have seawater from the same location.

Adventures with Winogradskies

Often when microbiologists begin to explore an unknown (or relatively unknown) environment, they begin by using classical microbiological techniques to try to characterize the communities of microbes living in that environment. These classical techniques are often referred to as “culture-based” because they are oriented towards the goal of trying to grow (or culture) microbes in the lab. Although culture-based techniques can be limiting (it’s nearly impossible to culture every single organism in any given environment), they are very useful for laying the foundation for the non-culture-based techniques the Seagrass Microbiome project will be using.

As a result, we in the Eisen lab have been playing around with some classical microbiology techniques alongside our non-culture-based explorations. One of the coolest techniques we’re using is Winogradsky columns. Winogradsky columns are essentially microbial terrariums. The basic recipe is as follows: take a clean tube, add a few essential chemicals, spike in some wild microbes, close the lid and let natural nutrient cycles take over. If you’ve done everything right, in a couple of weeks, you should start to see layers of microbes each living in a different mini niche within your mini ecosystem.

Two weeks ago we did just that. We’ve been following the progress of the tubes on the side as we pursue other non-culture-based projects. We’ve also been exploring different ways of making the columns to figure out the best way to get clean layers while still preserving the integrity of the column. Below are some pictures of our progress to date:

Two Days in:

20140702_171525
Two days into the experiment bubbles started to appear.

One week in:

20140707_101527
One week into the experiment, brown patches appeared on the surface of the jars.


20140707_101942

20140707_102008
The smaller tubes took longer to show brown spots, at one week all they had was bubbles.

1.5 weeks in:

20140709_114539
At a week and a half the brown mat has spread over the surface of each container.


20140709_115336

9 Days in:

20140709_165522
9 days into the experiment, we decided to cover one of the large flasks to simulate soil conditions.

20140709_170102

2 weeks into the experiment: 

20140714_085939
14 days into the experiment dark black splotches appeared under the surface of one of the large flasks.
20140714_090140
Surprisingly, the covered flask also had the same black splotches developing.
20140714_090315
Some of the smaller tubes had them as well.
20140714_090358
One microcentrifuge tube had a beautiful green layer develop.

_________________

20140714_090650
As a side experiment, we spiked new tubes with potassium nitrate and ammonium acetate to see if the presence of nitrogen changed anything about the development of the flasks. These tubes were created a week behind the others.

What the fungi do I do with my ITS library? (Part 2)

What the fungi do I do with my ITS library (Part 2)
Originally posted on jennomics.com on May 22, 2014

Previously, I expressed some concern about size variation in my environmental fungal ITS PCR libraries. I’m still concerned about that, but I have an additional concern. The ITS region can’t be aligned, and I’m partial to phylogenetic approaches to pretty much everything. So maybe ITS is not for me?

So, I asked Twitter again…

In summary, I don’t think that I can use ITS given the size variation that I see, and I’m not sure that I want to, given the fact that you cannot align it to do phylogeny-based analyses.

28S (or LSU) is a reasonable alternative to ITS that has two big downsides: 1) the reference database is much smaller than the ITS reference database and 2) it does not provide the fine-scale taxonomic resolution that ITS does.

Rachel Adams referred me to Amend et al, in which they use both. I’ll have to look into this approach…

Seagrass Microbe Sampling Kit

Here’s the version of the sampling kit that’s being sent to 25 ZEN partner sites throughout the world:

Photo: Madison Dunitz

Each ZEN partner (site) is working in two Zostera marina beds (subsites.) At each subsite, the partners will take three water, sediment, and plant (root+leaf tissue) samples.

On the left, is the AeroPress coffee maker that will function as a water filtration device. The plunger is hollow, so inside of that, I put plastic forceps and 6 gloves. A piece of tape over the top will make sure that it doesn’t all slide out.

On the right is a 500mL plastic bottle for water collection.

In the middle is a plastic, hinged tube storage box. There are 30 2mL tubes inside. The tops of the tubes are pre-labeled:

Lavender: R1.1, R1.2, R1.3 for the three root collections at subsite 1.

Lavender: R2.1, R2.2, R2.3 for the three root collections at subsite 2.

Green: L1.1, L1.2, L1.3 for the three leaf collections at subsite 1.

Green: L2.1, L2.2, L2.3 for the three root collections at subsite 2.

Orange: S1.1, S1.2, S1.3 for the three sediment collections at subsite 1.

Orange: S2.1, S2.2, S2.3 for the three sediment collections at subsite 2.

Blue (2 of each): W1.1, W1.2, W1.3 for the three water collections at subsite 1.

Blue (2 of each): W2.1, W2.2, W2.3 for the three water collections at subsite 2.

There are two blue tubes for each water collection because the filter is to be cut in half and put into two tubes. There are also 30 Tough Tag labels for the sides of the tubes that are to be filled out by the ZEN partners with their site ID, subsite ID, plot ID, and date.

Also, six 0.22micron filters that have been LASER cut to fit the AeroPress, a small pair of scissors for cutting leaves and roots and water filters, a 6mL syringe (top cut off) for taking sediment cores, plastic spatulas for scooping a little bit of sediment out of the corer, a Sharpie, 24 individually-wrapped alcohol swabs, and the 3D-printed stand for the Aeropress.

Pretty cool, huh? Hope I didn’t forget anything!!

I will update with the sampling protocol when it has been finalized.

3D printed AeroPress base

While in Cocoa Beach, waiting for the rocket to launch, we decided to test out Russell Neches’s idea for filtering seawater with an AeroPress coffee maker. We were also shooting the instructional video for the Seagrass Microbiome sampling kits that include the AeroPress for this purpose.

Forcing water through a 0.2 micron filter with the AeroPress was easier than I thought it would be, but pretty awkward. It would have been much easier to put that thing over something like – oh I don’t know – a coffee cup to hold it in place while pressing down. I’d decided that if I put a 500mL wide-mouth plastic collection bottle (for the seawater collections) in the kit, that they might also be able to use the bottle for that purpose. But, I was having a hard time figuring out if the mouth of the bottle would be wide enough. So, I went next door to complain to Russell Neches and David Coil. And David said, “you should just have Russell 3D print something,” and Russell said, “Sure, I can do that!” and then 30 minutes later an email had been sent to Madison Dunitz, an undergrad in the lab, and within a couple of hours, it’s done! It’s really simple, just a ring that serves the same purpose as the rim of the coffee cup, with channels in the sides for the water to go through, that is just tall enough to keep the bottom of the AeroPress off the table (or whatever surface.)

Embedded image permalink

Visit to the Smithsonian Marine Station

Armed with some instructions for where to find a few different seagrass species and a couple of names to ask for, I headed to the Smithsonian Marine Station (SMS) in Fort Pierce, FL on Thursday, April 17th.

The SMS was kind of deserted, but there was a behind the scenes tour scheduled for 2pm, so I waited around for that. In the meantime, I went to meet with Bill Hoffman, the Exhibit Manager at the St. Lucie County Aquarium, across the street from the SMS. He shared with me his experience with setting seagrasses up in his aquarium there. He said that at first, he would try to lay a patch of seagrass, with surrounding sediment into the tanks (like sod,) but that they kept dying. Eventually, he had success when he planted the plants into the tanks that contained the dead “sod.” But still, not every species he tried will grow in the tanks.

Bill loaned me some snorkeling gear so that I could go hunt down the seagrass beds that Robert Virnstein described to me. My only experience of seagrass is the Zostera marina at Bodega Bay, so I was interested in laying eyes on some other species. I found the dense Syringodium bed next to the boat ramp at the end of the Aquarium’s parking lot. It was remarkable to me how variable the density of both the seagrass as well as the algae were over a really small area. Sometime, the algae was so abundant and dense that I couldn’t even see the seagrasses. Other times, it was easy to see individual seagrass shoots poking out in the sandy sediment. Syringodium has cylindrical leaves, so that was different. The leaves were only about 8 inches long, and the rhizomes were very delicate compared to Z. marina.

Then, I went over to Chuck’s Steak House. There, I found a mixed bed with two kinds; I think Halophila and Halodule. They were about the same size, but their leaves were shaped differently. These were remarkably tiny! I will definitely have to re-write the sampling protocol for these.

The three species I found in Indian River Lagoon. My guess is Top: Halodule, Right: Syringodium, Bottom: Halophila

After my little snorkeling adventure, I went to the SMS “Behind the Scenes” tour. I learned a lot about the Indian River Lagoon, which has significant temperature and salinity gradients, making it an incredibly biodiverse ecosystem. The tour was useful and interesting. Especially, the Mangrove experiments – couldn’t help but wonder about the phylosphere microbial communities on these salty leaves.

Baby Mangroves! Some deal with salt by excreting it from the leaf surface, others have specialized salt excretion nodules at the base of the leaves.

Eventually, I connected with Niclas Engene, who is interested in collaborating with us on a GoLife proposal to do Cyanobacterial genome sequencing/phylogenetics. I also chatted with a few people, including Jenny Sneed about which would be the best primers to use for algal diversity surveys. No one seemed to know, but at least I’m not alone in my uncertainty. I gather that the person I really needed to talk to is Justin Campbell, but he was probably on a plane coming back from Belize while I was there. Oh well.

Seagrass Phylogeny

We need a comprehensive phylogeny that includes all of the seagrasses. All of the seagrass lineages are within the Order Alismatales. The best available Alismatales phylogeny only resolves lineages to genus, and uses a combination of morphological characters and rbcL. So, here’s what I did to produce a phylogeny of all available Alismatales with rbcL:

1. Search the NCBI Nucleotide database for “rbcl” and “partial cds”

2. Use the Taxonomic Groups filter (box on the right side of the results page) to get only the Alismatales

3. Export (Send to > file > FASTA) the 1649 Alismatales sequences in fasta format

4. Fix the sequence identifiers.

5. Align those sequences with Muscle.

6. Build tree with FastTree.

Then, I had to do a lot of manual editing to 1) highlight the seagrass species, 2) remove some matK sequences that made their way in there somehow, 3) de-replicate redundant species (when they formed monophyletic groups), and 4) reduce the tree to the smallest monophyletic clade that contained all of the seagrasses.

I would not use this tree in an analysis or publication, but for our current needs, I think this will be sufficient. Producing a high-quality, comprehensive phylogeny of the monophyletic clade that contains all seagrasses is going to be a big job.

Image