This past weekend we took Bethany Dixon (@MsBethDixon)’s class of AP Bio students out to Bodega Marine Laboratory to make winogradsky columns from seagrass sediments. For more information about what we were doing, why we did it and what the heck a winogradsky column is see Jenna’s previous posts, AP Bio Winogradskies and AP Bio Winogradskies Pt 2. As part of the experience, the students had to opportunity to wade out into a seagrass meadow to collect samples and thus the mysteries begin! Follow along on twitter with #APBioGradsky!
UNSOLVED MYSTERIES:
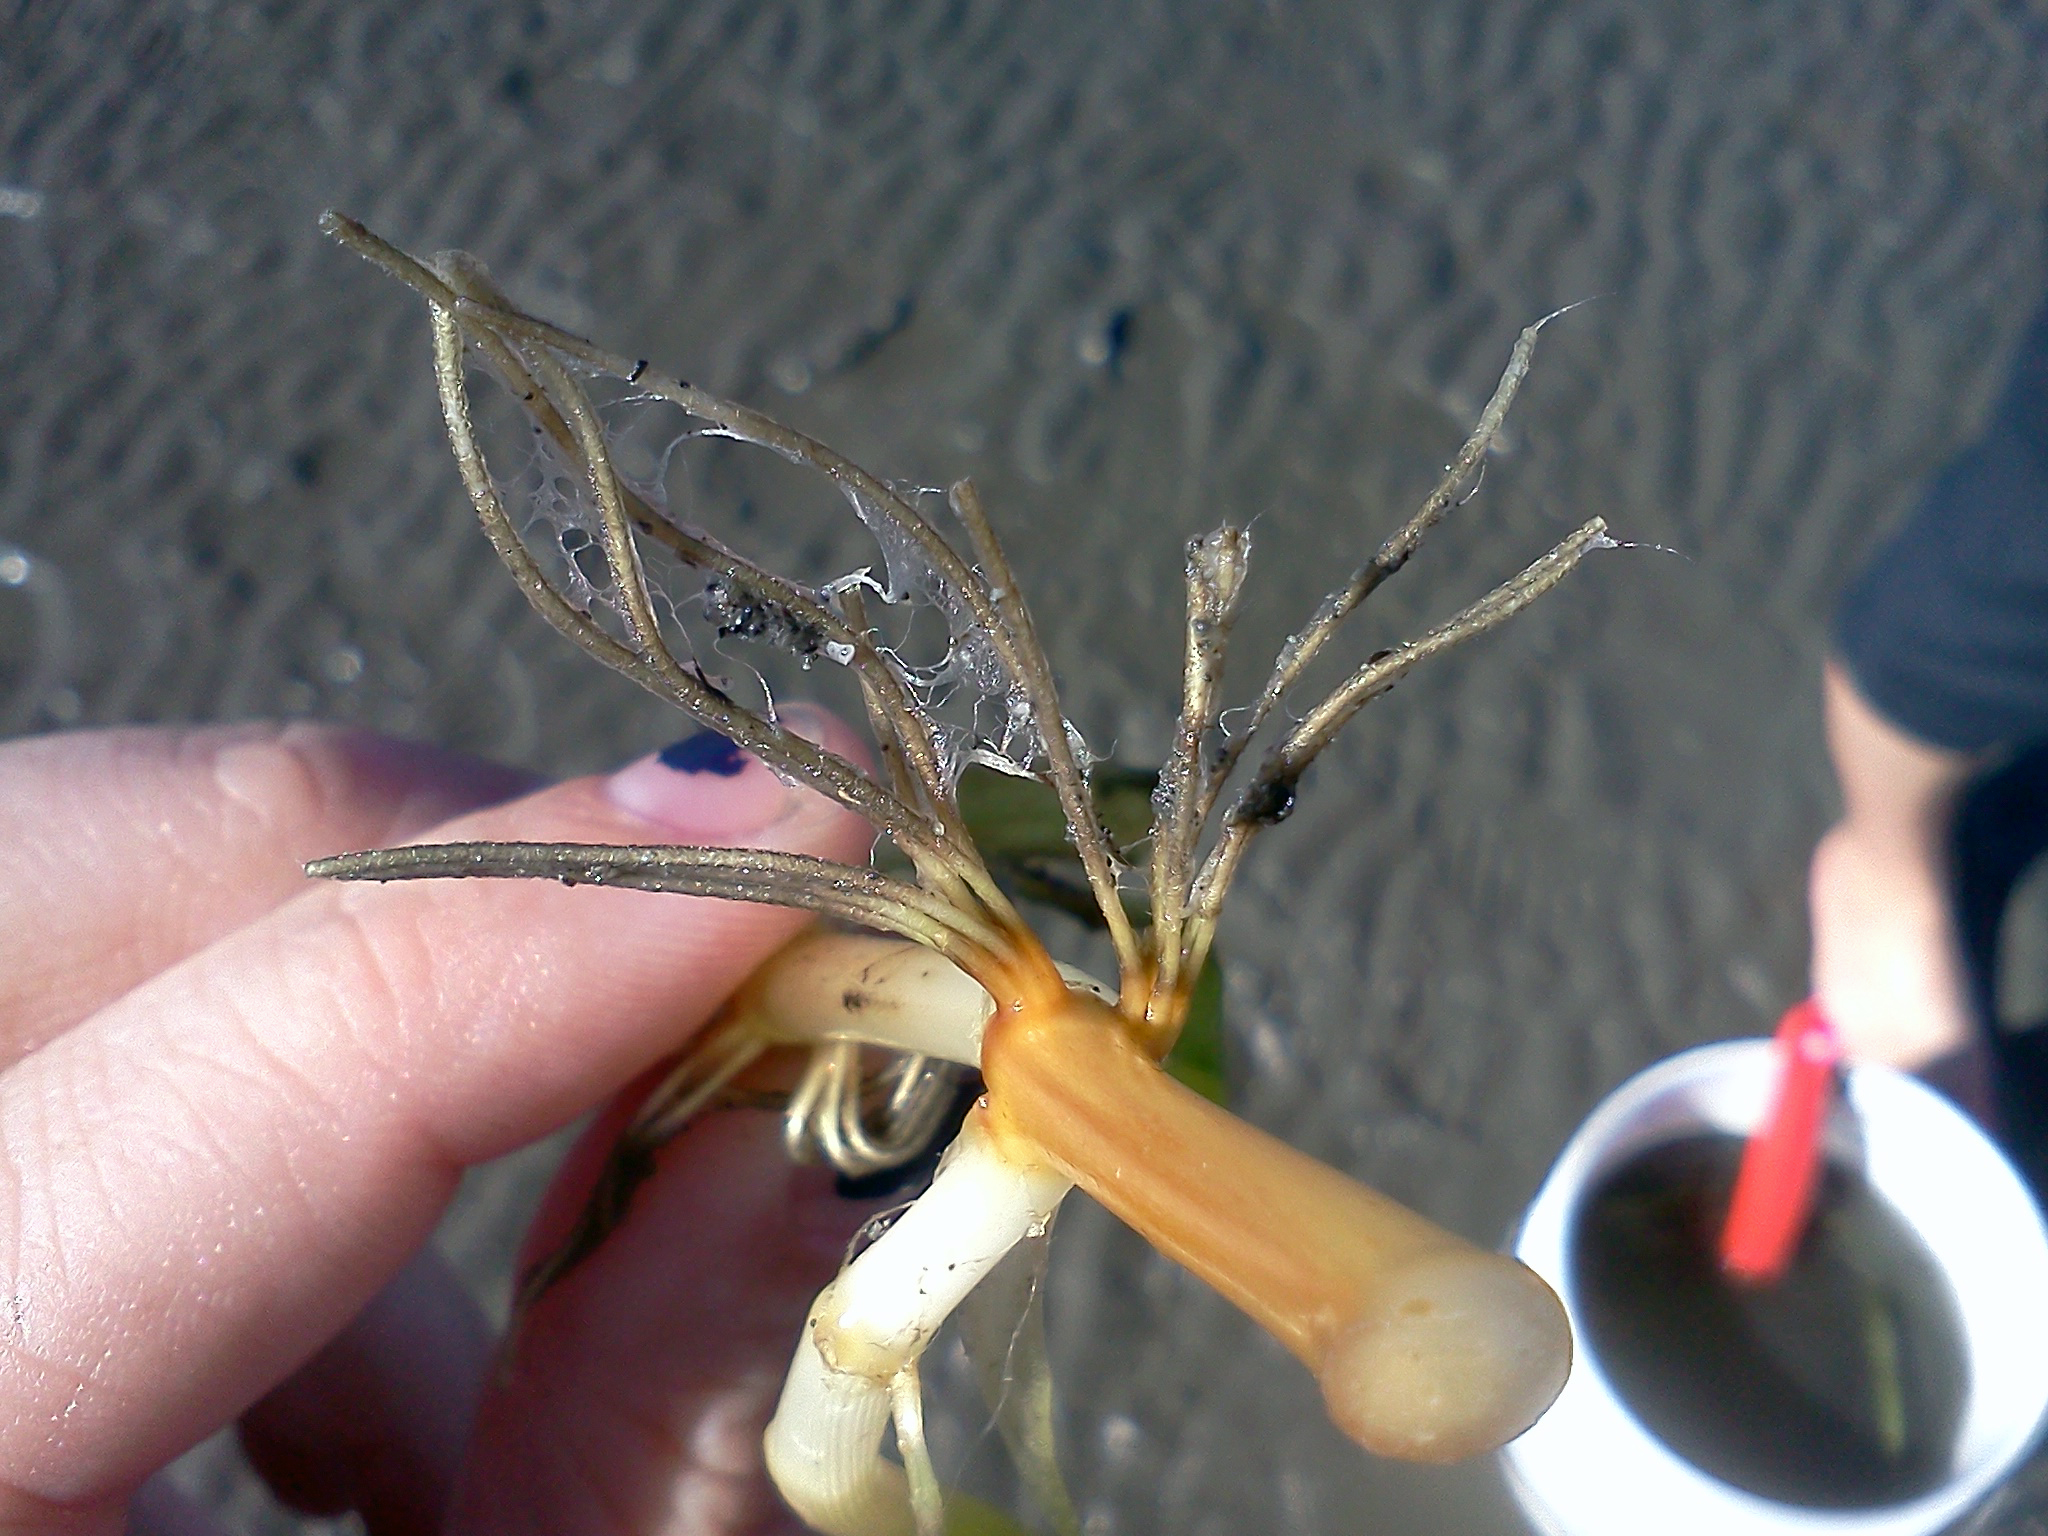
What is that I see in my seagrass roots? What is that is that sticky white stuff? Fungi? Underwater spiderweb?
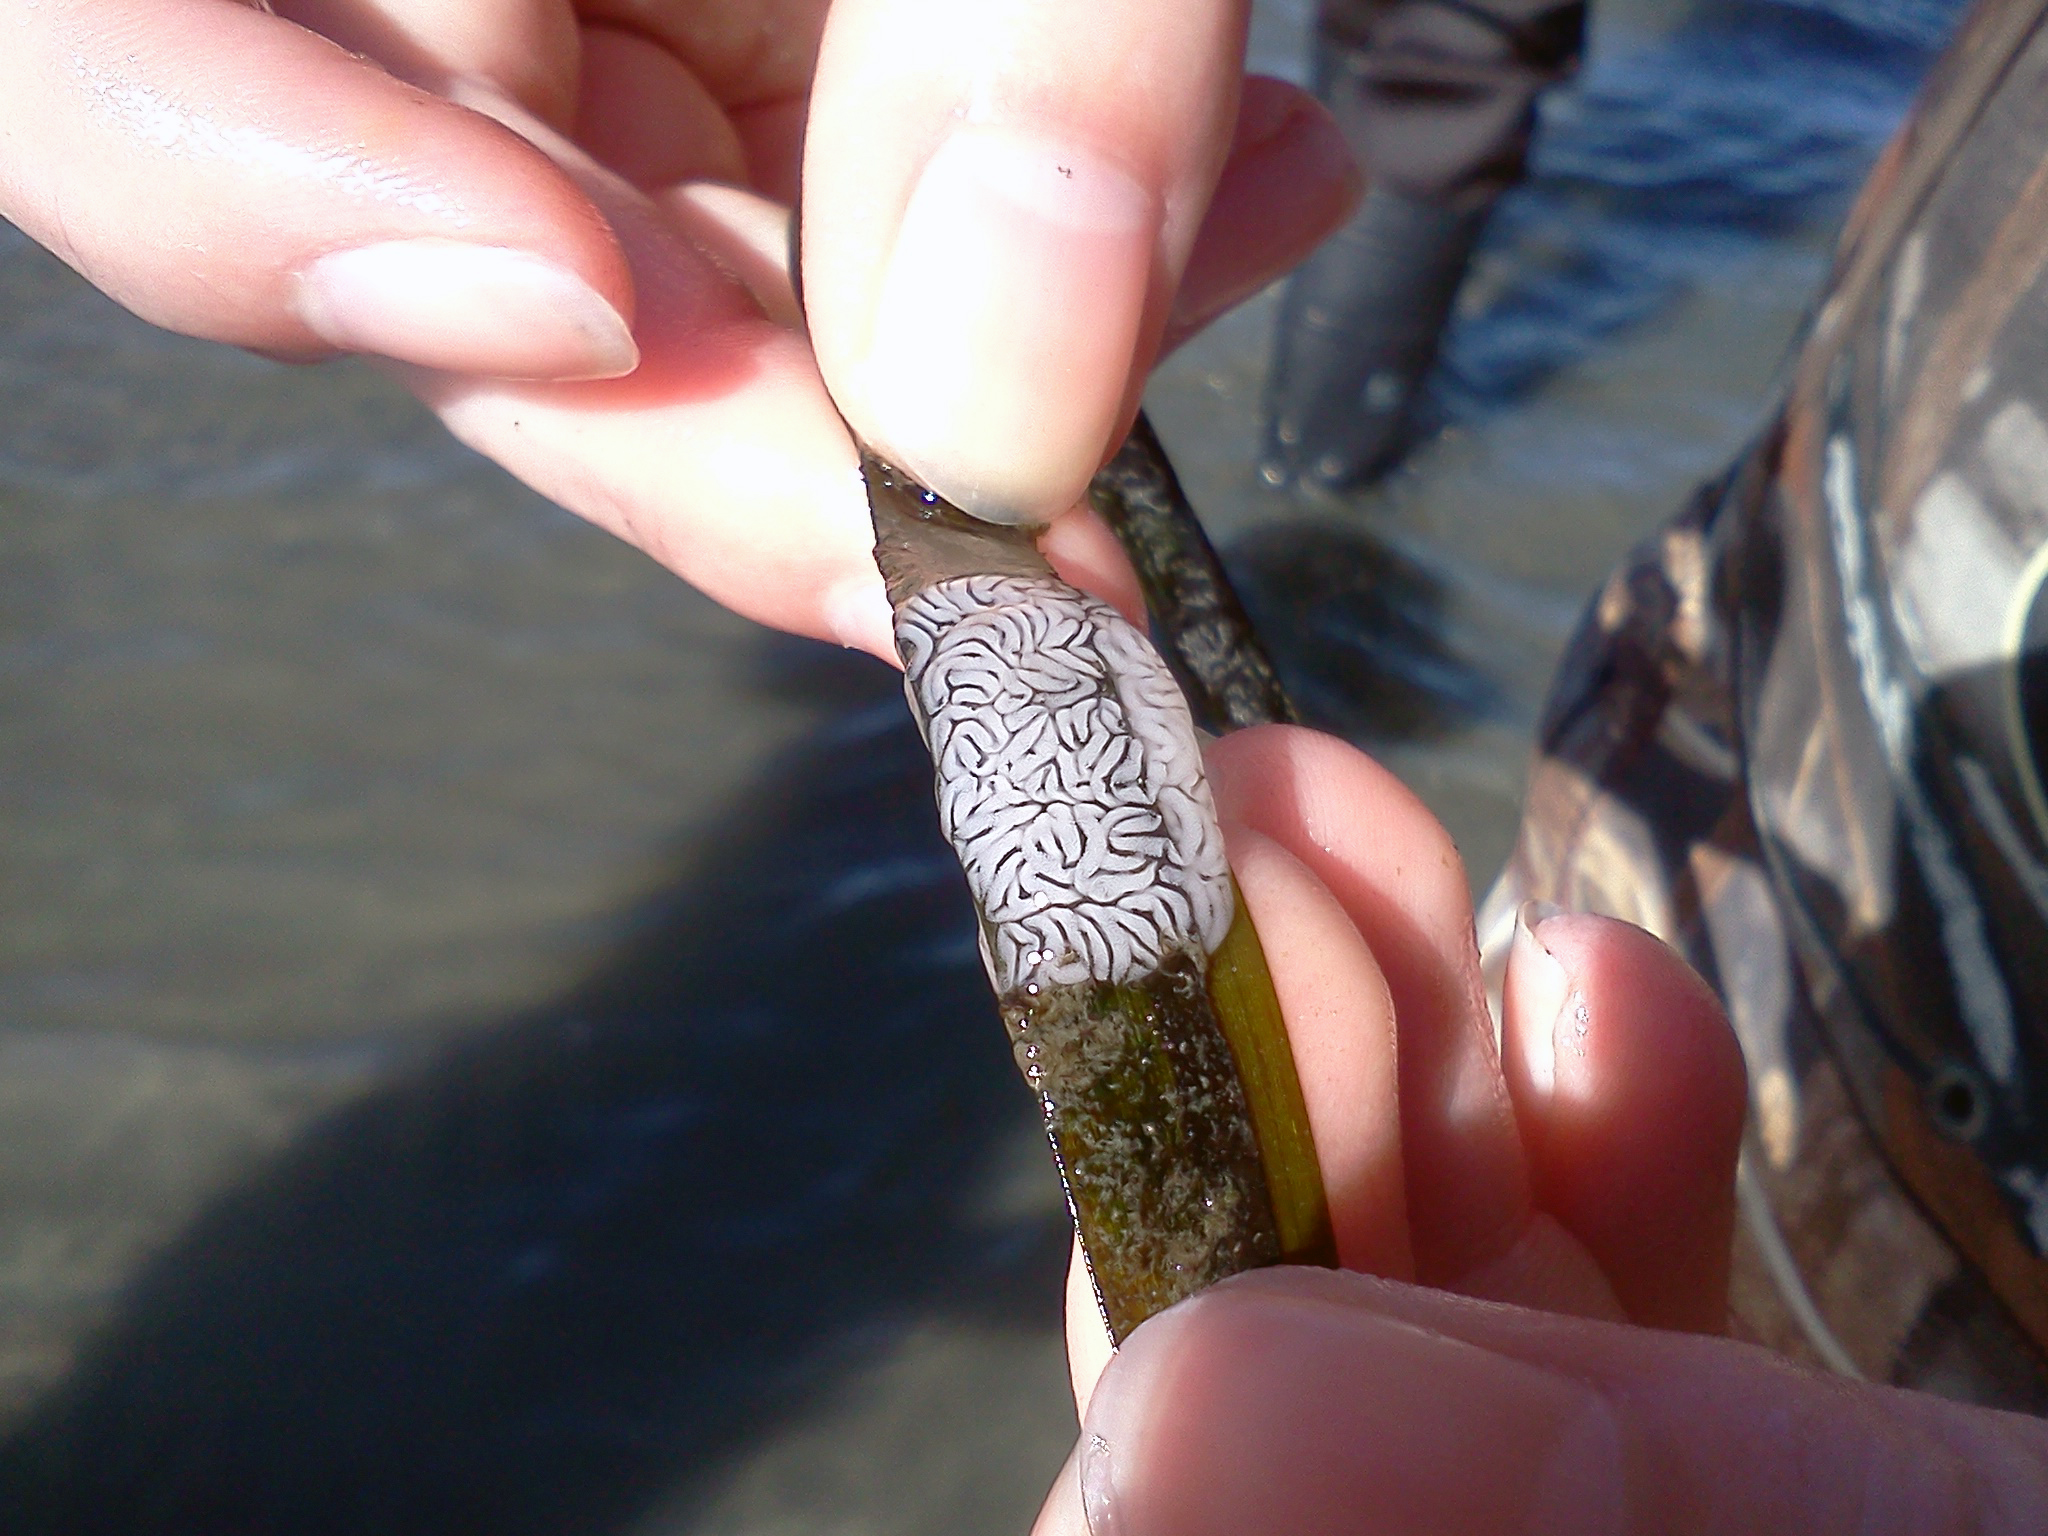
When placed underwater this strange organism looks like a wiggly worm brain – what the heck is it?? Zombie slug?
How to Make a Winogradsky: We gave the AP Bio class a standard winogradsky recipe and then five “experimental” recipes. These recipes are described below.
Standard (10x Recipe)
cellulose 1 g
sodium sulfate 1 g
ammonium chloride 0.1 g
calcium carbonate 0.1 g
potassium phosphate 0.1 g
diatomaceous earth 300g
This is the standard recipe which we are using for our “control” columns.
Potassium Nitrate (10x Recipe)
cellulose 1 g
sodium sulfate 1 g
ammonium chloride 0.1 g
calcium carbonate 0.1 g
potassium phosphate 0.1 g
diatomaceous earth 300g potassium nitrate 0.1 g
This recipe adds potassium nitrate to the standard recipe. By adding potassium nitrate, we hope to encourage denitrification (the process by which microbes take in nitrate and produce N2). By encouraging denitrification, we hope to enrich for microbes potentially involved in the nitrogen cycle. Ammonium Acetate (10x Recipe)
cellulose 1 g
sodium sulfate 1 g
ammonium chloride 0.1 g
calcium carbonate 0.1 g
potassium phosphate 0.1 g
diatomaceous earth 300g ammonium acetate 0.1 g
This recipe adds ammonium acetate to the standard recipe. By adding ammonium acetate, we hope to encourage nitrification (the process by which microbes take in ammonia and produce nitrite). By encouraging nitrification, we hope to enrich for microbes potentially involved in the nitrogen cycle. Also ammonium acetate provides an additional carbon source for the microbes and should help encourage microbial growth.
Iron(III) Phosphate (dihydrate) (10x Recipe)
cellulose 1 g
sodium sulfate 1 g Iron(III) Phosphate (dihydrate) 0.1 g
calcium carbonate 0.1 g
potassium phosphate 0.1 g
diatomaceous earth 300g
This recipe replaces ammonium chloride from the standard recipe with Iron(III) phosphate (dihydrate). Iron is a necessary co-factor for nitrogen fixation and both iron and phosphorus have been posited to co-limit nitrogen fixation in the ocean. By adding iron(III) phosphate, we hope to encourage nitrogen fixation (the process by which microbes take in N2 and produce ammonia). By encouraging nitrogen fixation, we hope to enrich for microbes potentially involved in the nitrogen cycle.
Seagrass Roots (10x Recipe) Seagrass roots 1g
sodium sulfate 1 g
ammonium chloride 0.1 g
calcium carbonate 0.1 g
potassium phosphate 0.1 g
diatomaceous earth 300g
This recipe replaces cellulose from the standard recipe with seagrass roots. Since we are trying to culture seagrass associated microbes, we thought that it would be interesting to use seagrass roots as the carbon source for the winogradsky columns. We hope that this will result in an enrichment of microbes that from symbiotic relations with seagrass roots.
Elemental Sulfur (10x Recipe)
cellulose 1 g
sodium sulfate 1 g
ammonium chloride 0.1 g
calcium carbonate 0.1 g
potassium phosphate 0.1 g
diatomaceous earth 300g elemental sulfur 0.1g
This recipe adds elemental sulfur to the standard recipe. By adding elemental sulfur, we hope to enrich for microbes involved in the sulfur cycle.
Collecting seagrass and sediment!
Inoculation: We had the students prepare their recipes on their first day and then inoculate them on their second day. We inoculated them with seagrass sediment and water collected from Bodega Bay by the AP Bio class. We mixed the sediment and water collected vigorously and let the sediment settle. The water was then used to inoculate the columns.
Even with a few days distance from the (hopefully) inaugural field trip with the AP Bio class from Rocklin Collegiate Academy, I’m still shocked by how smoothly everything went. On Friday, we set up the Winogradsky columns (see posthere.) On Saturday morning, were were so fortunate to be at the Bodega Marine Lab on the day when UC Davis Biological Sciences freshman are bussed out to the BML for a tour and some proselytizing for marine biology as a field of study. Because there was already staff on hand for the freshman tours, we were offered the opportunity to have our class go on the same tour. After the tour and an inspirational overview, given by Dr. Eric Sanford, of ongoing research at BML, we had lunch and then killed time at the dorms while waiting for the tide to go down.
I’d borrowed 3 pairs of waders for the students who were adventurous enough to get into the chilly water to collect seagrass plants and sediment. However, after polling the students, I realized that almost everyone was pretty excited about putting on the waders, so I grabbed a bunch more. At 2:30, low tide, we went to Westside Park to hunt for seagrass beds. From the shore, it was pretty easy to spot the dark patches in the water that I assumed were them. So, we walked across the mudflat for about 100 yards and then just a few feet into the water, they were right in the thick of them!
We gave them spades and buckets and they dug right in. The buckets were filled up about halfway with sediment and plants, and topped off with seawater. After about an hour, we had to drag them away, they loved looking at all of the crazy marine invertebrates and eggs that were attached to the leaves. Back at the lab, we stirred the buckets, let the sediment settle a little, and then loaded up the columns. They’re now in the hands of WSCA’s AP Bio class, and we’re really looking forward to watching them develop!
For the Seagrass Microbiome project, one thing we’d like to do is to build a culture/reference genome collection for microbes found in association with seagrasses. For now, we are just working on this for Zostera marina, both because it is our primary experimental model organism and because we have easy year-round access to it at Bodega Bay.
However, while we hope to do more of it in the future, the Eisen lab isn’t currently set up to isolate the types of organisms that we think are likely to play an important role in seagrass adaptation to marine sediments, e.g., sulfur-oxidizing microbes (which require anaerobic conditions to grow). So, for now, we are using an enrichment tool known as a Winogradsky column to grow lots of sulfur oxidizers (and other things, but we’ll focus on sulfur oxidation here.)
In Winogradsky columns, sulfur and oxygen gradients cause microbes to stratify themselves according to their ability to utilize the available electron donors and acceptors. These microbial layers are visible to the eye, making Winogradsky columns a great classroom tool for teaching students about microbial physiology, biogeochemistry, ecological niches, succession, and much more.
Bethany Dixon is an AP Biology teacher at Western Sierra Collegiate Academy, a charter school in Rocklin, California. She has been building Winogradsky columns in her classroom for a couple of years now. We have teamed up to have her students build Winogradsky columns that have been inoculated with seagrass bed sediment. One thing we know is that we will be able to enrich for seagrass-associated microbes with a variety of metabolic capabilities. But, we don’t know much more than that. For example, how many different species will be oxidizing sulfur in these columns? Will the same microbial species perform sulfur oxidation in every column that’s made from the same sediment? What will happen if we add a bunch of elemental sulfur to the column? Will that change the makeup of the sulfur oxidizing community in the columns? Will it affect the shape of the sulfur gradient? Will it affect how quickly the layers form in the columns? Will it kill the column?
So, we arranged for Bethany’s AP Bio class to come to UC Davis’ Bodega Marine Lab (BML) to collect some sediment and inoculate some Winogradsky columns. Typically, Winogradsky columns are built by mixing sediment with a carbon source (like newspaper) and a sulfur source (like egg yolk), topping it off with water, and then sealing it. I got the idea of using diatomaceous earth as a physical matrix and laboratory chemicals for the carbon source (cellulose) and sulfur source (sodium sulfate) from Tom Benoit at McMurry University. We just make a slurry of the sediment and water, let the big particles settle, and then add the water to the columns.
This is really cool because we can control and systematically vary the chemical composition of each column. So, with the AP Bio class, we have defined 5 experimental “recipes” and each student is making two columns, with one experimental and one standard recipe. We’ll discuss the five experimental recipes in a follow-up post.
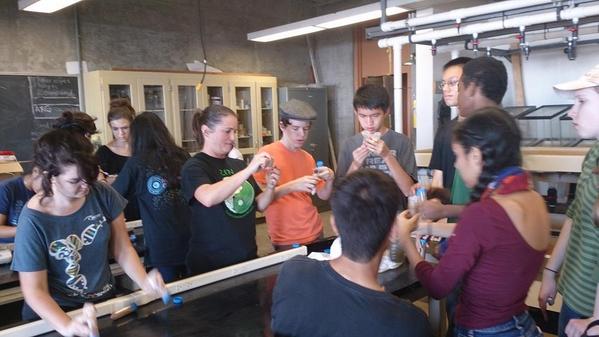
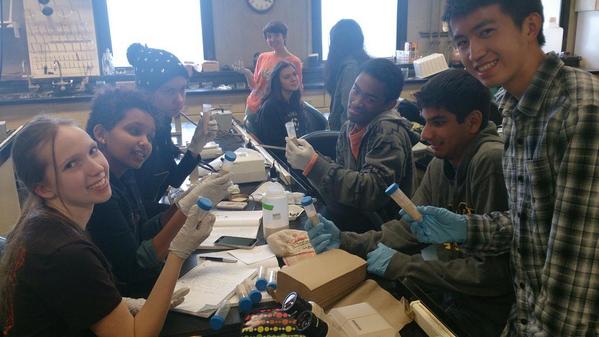
Today, the students arrived at the BML. We spent the afternoon weighing out and mixing chemicals, and loading our 50ml conical tube columns. Tomorrow, at low tide, we’ll head over to a seagrass bed, load up a bucket with sediment, and haul it back to the lab to inoculate the columns!
You can follow our progress here, or in real-time on Twitter with the hashtag #APBioGradksy
Visiting the experimental seagrass tanks. One of the experimental recipes involves substituting macerated seagrass roots for cellulose. Everyone visited the experimental tanks to grab some seagrass roots for those. They would have spent hours here, checking out the different tanks, watching the sea stars, urchins, and sea hares.Ecosystem engineers. Back in the lab, a classroom provided by the BML, five teams weighed out the chemicals for their experimental columns, and loaded them up.
**Note all photographs in this post were taken approx. 2 weeks ago and thus the winogradskies herein described are reflective of that time point.
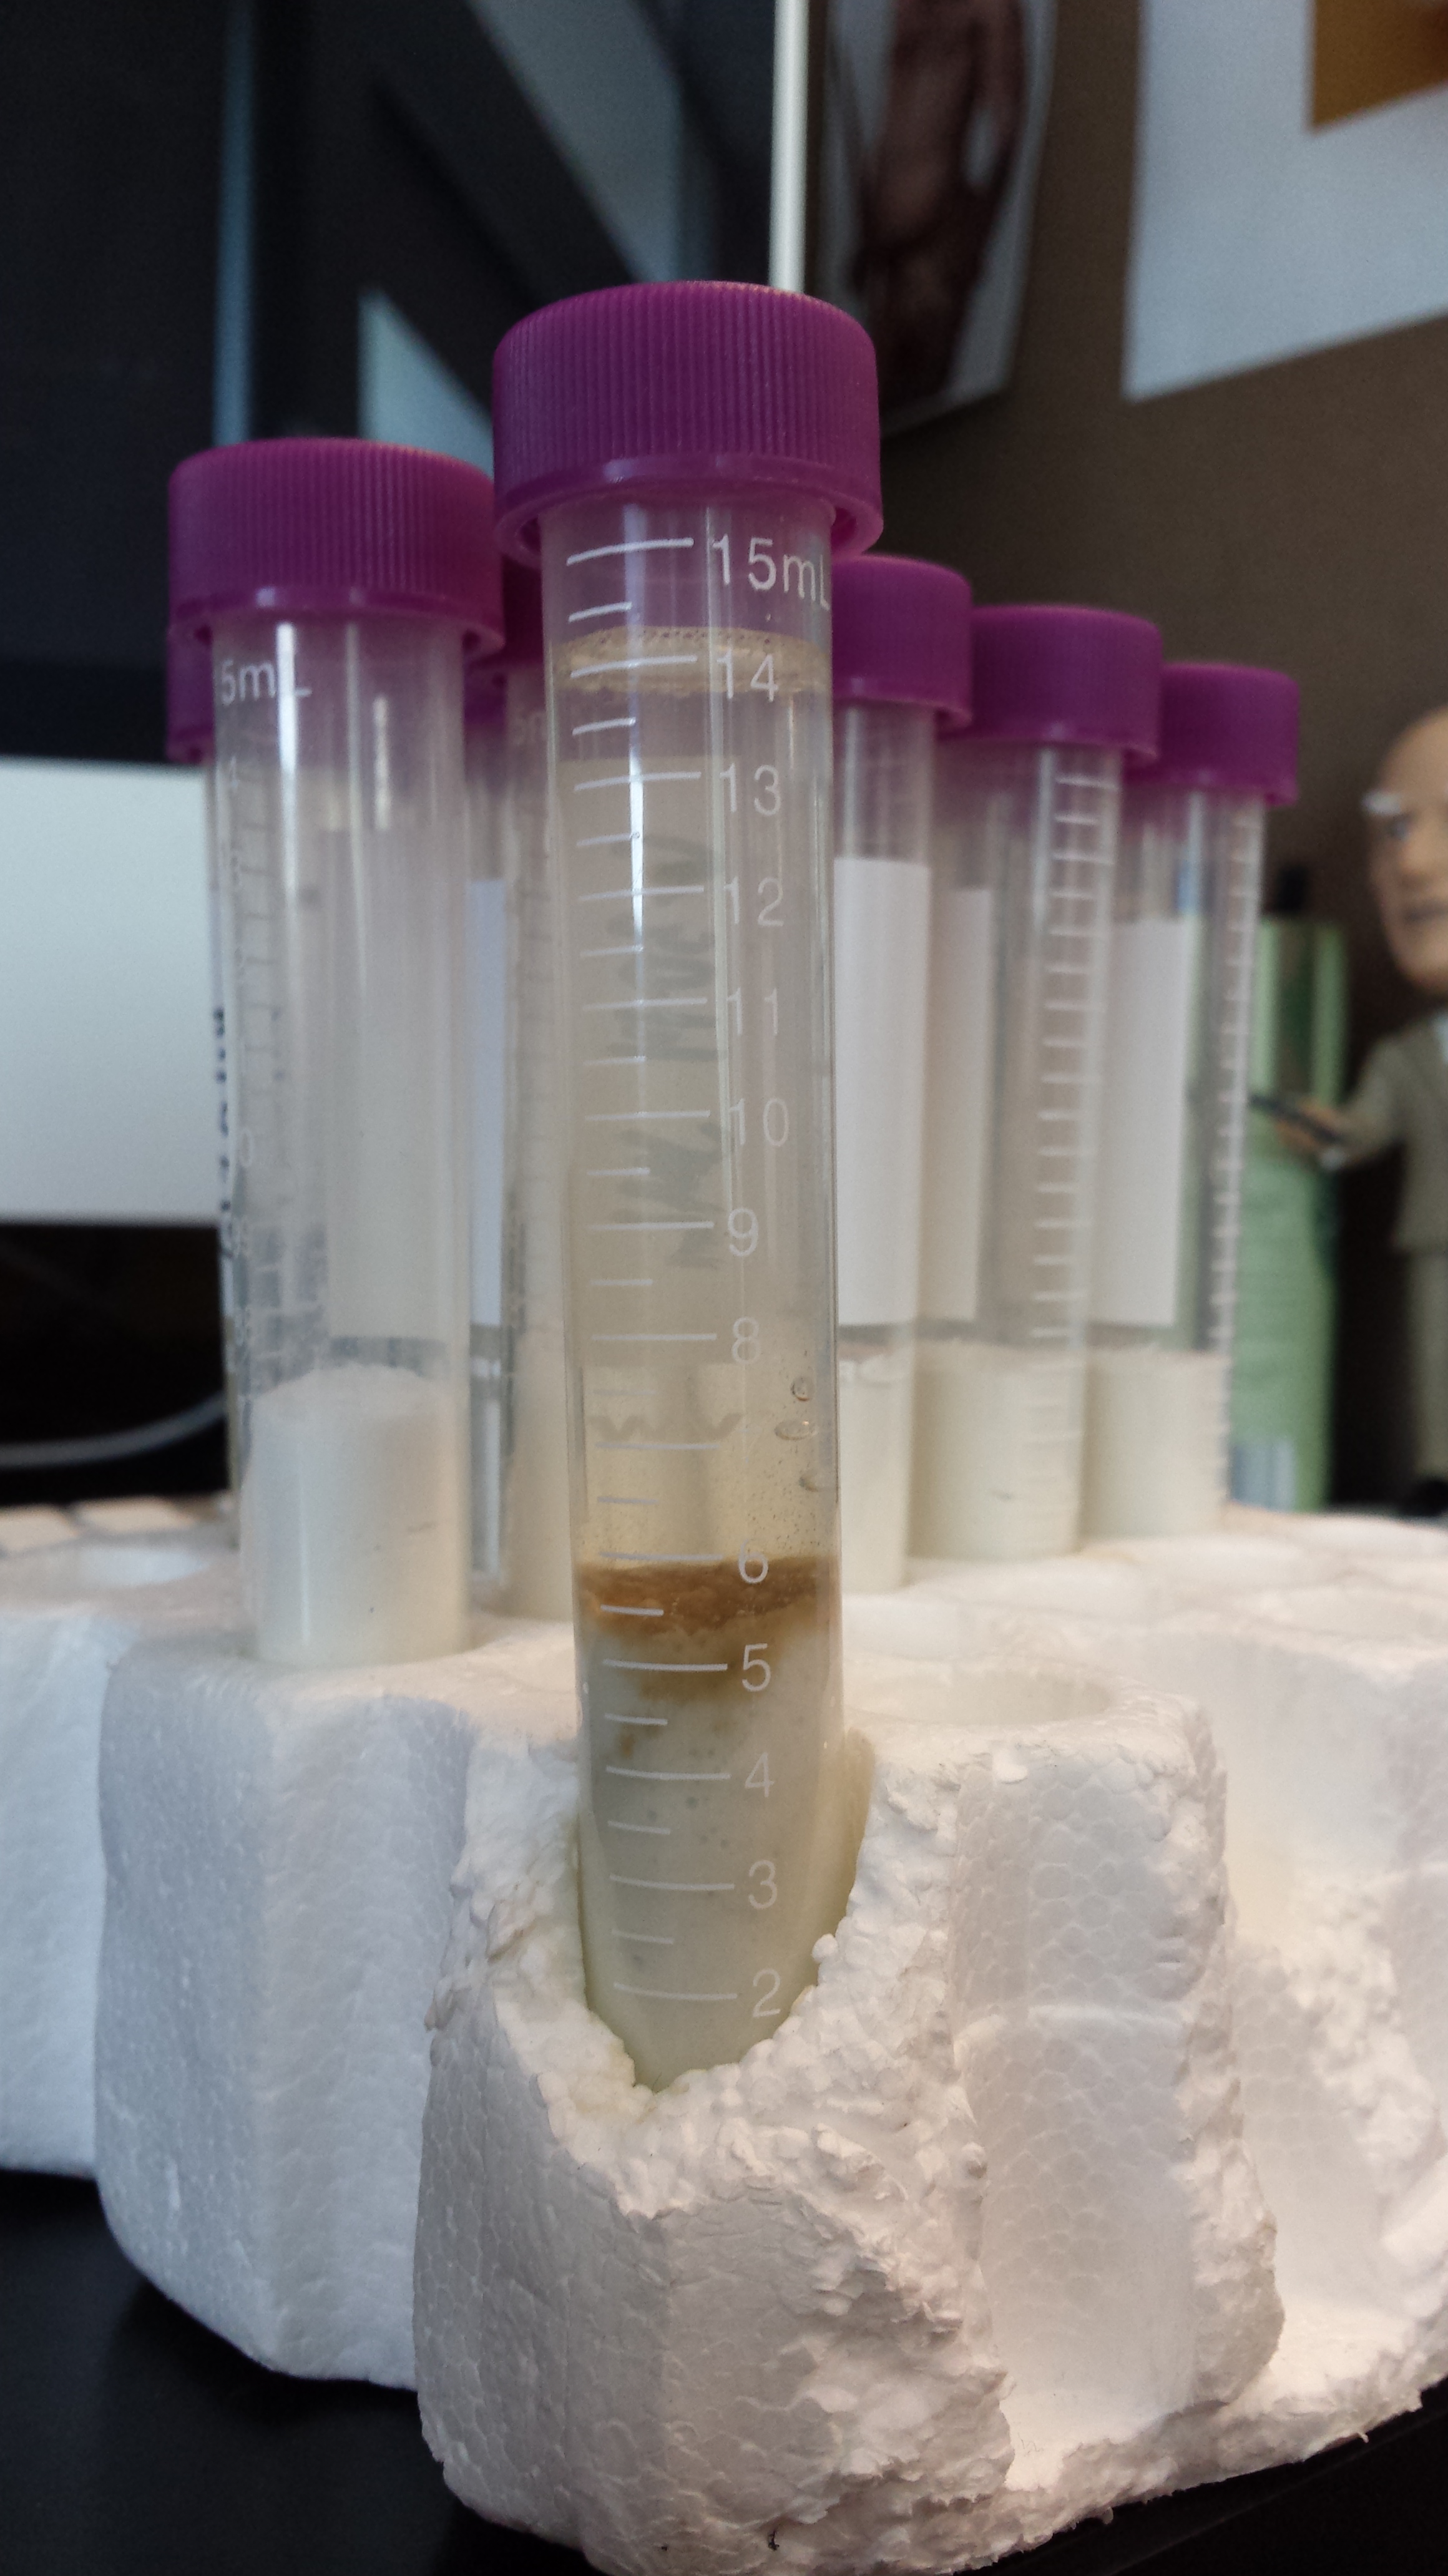
After 10 weeks:
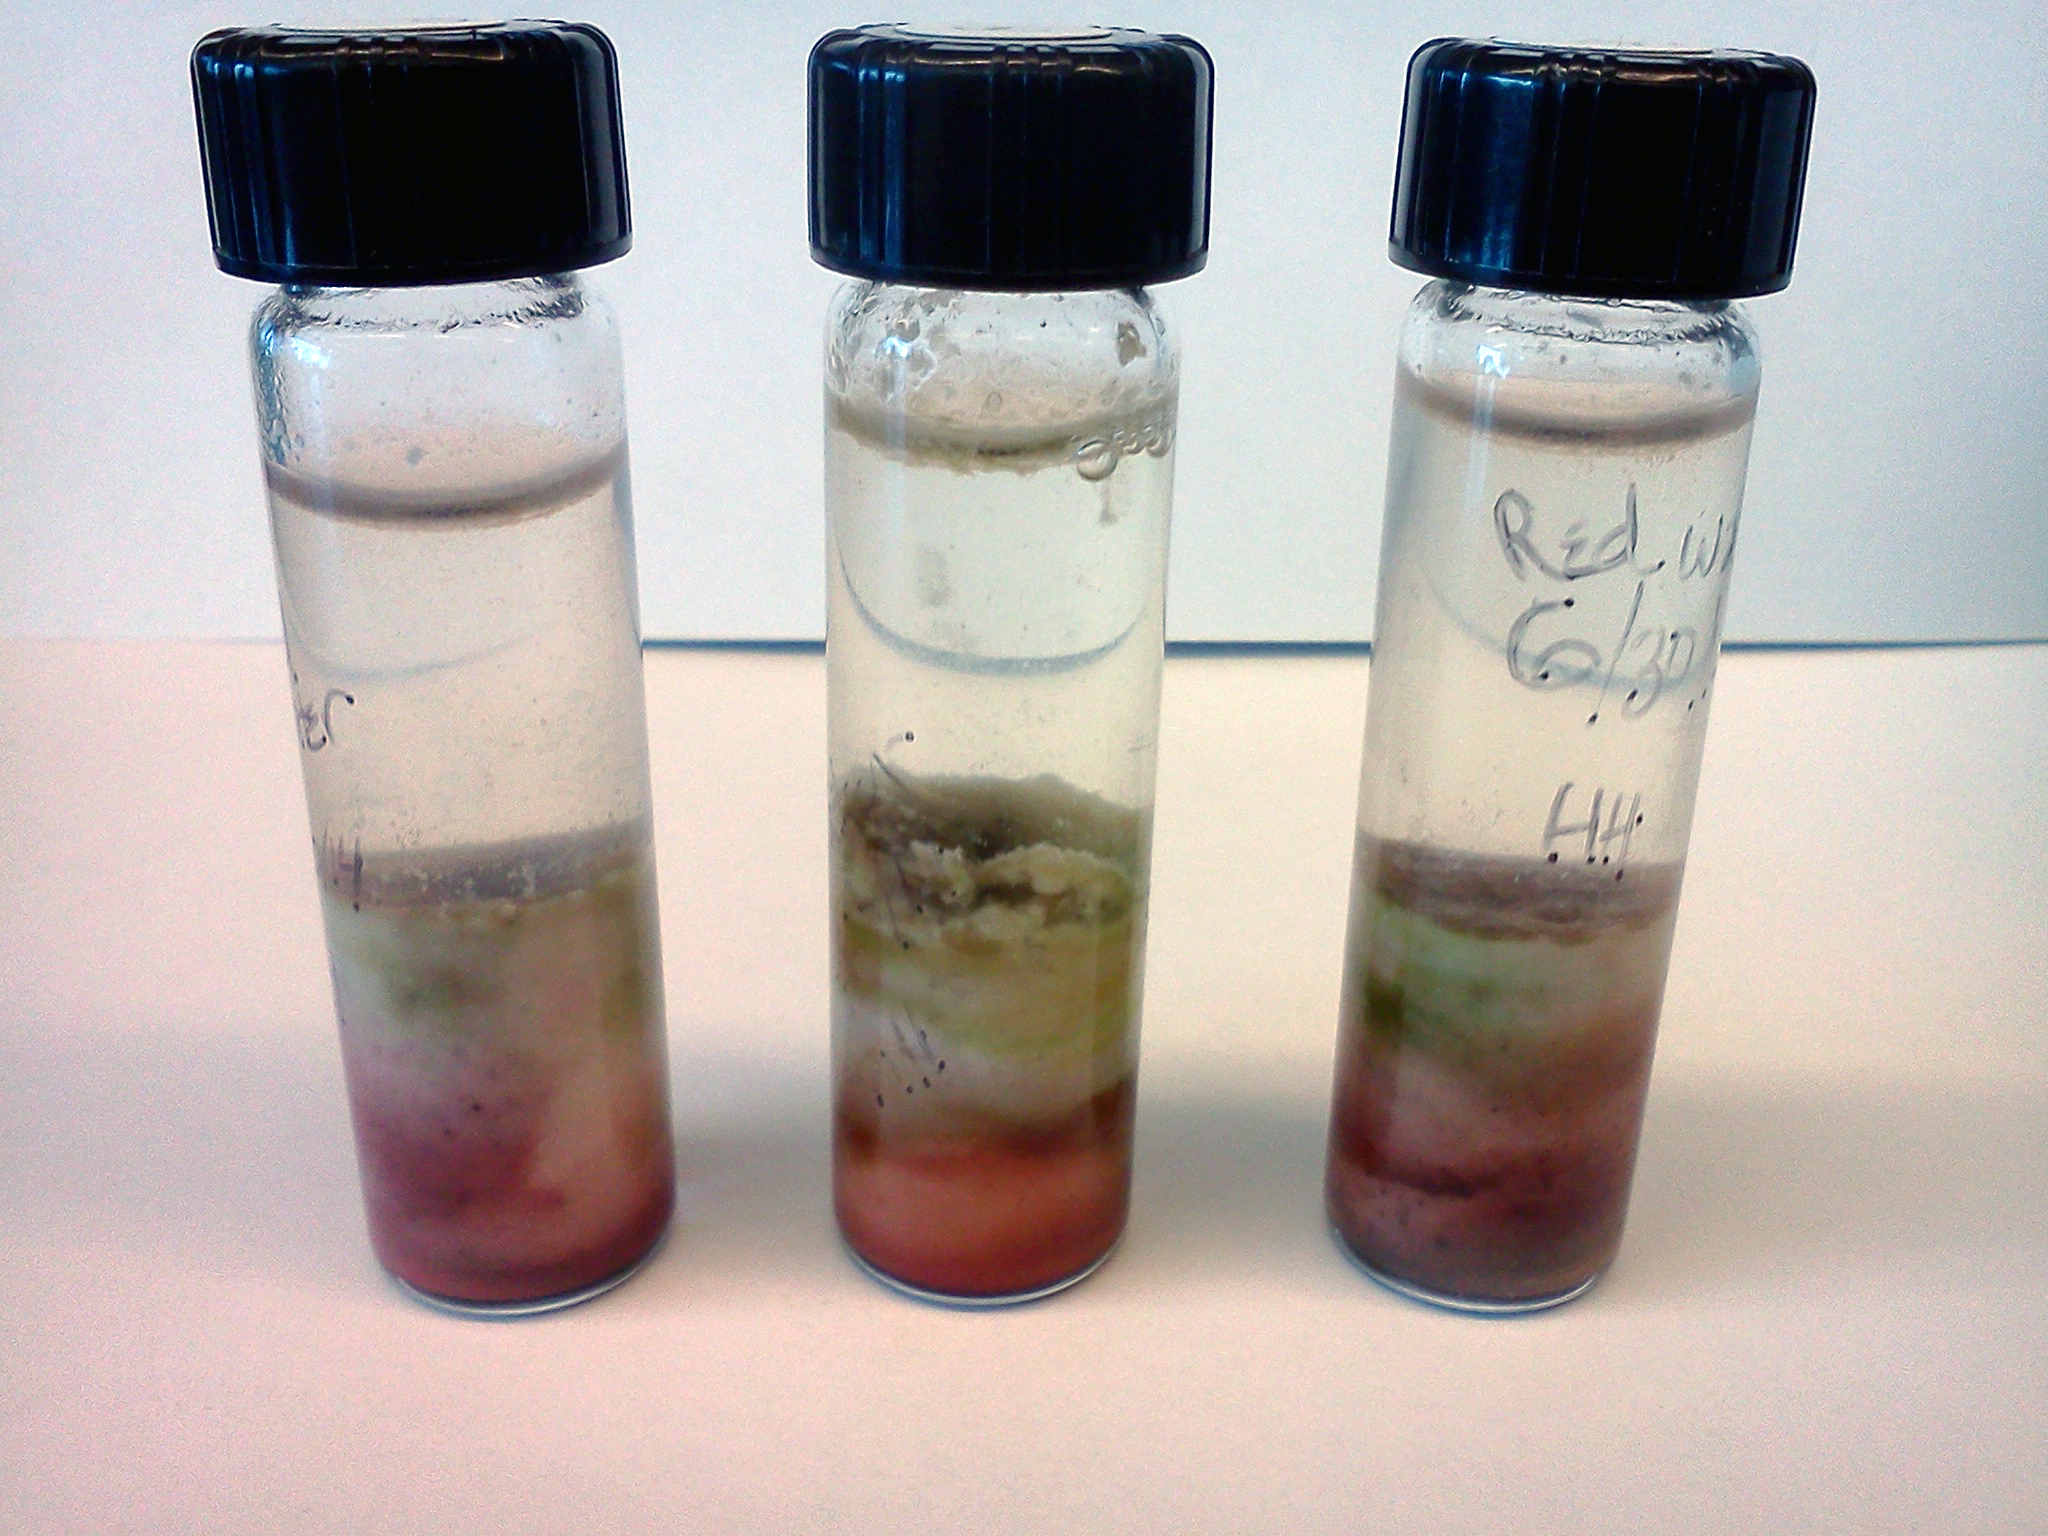
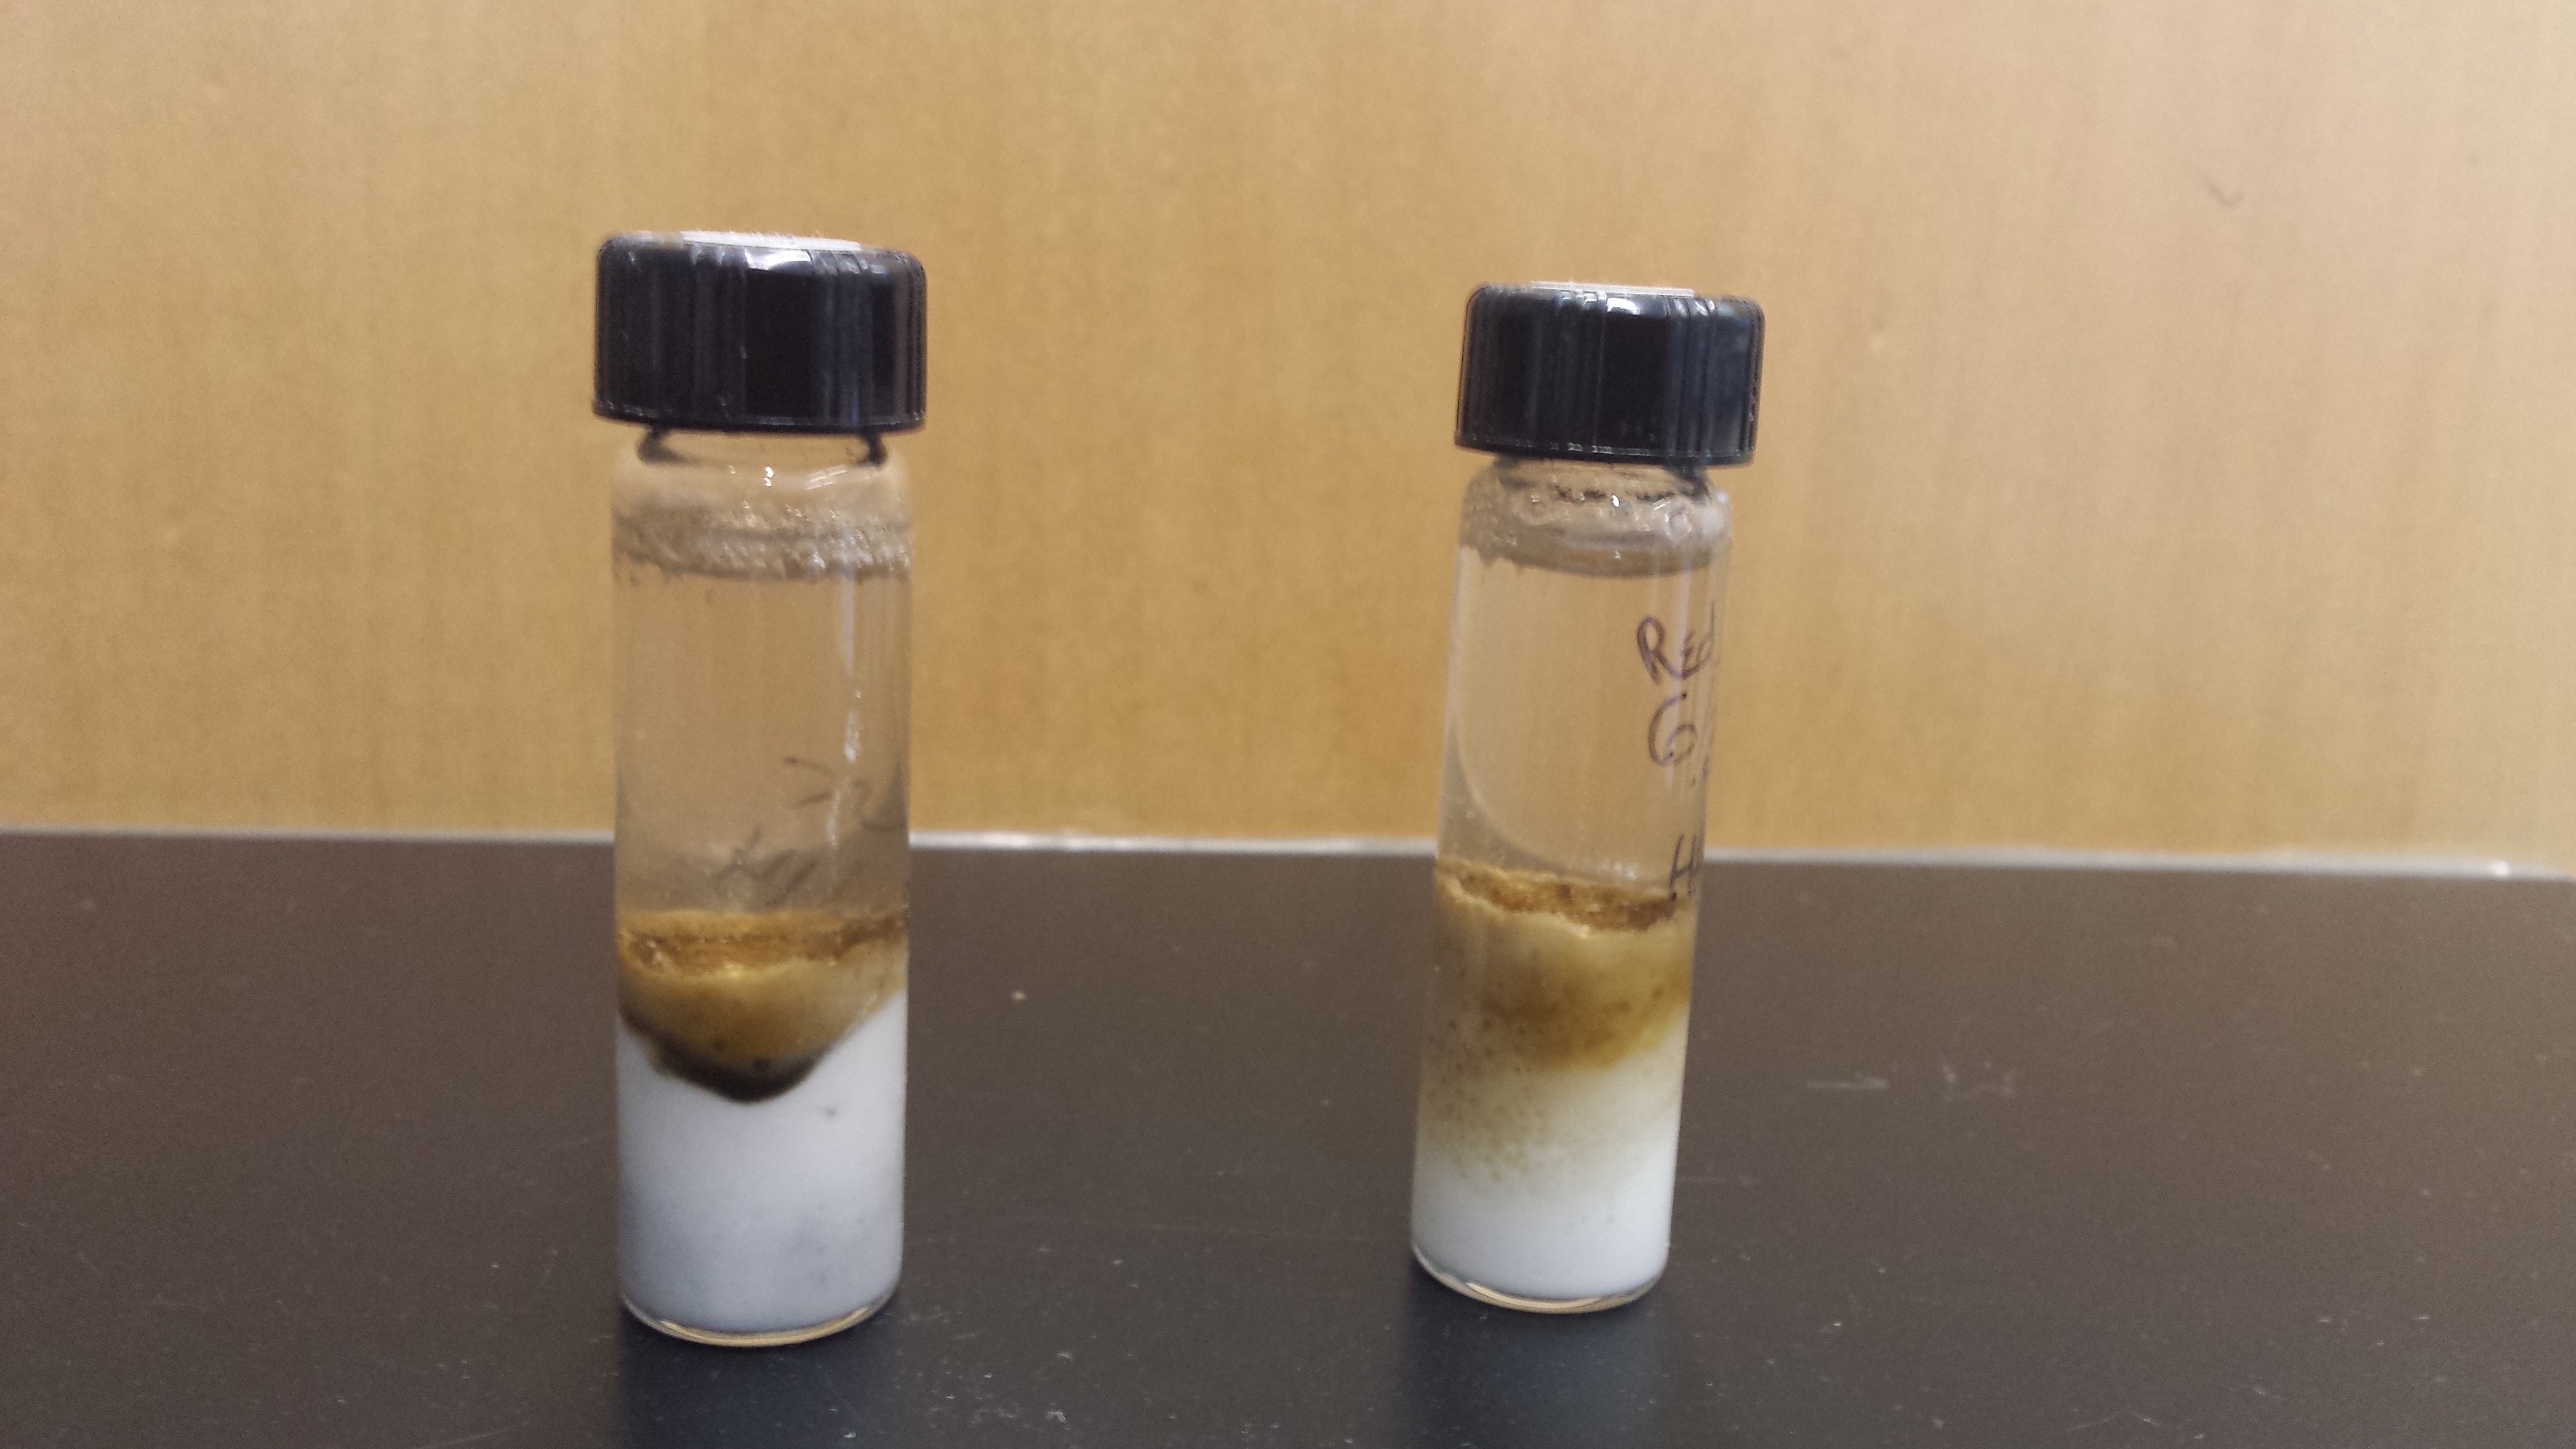
These columns haven’t experienced much change except for a small increase in biomass towards the top of the layers. These three vials all still look relatively visually identical, which is reassuring as they were inoculated from the same water source and *should* be replicates of each other.
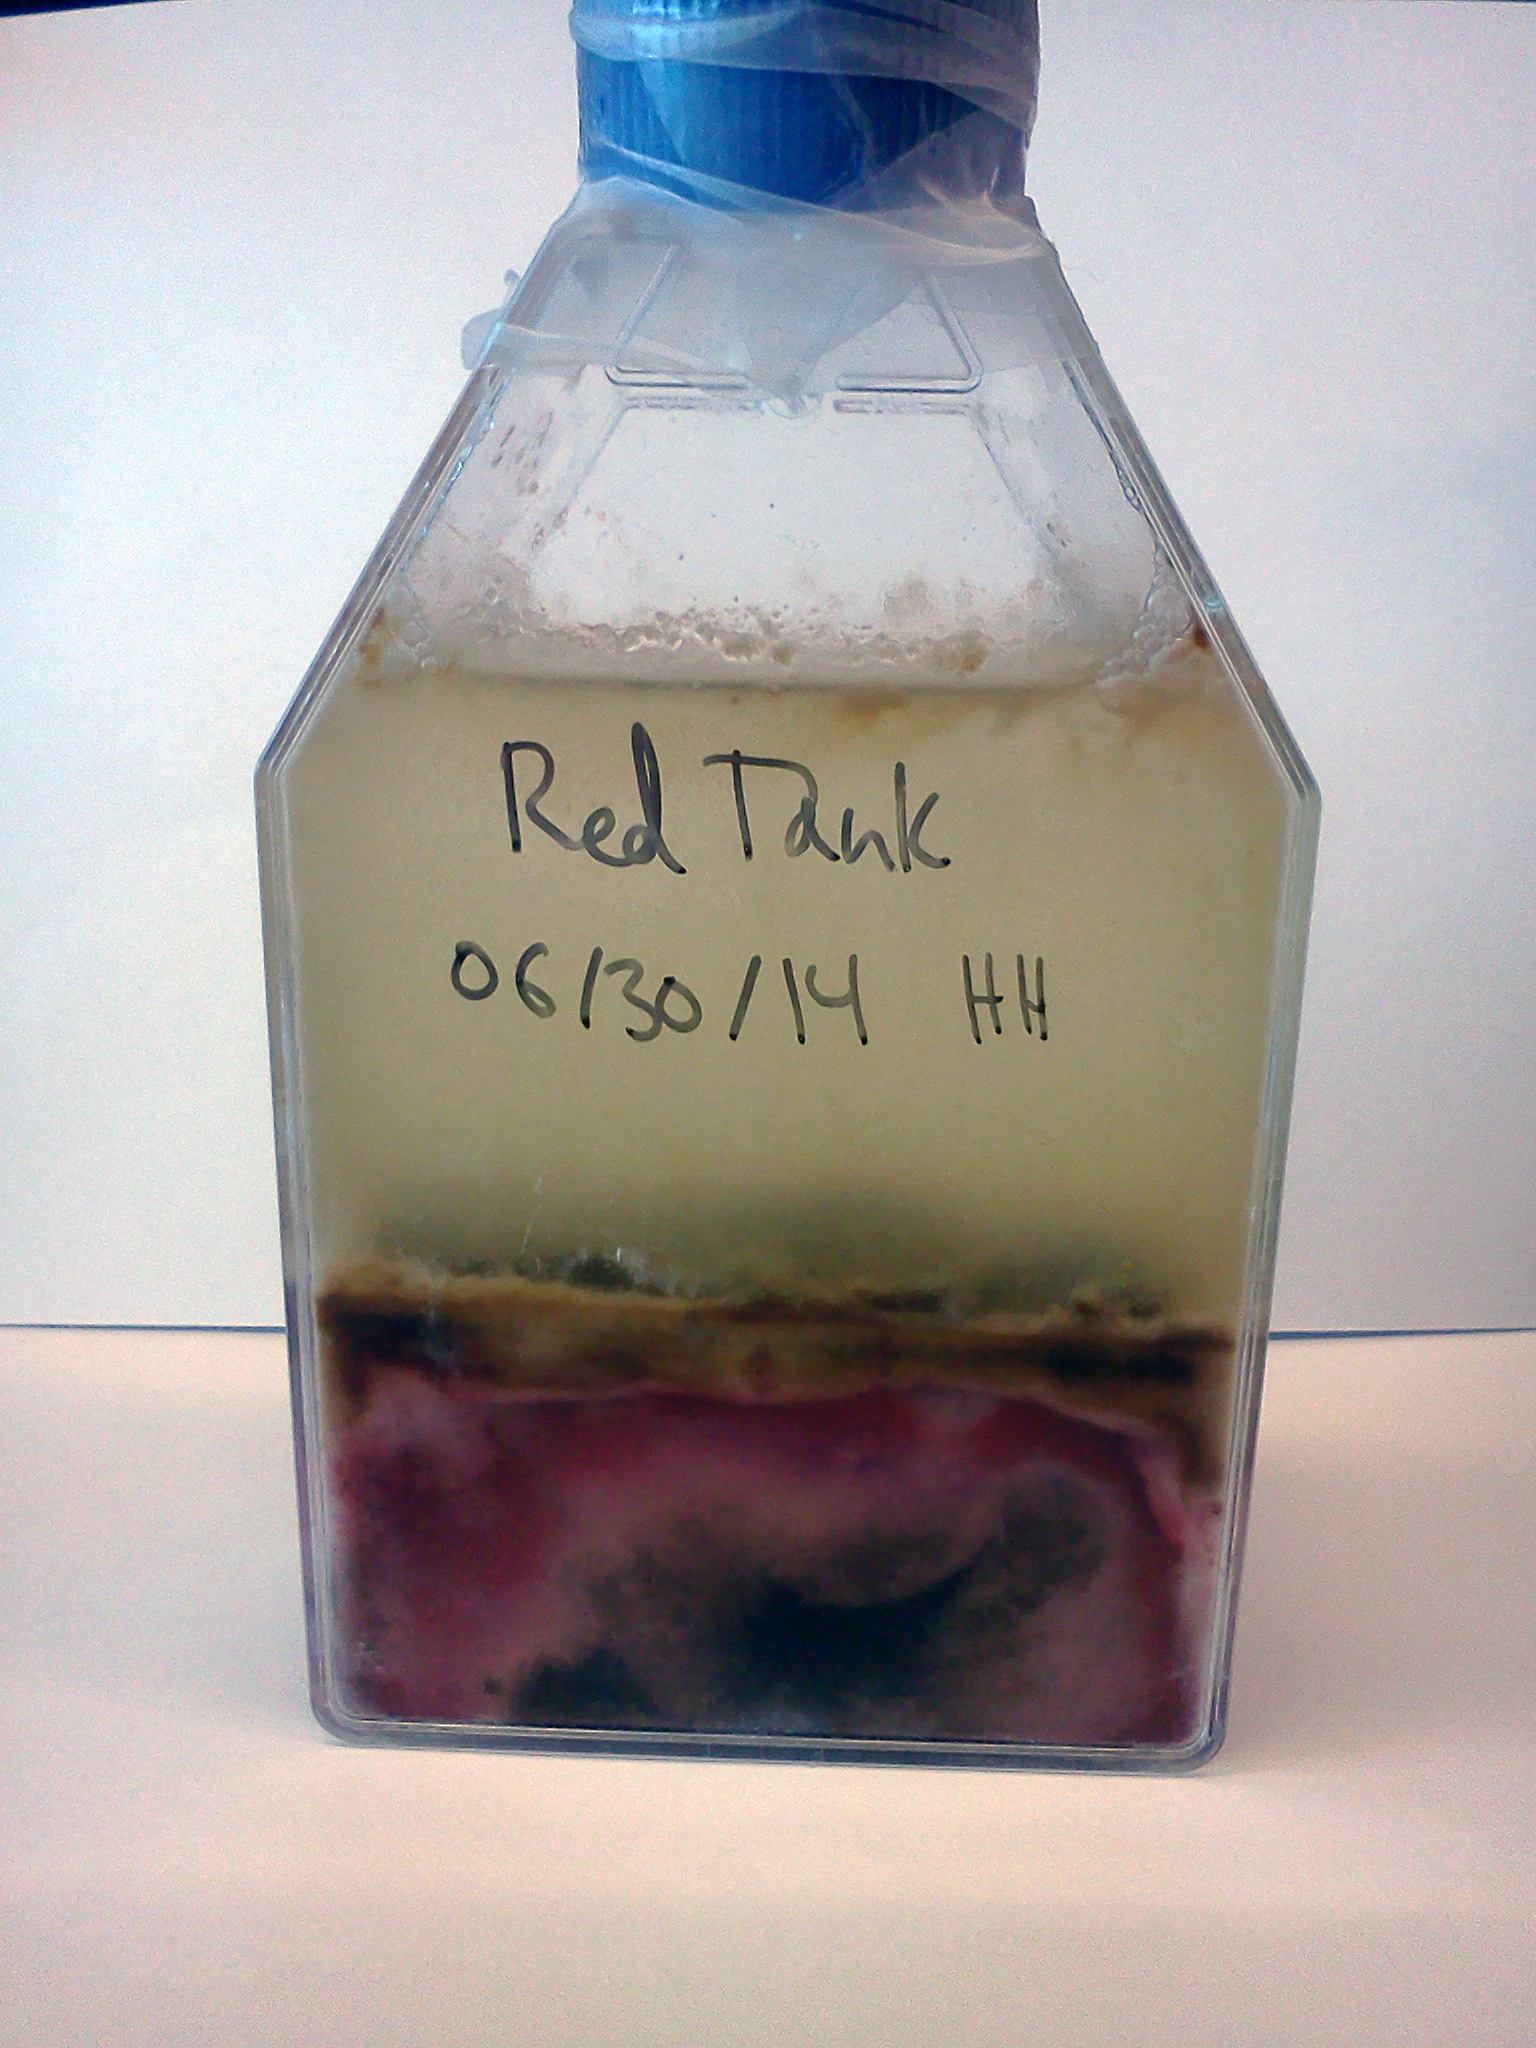
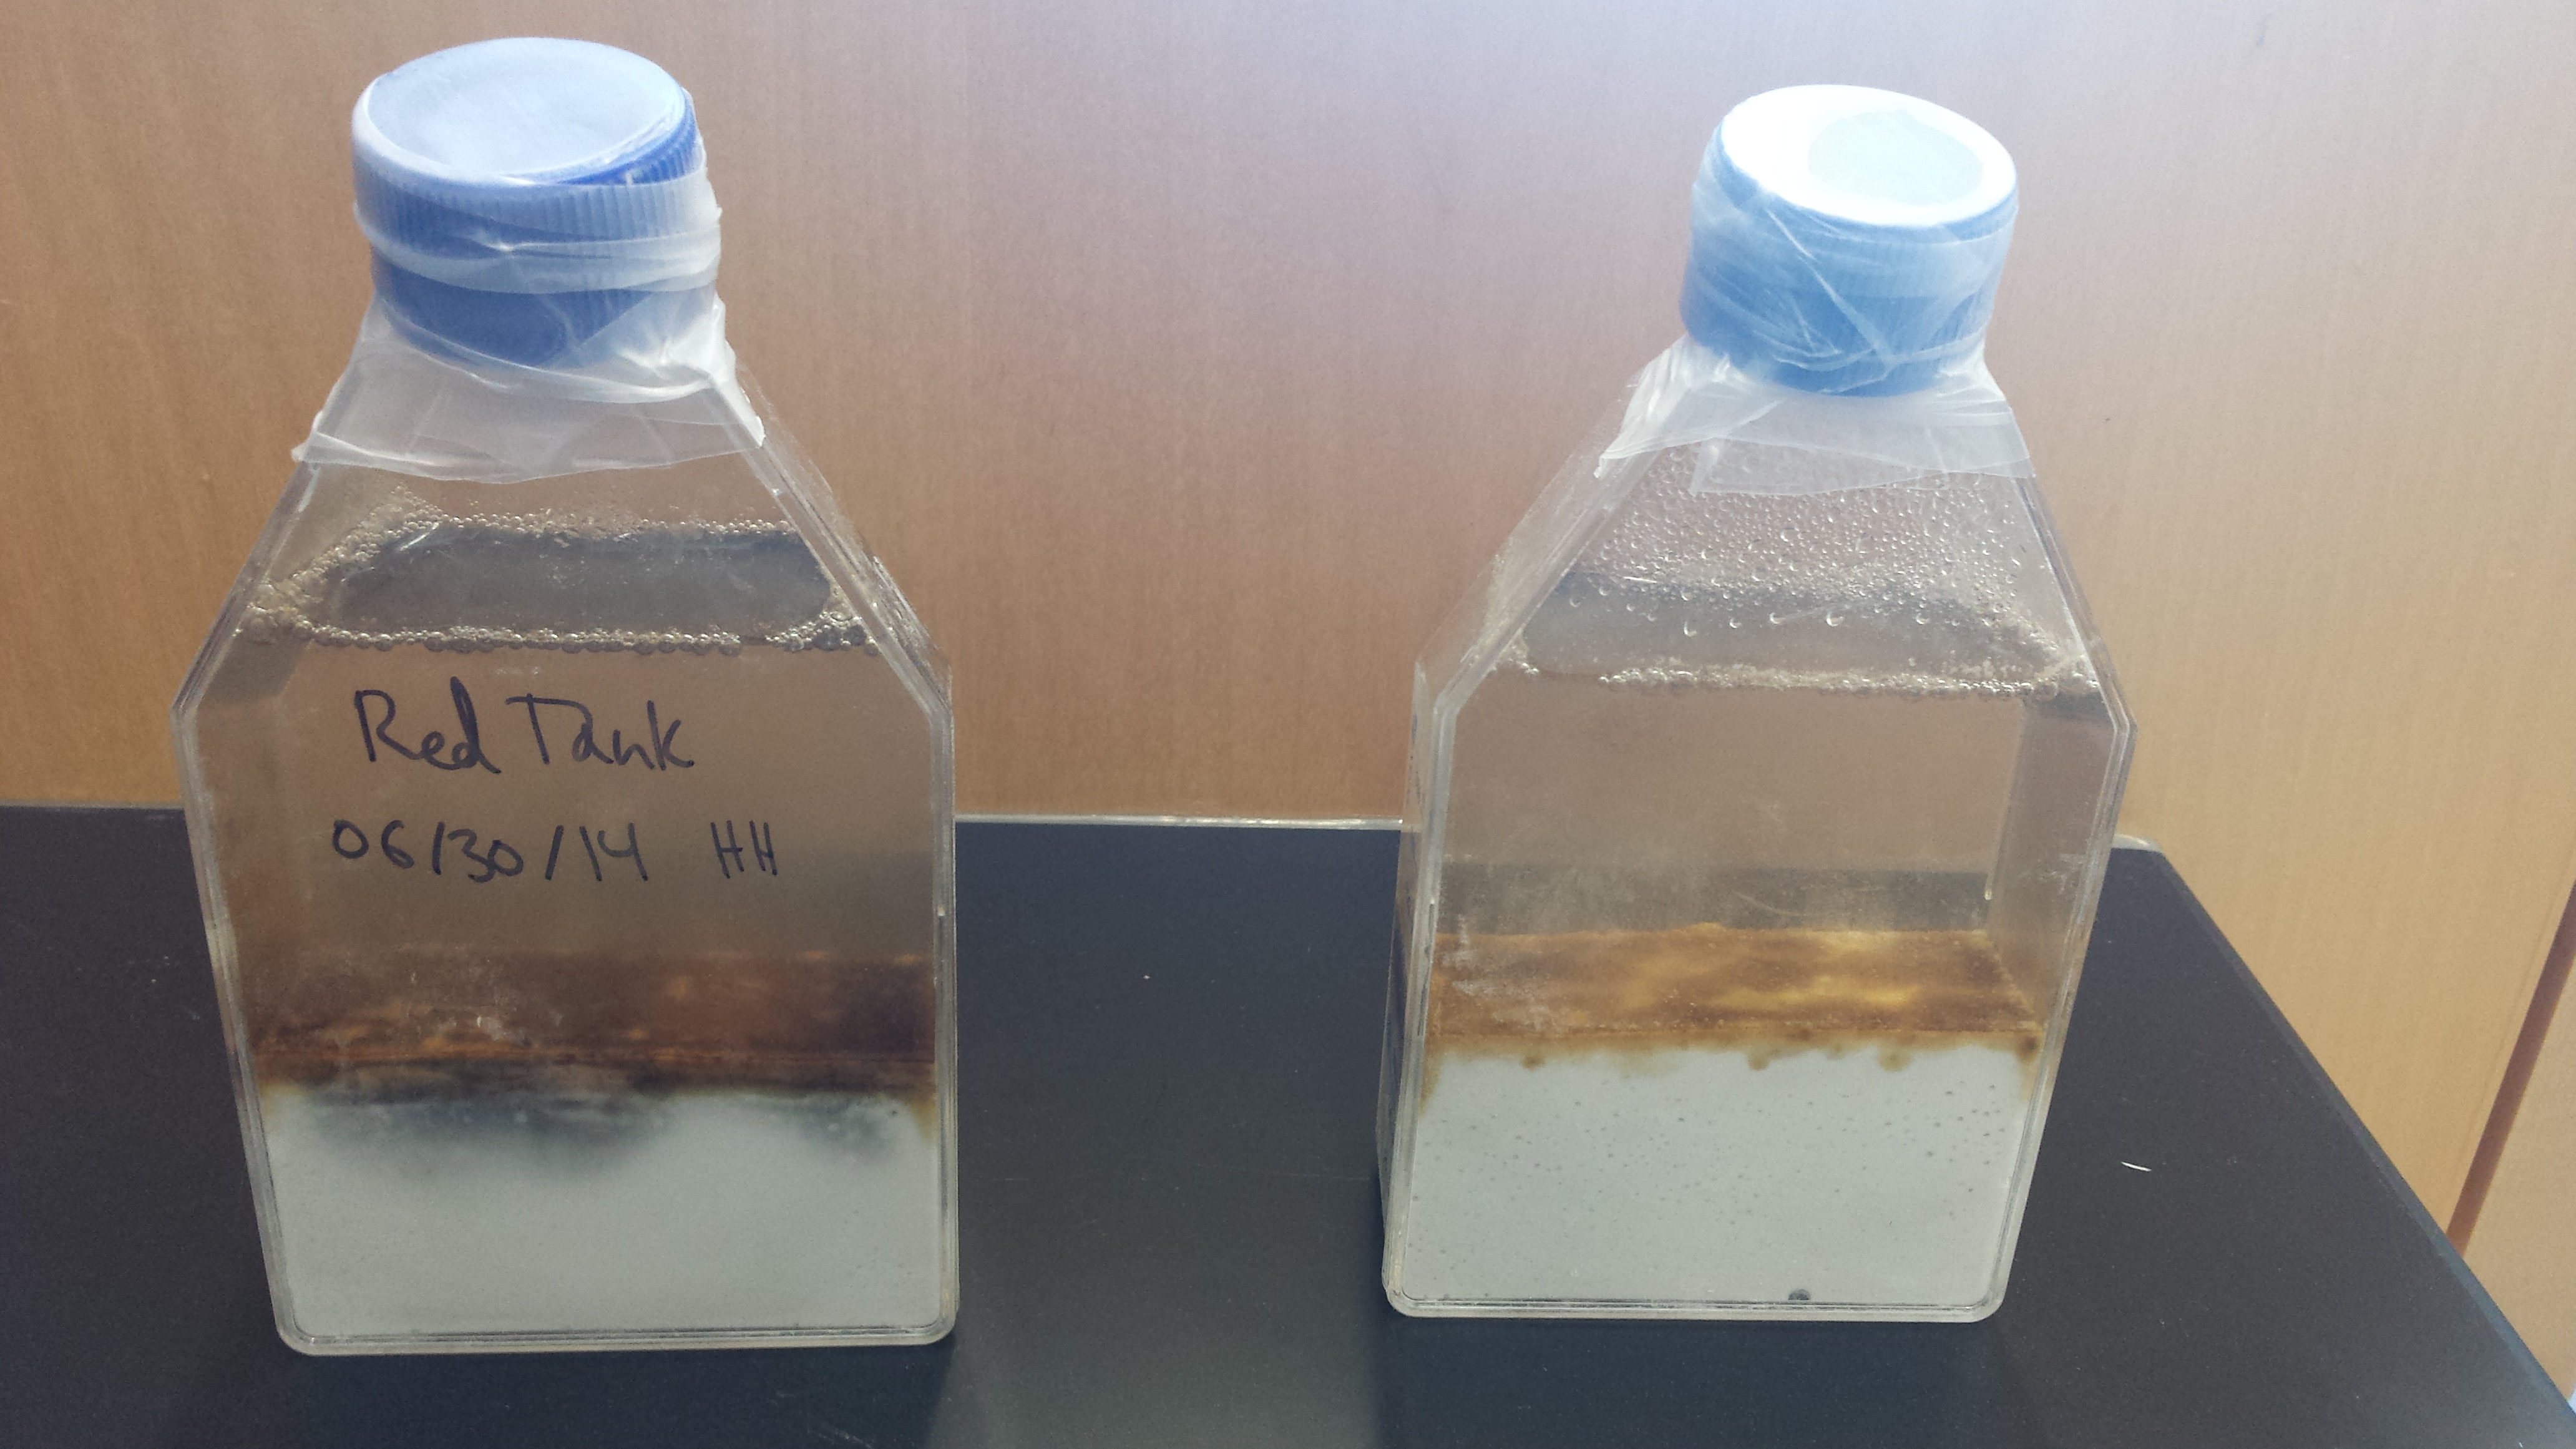
Microbial succession in action???? The two large columns that get full light (left and middle columns) were solid pink/black at 7 weeks, but now we are seeing some snow-white colored microbes intruding in. I wonder what these snow-white microbes are and what the earlier coal-black and pretty-in-pink microbes were doing metabolically that allowed the white microbes to now flourish in the columns. Alternatively, there could be no white microbes – perhaps the white is just the diatomaceous earth which is now visible again as the pink and black microbes recede into the past.
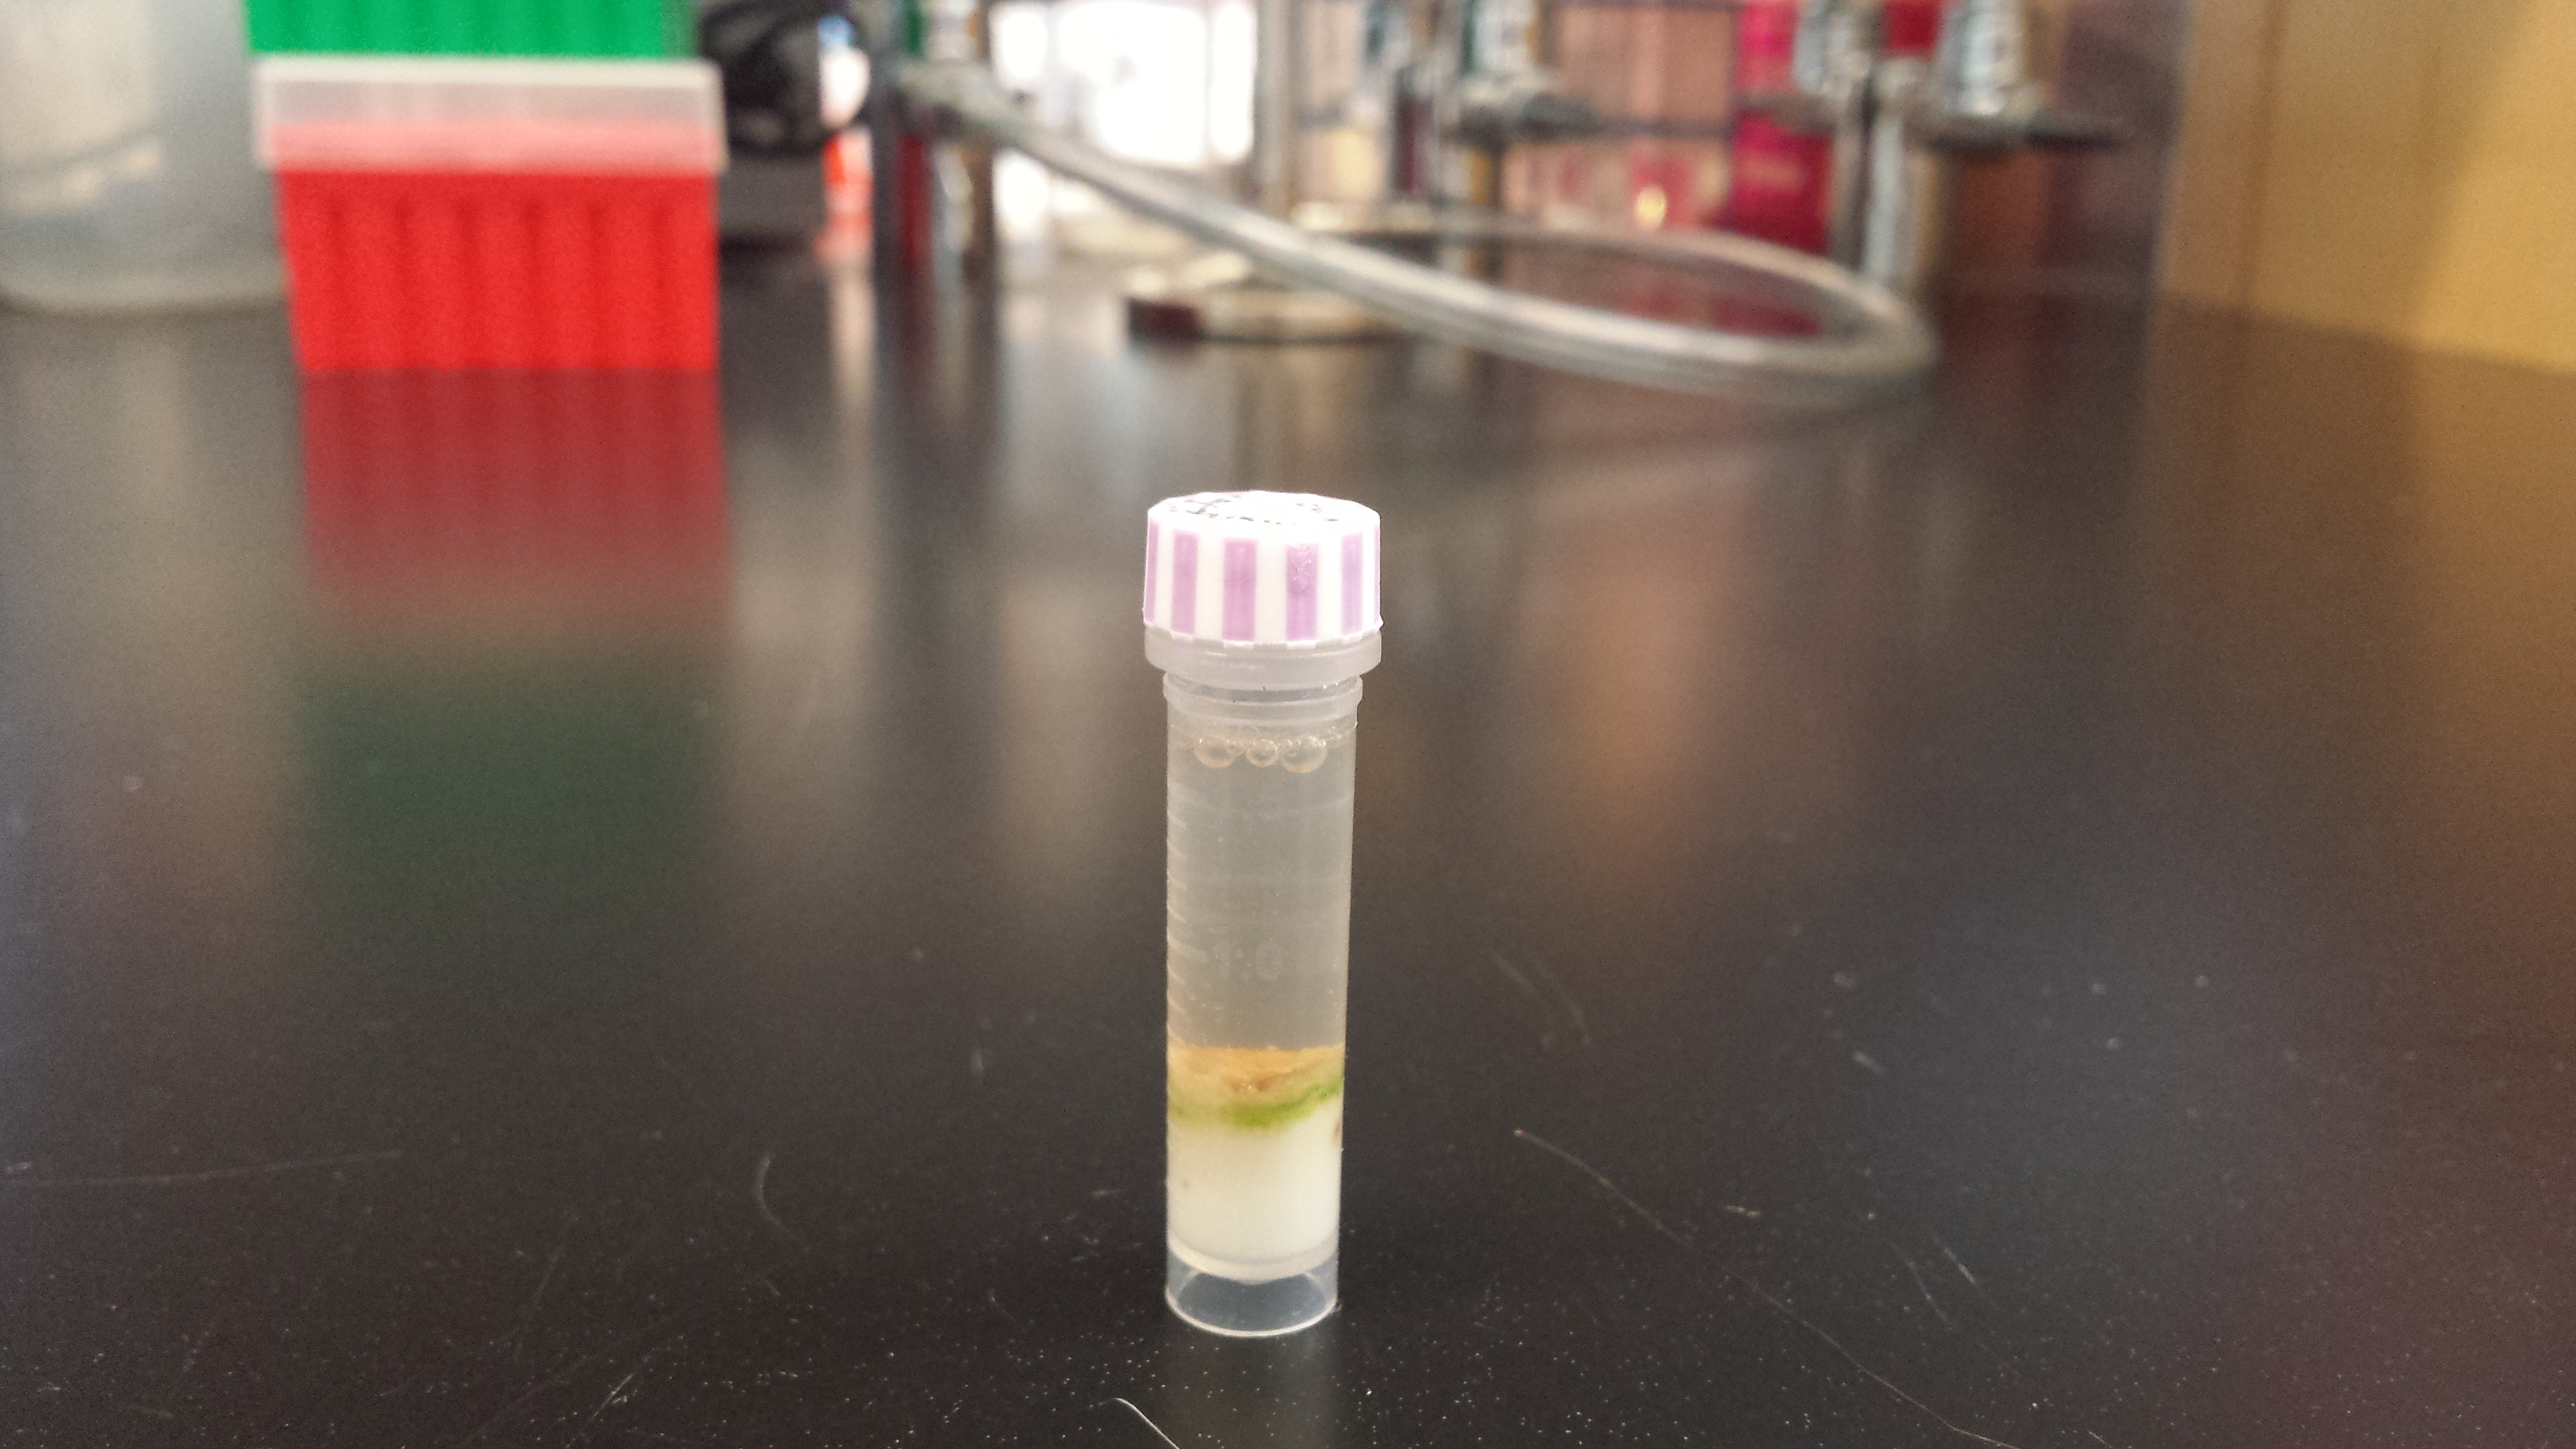
Overall, there is not a lot to report on the 5 mL tubes that were inoculated with water from different sampling locations. Except in the one above where we see a tiny band of purple!! This is the first 5 mL tube to show the presence of any pink and/or purple microbes!
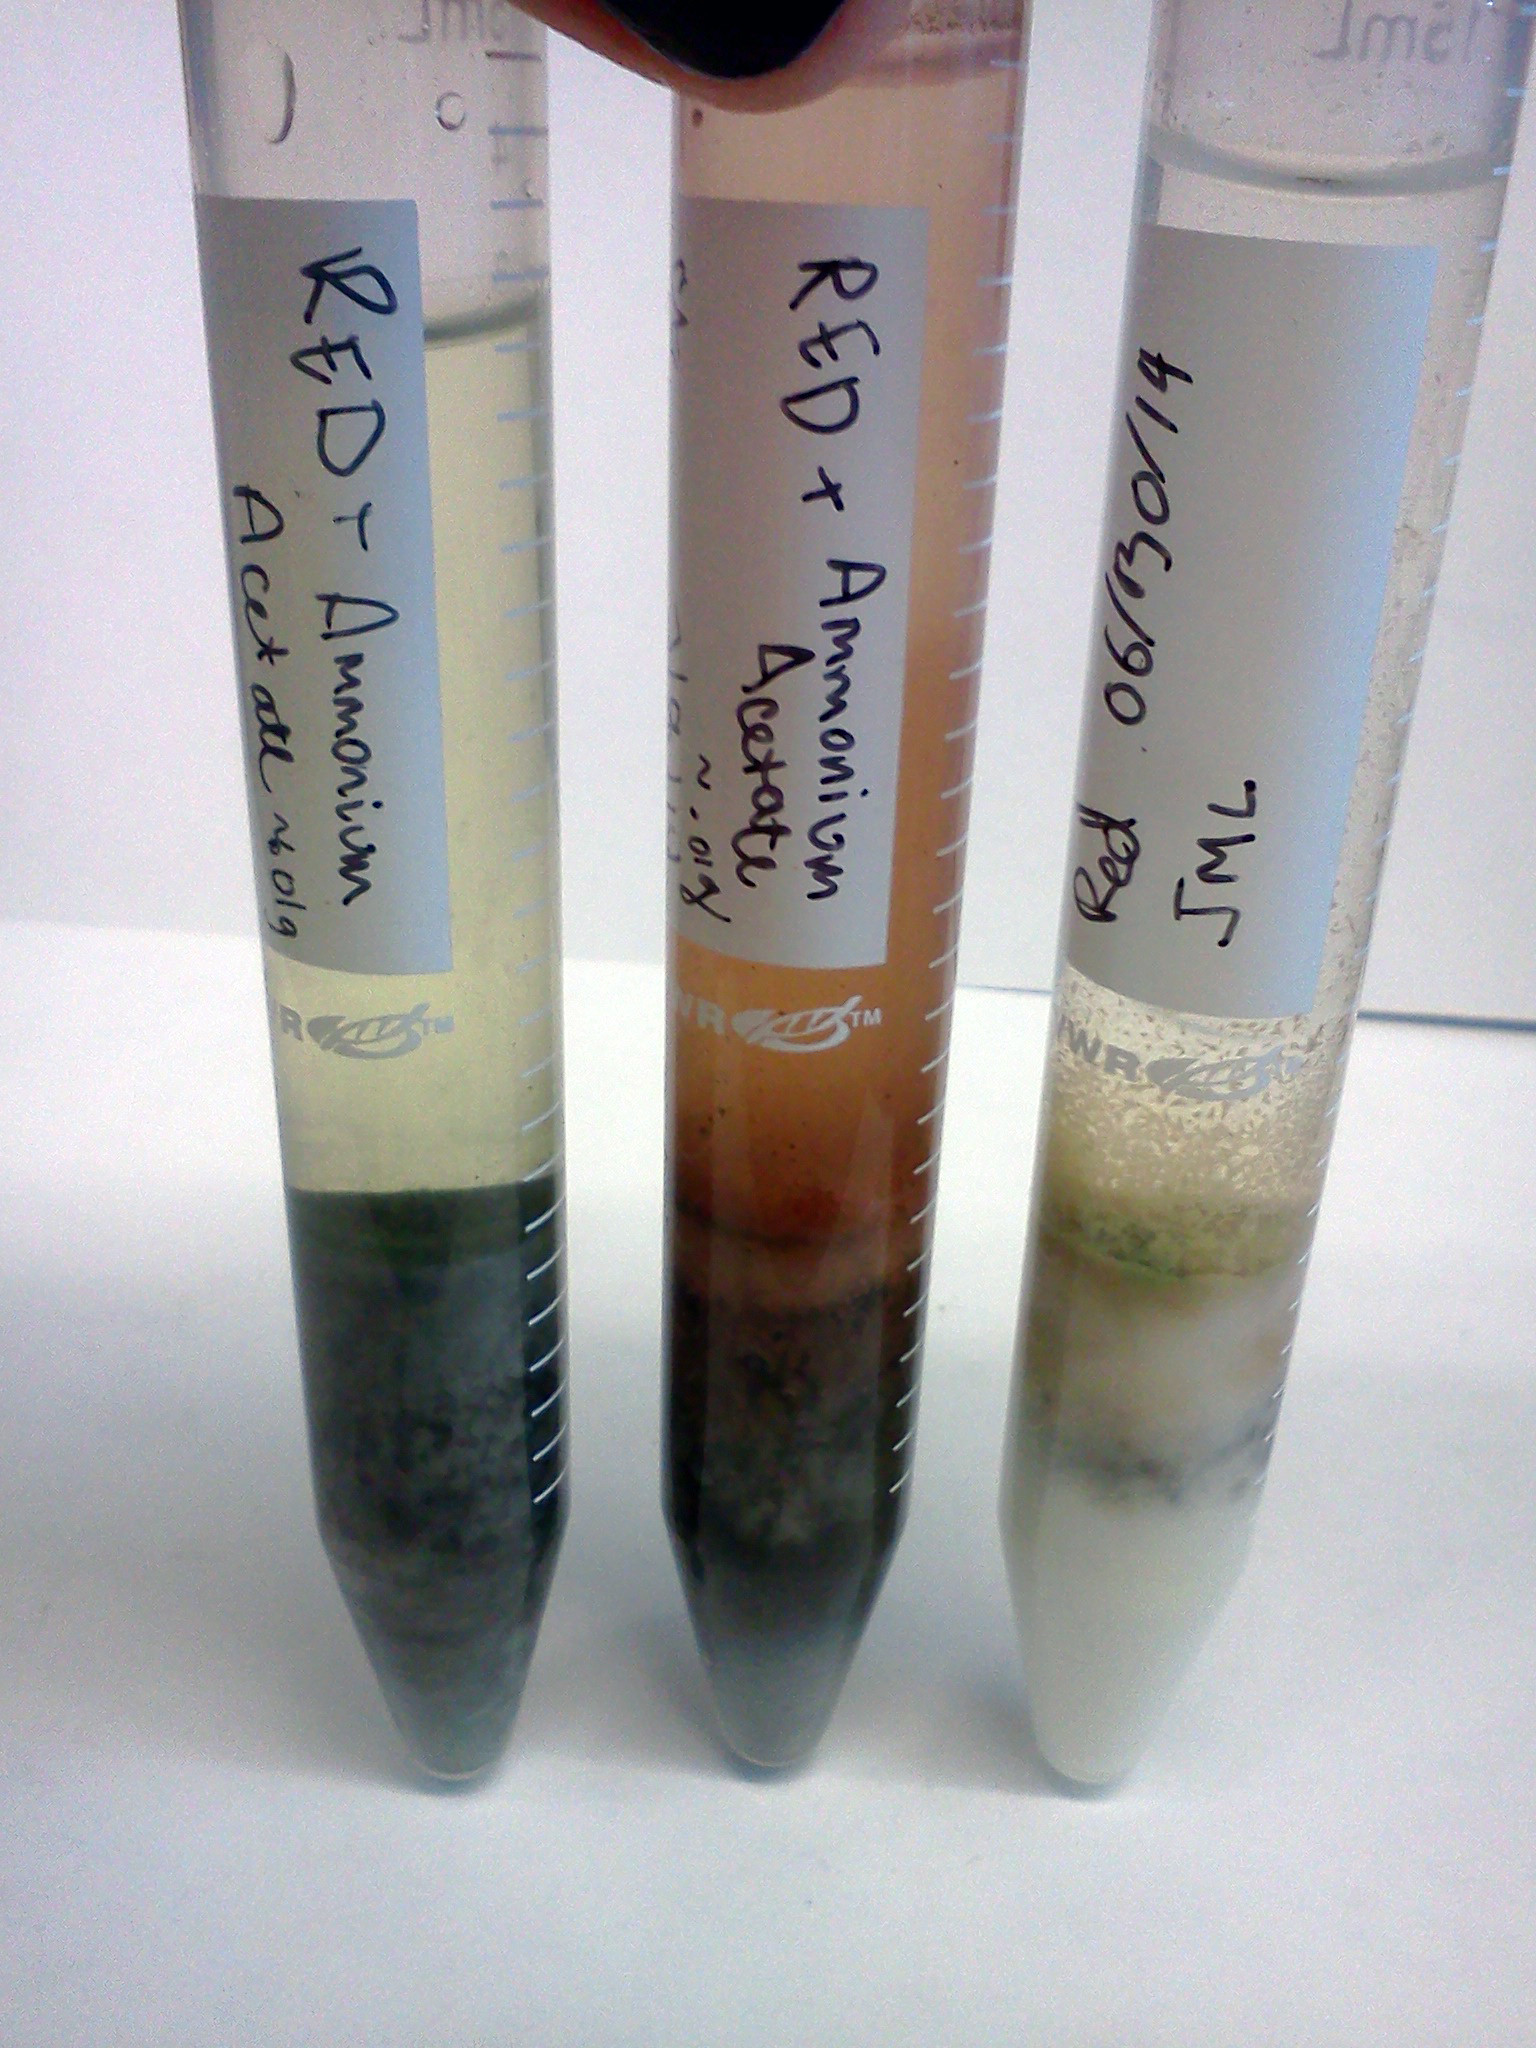
Experimental Tubes (where we added either Potassium Nitrate or Ammonium Acetate) – After 9 weeks:
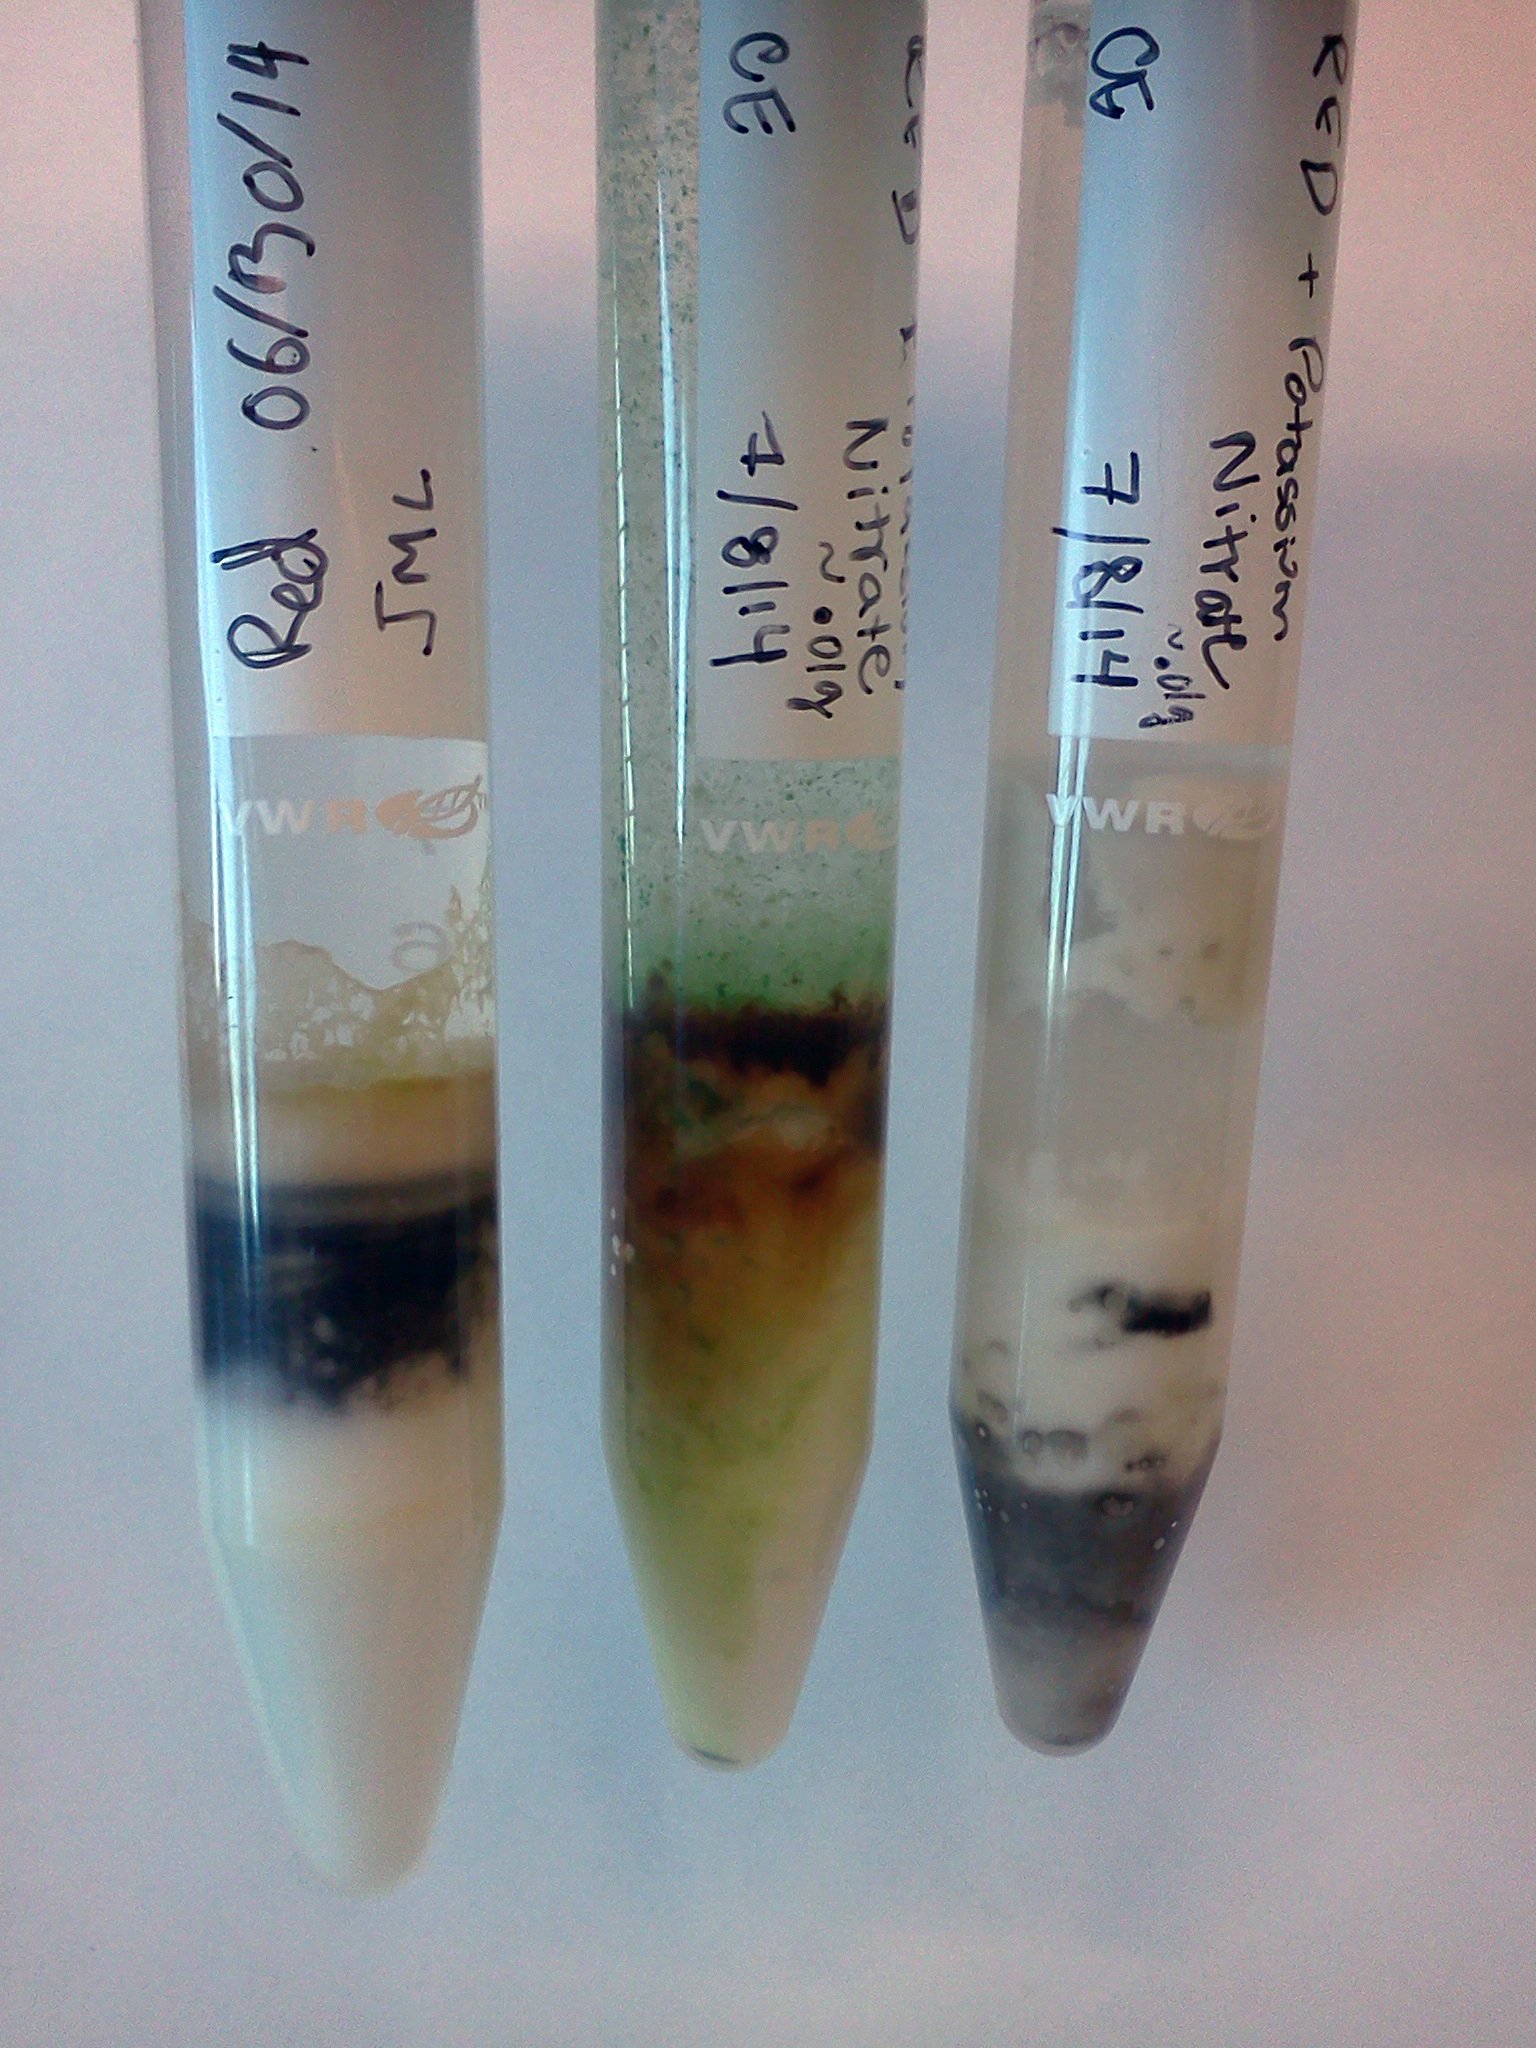
Overall, these tubes also look fairly similar to their 7 week incarnation. However, one of the Ammonium Acetate added vials has less black microbes at the bottom of the tube than it had previously (appearance of white microbes?). The Potassium Nitrate added vials appear to have a slight increase in the thickness of the layers.
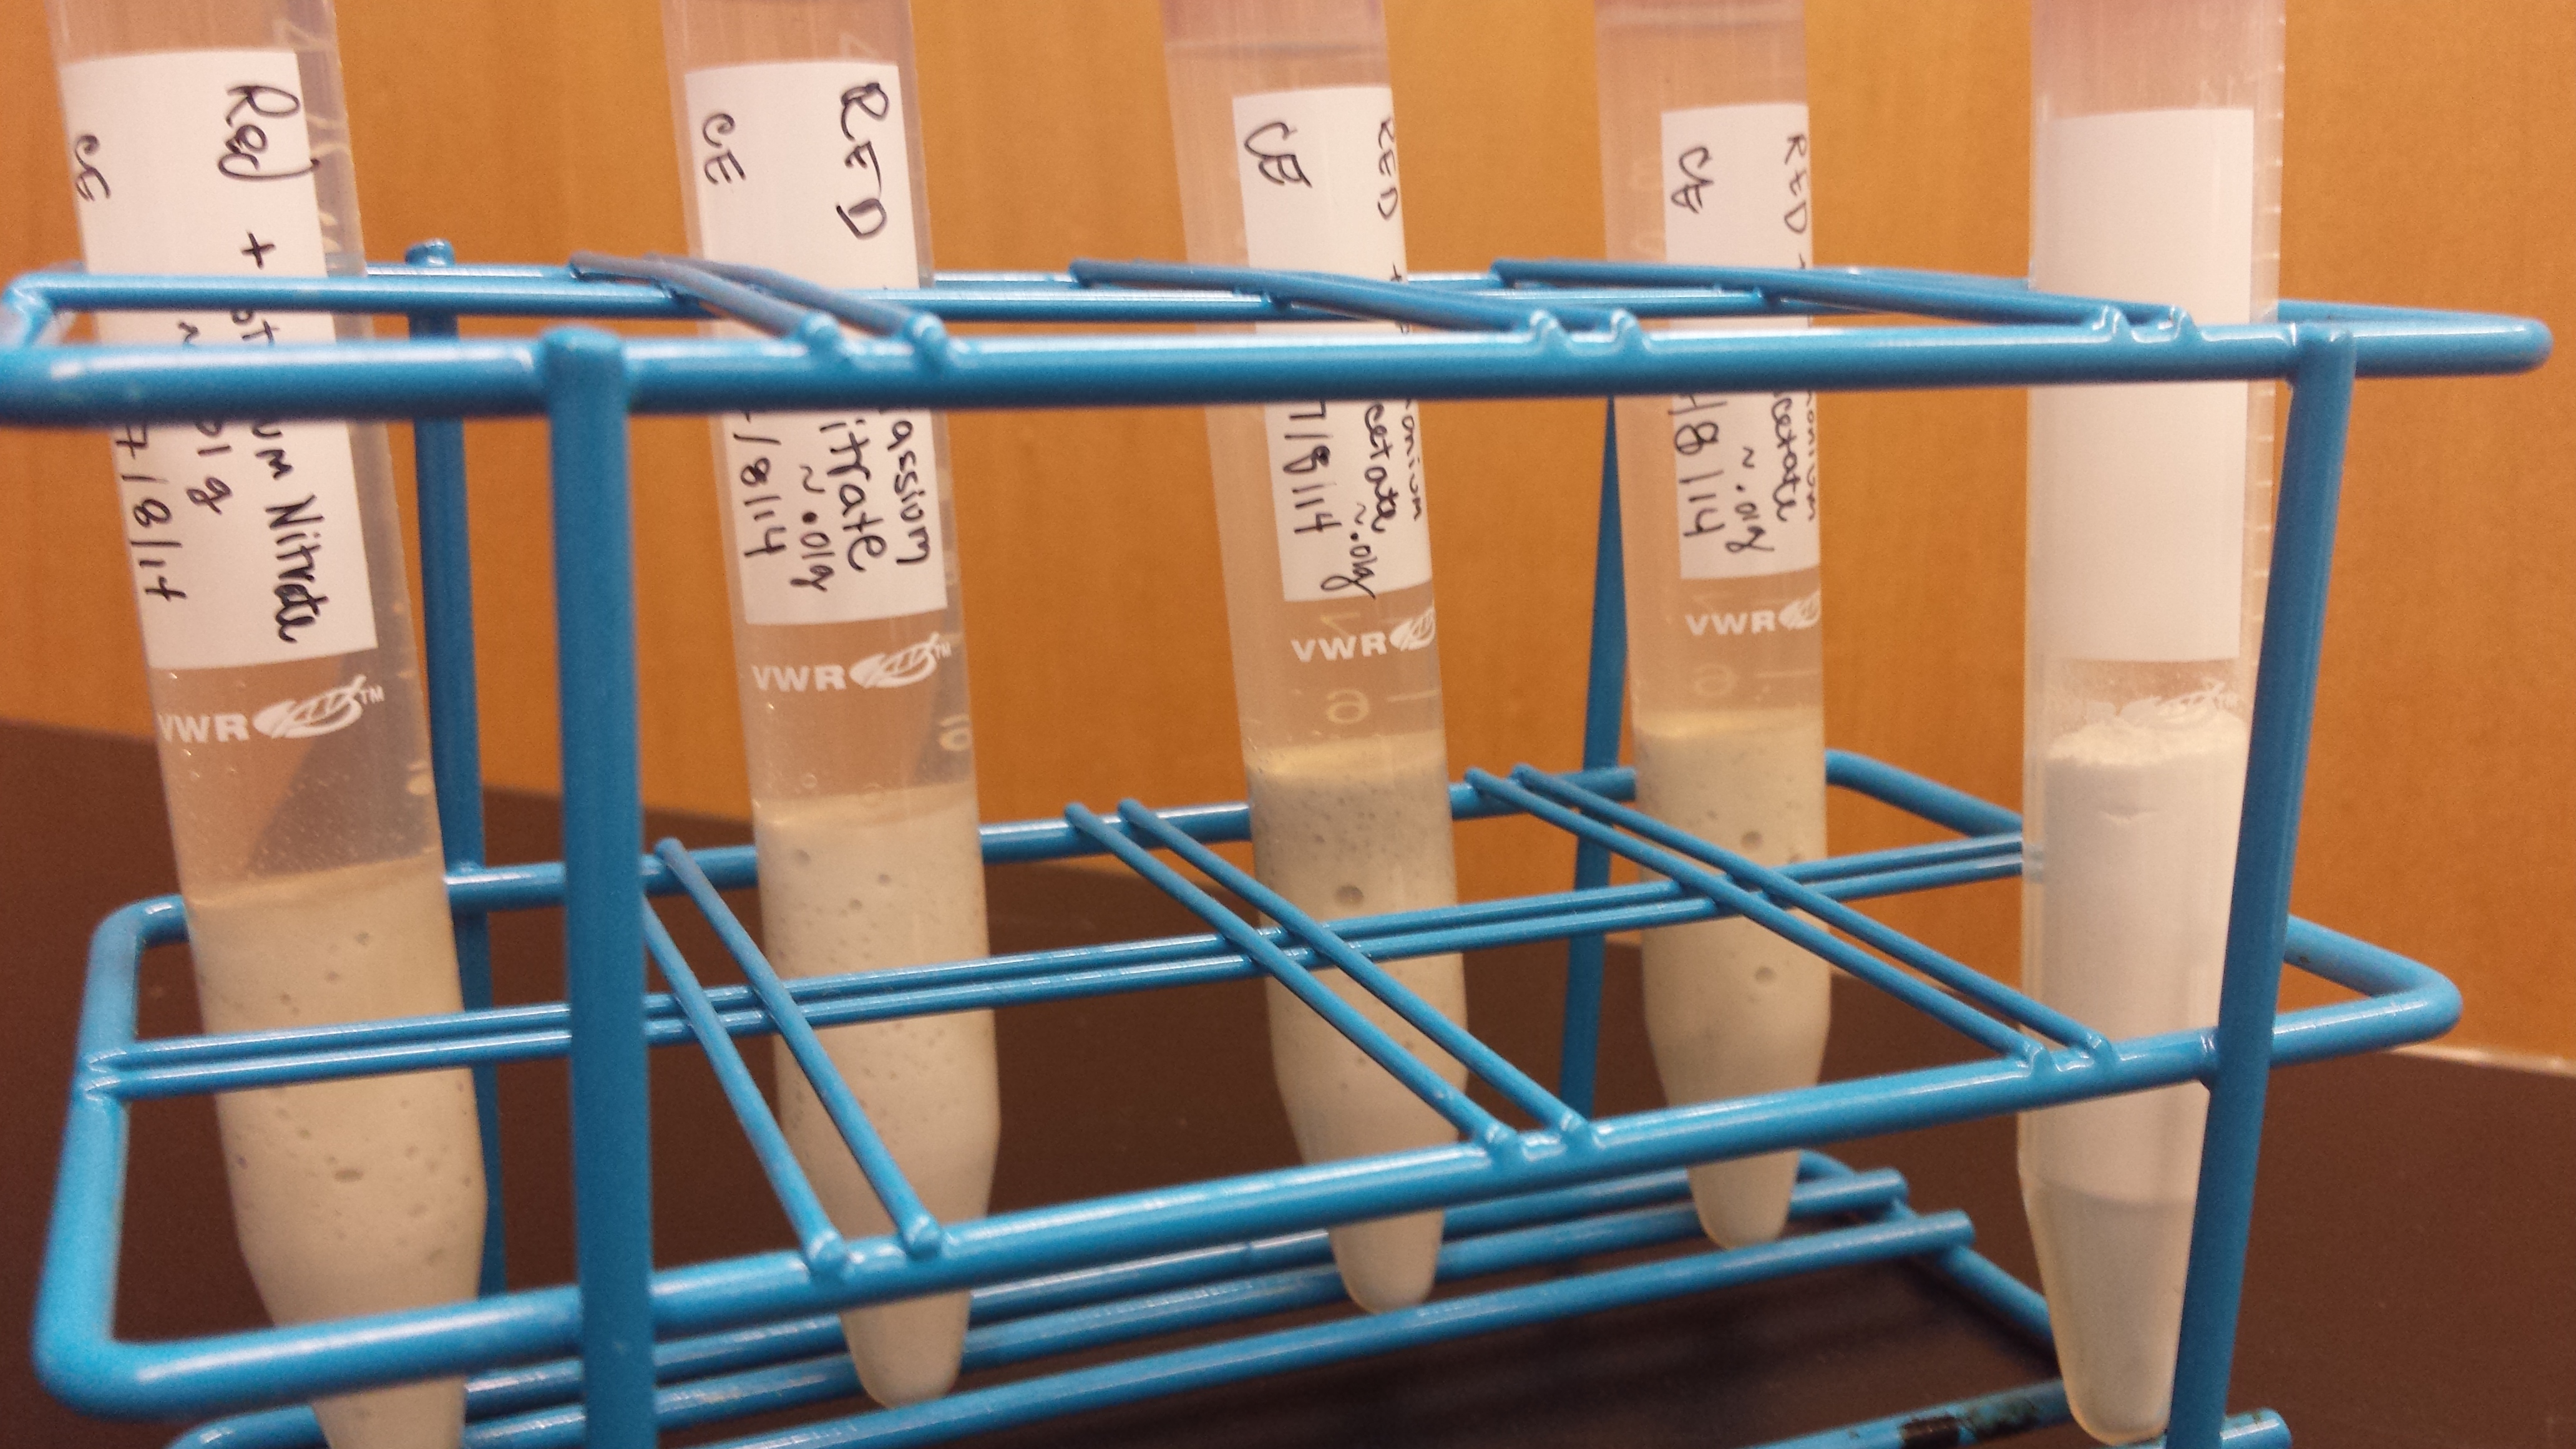
Left to Right: Nothing Added, Ammonium Acetate Added, Ammonium Acetate Added (Kept in Dark) – Nothing Added, Potassium Nitrate Added, Potassium Nitrate Added (Kept in Dark)
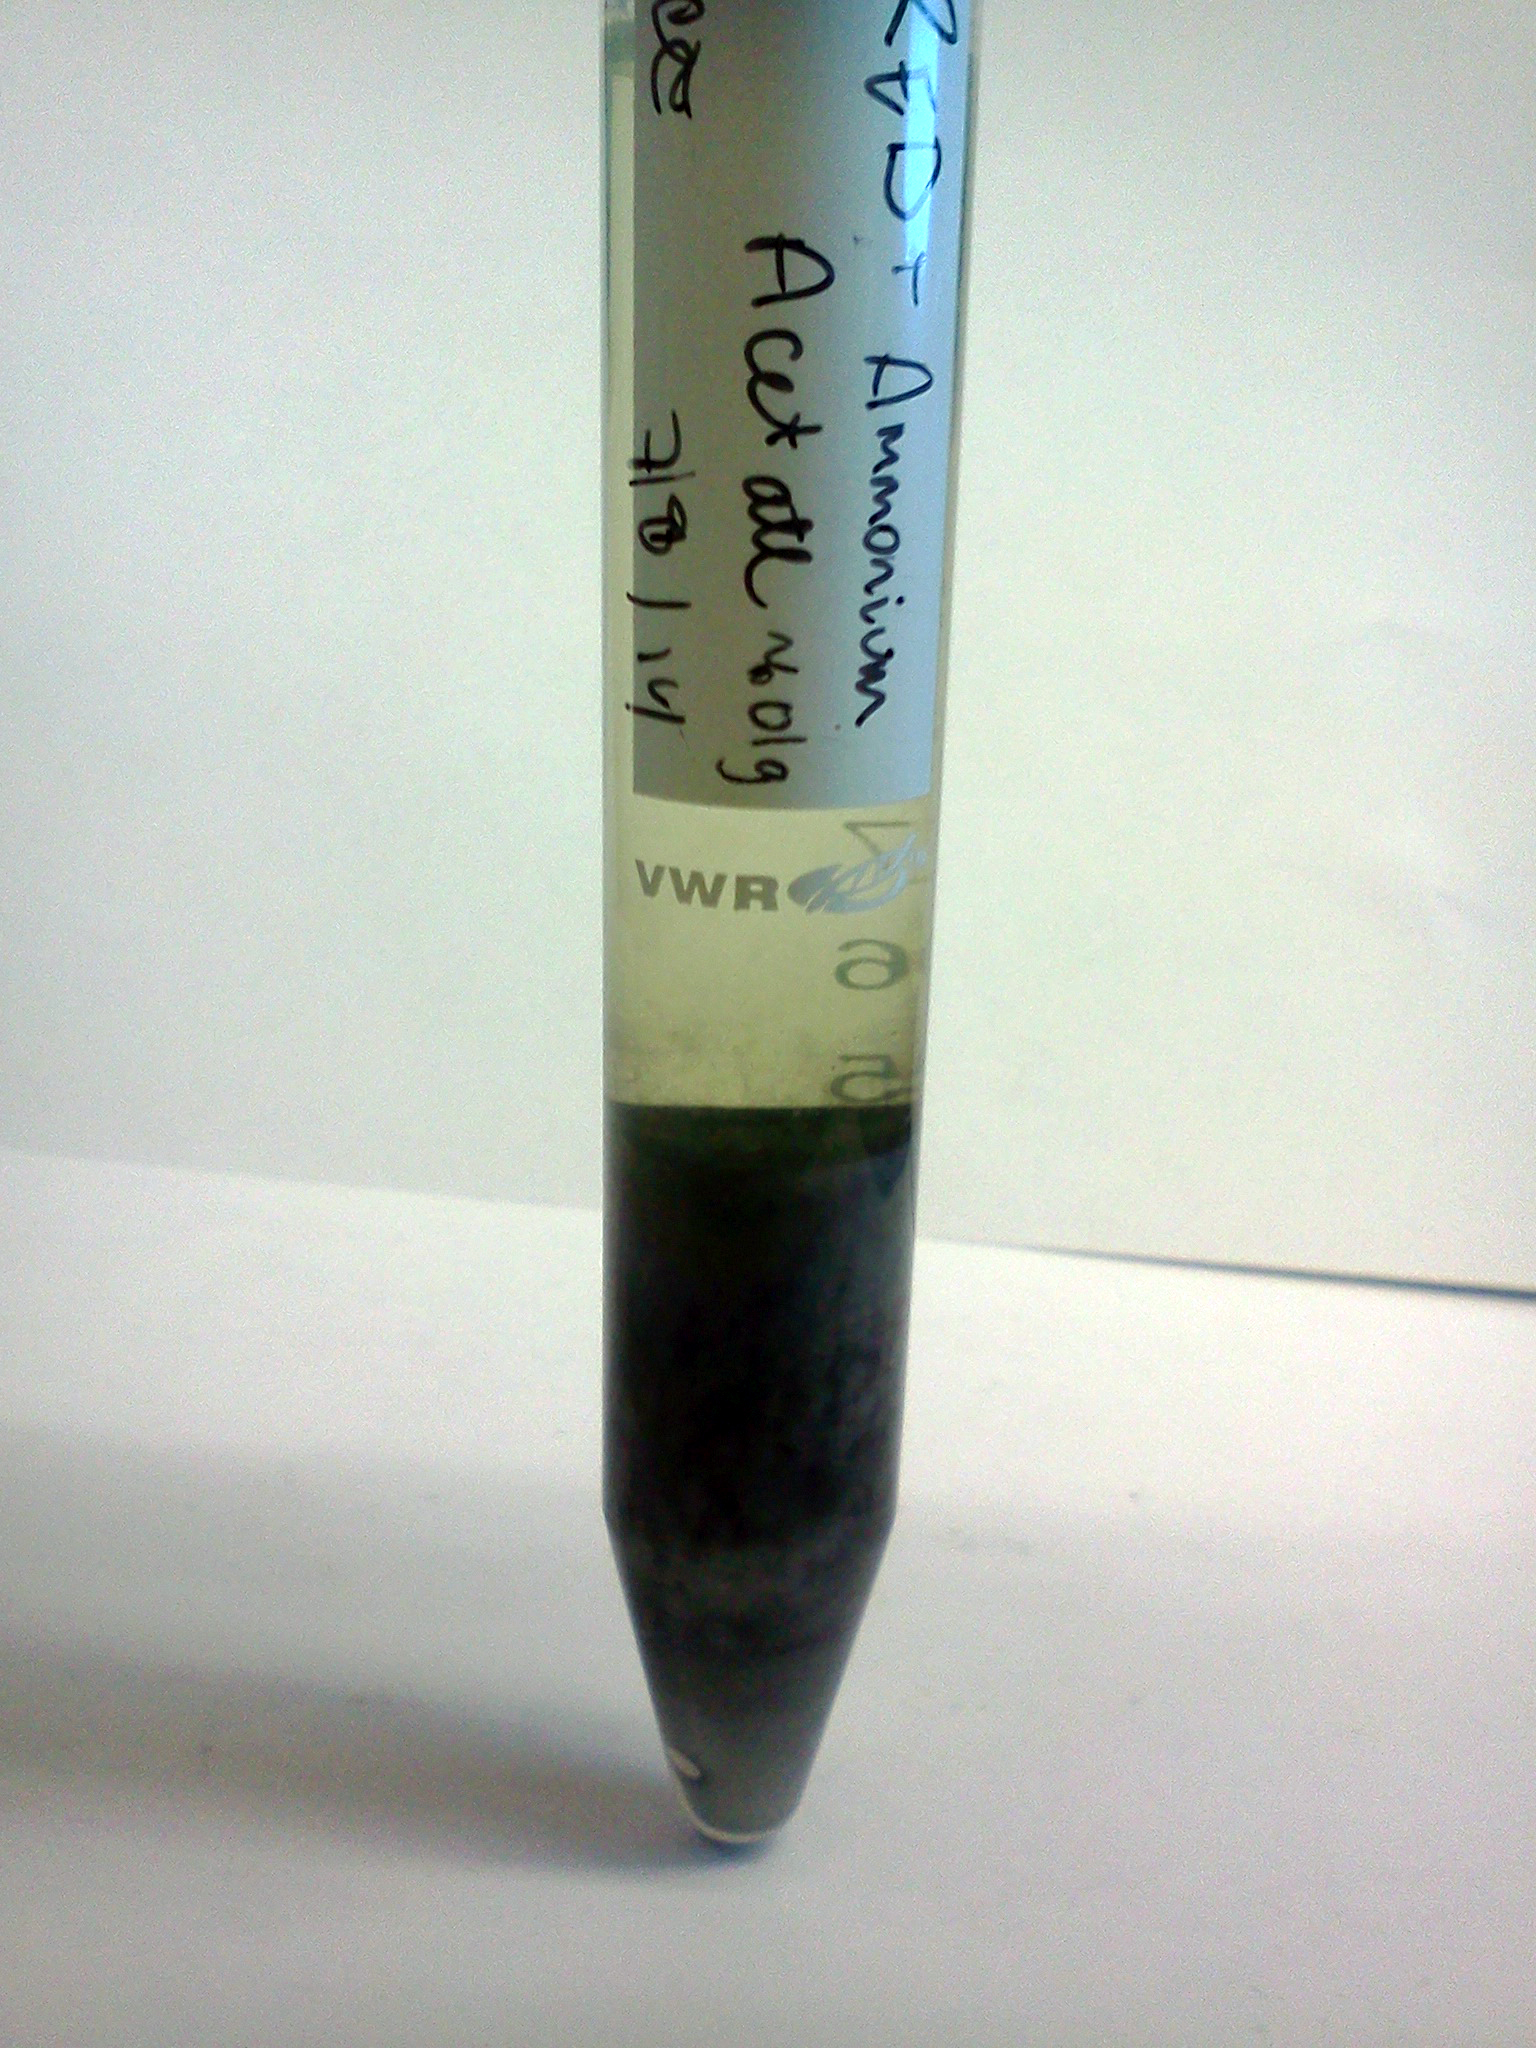
The most noticeable difference is that the Ammonium Acetate added dark vial’s liquid portion has a green hue which it didn’t have before. Additionally the pinkish hue in the liquid in the Ammonium Acetate added light vial is much darker than it was before. The Potassium Nitrate vials are similar to their 7 week counterparts; they just have more biomass and/or bubbles.
Update over. Hopefully, you’ll hear from us again fairly soon with a new update on our lovable wino’s!
It is time again for a Winogradsky column update! It has been three weeks since we last shared with you our Winograsky column progress. If in that time you’ve forgotten what a Winogradsky column is and our goals for them I urge you to visit: Adventures with Winogradskies and Further Adventures with Winogradskies to refresh your memory.
After 7 weeks:
We are finally starting to see some pretty pink layers! Many of the darker colored bacteria from week 4 are gone from these columns… could it be that our columns are undergoing microbial succession?? Could Winograsky columns be a good model system for studying microbial succession?
Strangely (or not so strangely?), it is our large containers that show the most variation between replicates from the same sample location. We have everything from green-as-grass and pretty-in-pink to black-as-coal microbes. The container above on the far right is the one that we’ve been simulating soil conditions in by covering the bottom half of the container – could the lack of pink and purple microbes be due to this?
Above you can see the variation in vials taken from different sampling locations. The microbes in these vials seem to be growing at a slower pace than those in the large container – we also see this with our small micro-centrifuge tubes (not pictured) which haven’t changed significantly form week 4.
Experimental Tubes ( (where we added either Potassium Nitrate or Ammonium Acetate) – After 6 weeks:
On the left are the tubes we added Potassium Nitrate too and on the right are the tubes we added Ammonium Acetate too. The Potassium Nitrate tubes have green microbes growing in firework like patterns up the sides of the tubes! The Ammonium Acetate tubes have pinkish-brown microbes clouding them up! It is amazing how different the Potassium Nitrate and Ammonium Acetate tubes are given that they came from the same original sample!
The two above tubes were kept in the dark via aluminum foil. The left tube has had Potassium Nitrate added to it and the right tube has had Ammonium Acetate added. It is hard to see but the Potassium Nitrate tube has a lot of gas bubbles in the diatomaceous earth in the bottom of the column.
Left to Right: Ammonium Acetate Added (Kept in Dark), Ammonium Acetate Added, Nothing Added – Potassium Nitrate Added (Kept in Dark), Potassium Nitrate Added, Nothing Added
The differences between the different treatments (light with chemical vs. dark with chemical vs. no chemical ) is most significant when you observe the tubes right next to each other. It will be interesting to investigate the community composition differences between all these tubes! I wonder what types of communities we’d see with different pH’s, salt concentrations or other added chemicals… Until next time, stay tuned!
Our Winograsky columns have come a long way from our previous post two weeks ago. To review what a Winogradsky column is and our goals for them please see: Adventures with Winogradskies.
After 4 weeks:
Green layers have started to develop on the top of some of the tubes and to a less visible extent on some of the larger containers.
In some tubes we are starting to see defined layers. Layers seem to vary between tubes containing seawater from different sample locations as well as between tubes with water from the same location.
Unfortunately, our tiny microcentrifuge tubes haven’t changed much in the past two weeks.
4 Weeks vs. 1.5 Weeks:
Definitive layers are less visible in our large containers (perhaps due to their non-cylindrical shape?), but there is significant visible growth compared to the containers at 1.5 weeks. Additionally, upon closer inspection both red and green splotches can be found in the container.
Simulating Soil Conditions – 4 weeks:
At first glance, the container that we covered to simulate soil conditions looks similar to the uncovered columns. However, there is a small white strip at the top of sediment that we don’t see in the uncovered columns. There also appears to be a biofilm growing along the sides of the container.
As well as the beginning of a layer floating on the top of the seawater in the container.
Experimental tubes at 3 weeks (where we added either Potassium Nitrate or Ammonium Acetate):
From left to right: Ammonium Acetate Added, Potassium Nitrate Added, Nothing Added
We decided to keep one vial where Ammonium Acetate was added and one vial where Potassium Nitrate was added in complete darkness.
From left to right: Dark Potassium Nitrate Added, Light Potassium Nitrate Added, Light Nothing Added
Notice the difference in the amount of bubbles between the vials under different light and chemical conditions. All three of these vials have seawater from the same location.
Often when microbiologists begin to explore an unknown (or relatively unknown) environment, they begin by using classical microbiological techniques to try to characterize the communities of microbes living in that environment. These classical techniques are often referred to as “culture-based” because they are oriented towards the goal of trying to grow (or culture) microbes in the lab. Although culture-based techniques can be limiting (it’s nearly impossible to culture every single organism in any given environment), they are very useful for laying the foundation for the non-culture-based techniques the Seagrass Microbiome project will be using.
As a result, we in the Eisen lab have been playing around with some classical microbiology techniques alongside our non-culture-based explorations. One of the coolest techniques we’re using is Winogradsky columns. Winogradsky columns are essentially microbial terrariums. The basic recipe is as follows: take a clean tube, add a few essential chemicals, spike in some wild microbes, close the lid and let natural nutrient cycles take over. If you’ve done everything right, in a couple of weeks, you should start to see layers of microbes each living in a different mini niche within your mini ecosystem.
Two weeks ago we did just that. We’ve been following the progress of the tubes on the side as we pursue other non-culture-based projects. We’ve also been exploring different ways of making the columns to figure out the best way to get clean layers while still preserving the integrity of the column. Below are some pictures of our progress to date:
Two Days in:
Two days into the experiment bubbles started to appear.
One week in:
One week into the experiment, brown patches appeared on the surface of the jars.
The smaller tubes took longer to show brown spots, at one week all they had was bubbles.
1.5 weeks in:
At a week and a half the brown mat has spread over the surface of each container.
9 Days in:
9 days into the experiment, we decided to cover one of the large flasks to simulate soil conditions.
2 weeks into the experiment:
14 days into the experiment dark black splotches appeared under the surface of one of the large flasks.Surprisingly, the covered flask also had the same black splotches developing.Some of the smaller tubes had them as well.One microcentrifuge tube had a beautiful green layer develop.
_________________
As a side experiment, we spiked new tubes with potassium nitrate and ammonium acetate to see if the presence of nitrogen changed anything about the development of the flasks. These tubes were created a week behind the others.