Category Archives: Uncategorized

EDAMAME 2014’s Greatest Hits

I recently had the wonderful opportunity to attend the Explorations in Data Analyses for Metagenomic Advances in Microbial Ecology (EDAMAME) Workshop. The workshop was held at the Kellogg Biological Station in Michigan by Ashley Shade (@ashley17061), Tracy Teal (@tracykteal) and Josh Herr (@number_three) – who are all AWESOME. I thought I’d go through and highlight what I found to be my favorite and/or most useful parts of the workshop.

Before I jump right in to the science, my favorite non-science related parts of EDAMAME included non-stop ice cream (lunch and dinner – with waffle cones!), meeting such a diverse crowd of microbe lovers, seeing Guardians of the Galaxy at the Alamo Drafthouse Cinema, enjoying some local Michigan beer at Bell’s Brewery and hearing Jack Gilbert (@gilbertjacka) play guitar and sing one night at the campfire (and yes, there were s’mores!).

IMG_4536

Anyway, pop this bad boy in and let’s get started!

Track 1: O-T-U Child

For microbial ecology newbies, I think that EDAMAME’s introduction to alpha diversity and beta diversity lectures are a very good resource. I found the section on ordination plots especially helpful as even though I have taken introductory statistics classes such plots were never discussed! I would also point the microbial ecology newcomer to EDAMAME’s Introduction to Shell and Introduction to QIIME tutorials (Part 1, Part 2 and Part 3) as both are very well documented and every step in the tutorials is well described.

Some things to think about: Replication and Experimental Design. Something that was mentioned several times by different guest speakers (Pat Schloss (@PatSchloss) and Jim Cole, I think) was the idea of using a synthetic mock community each time you do a sequencing run to ascertain the error rate of that particular sequencing run. We also had several conversations about what replication means for microbial ecologists – if interested in what we discussed, go read: Replicate or lie.

Track 2: Bioinformatics Killed My Computer

If you have previously tried to pick OTU’s or chimera check in QIIME or mothur (if confused, please review resources discussed in Track 1) on your personal laptop or even a lab computer, you are probably familiar with long wait times, black screens and spinning wheels of death.  Data sets are increasing in size at a much more rapid pace then the computational power included in standard use laptops. My Macbook Pro is five years old (which means its basically a dinosaur) and still kicking it with its 2.26 GHz Intel Core 2 Duo processor and its recently upgraded 8 GB of RAM. However, when it comes to some of my data analysis, its fan and slow response time make it sound like a small dying animal. So what is a researcher to do? Use a superior lab computer that has an i7 processor and 16 GB of RAM – YAY! But what happens when even that is not enough?

Solution Numero Uno: Use a service like Amazon Web Services where you pay to use Amazon’s computational power to run your analyses. Don’t know how to set up an Amazon instance? The lovely EDAMAME instructors have got you covered with this tutorial and also these follow-up tutorials on how to connect to your instance from a PC or a Mac/Linux machine. One thing that makes using Amazon Web Services nice is that there are community API’s you can use that have QIIME and/or mothur already installed.

Solution Numero Dos: Use your university’s computing cluster (if available). In my experience, most clusters are logged into the same way as you log into your Amazon instance – using SSH. For those unfamiliar with SSH, here is a tutorial I found using the magic of Google for Mac/Linux computers. One problem you might run into with using a cluster is that the software you want to use might not be installed – in which case, if you are lucky the computer gurus who manage your local cluster will install it and keep it up to date for you! However if you are unlucky… they might say that they won’t install it at all.

If using either of these solutions, I highly suggest looking into using either Screen or Tmux which were introduced to us at EDAMAME (I am currently using Tmux). Screen and Tmux allow you to open multiple bash windows on the machine you are SSH-ed into. This means if you run a command from inside a bash window in Screen/Tmux and then detach from Screen/Tmux and exit your SSH session, your command will continue to run on the server or cluster your were logged into. This means you no longer have to worry about the internet cutting out or leaving your personal computer on when running commands on remote server/clusters!

Track 3: I Wanna Download Some Genomes

Have you ever wanted to download a genome from NCBI or MG-RAST but not wanted to hassle with the ever changing website interfaces? Have you ever wanted to download hundreds of genomes but the thought of all that clicking has you wanting to run to your safe place? Me too! I found guest lecturer, Adina Chuang Howe (@teeniedeenie)’s tutorial on how to do these things from the shell to be one of the most useful parts of EDAMAME. The tutorial comes with the necessary scripts that you can re-purpose to download your favorite genomes – these could potentially save you hours and hours of valuable research time (and most of your sanity).

Track 4: I Got A Database

Throughout EDAMAME, we were introduced to several different marker gene databases (16S, ITS). The default database in QIIME is the greengenes database and until EDAMAME, I never realized just how many databases there were! I was especially surprised when in Jim Cole’s guest lecture he showed us a slide with a venn diagram comparing the sequences contained in the different fungal ITS databases and there was a definite visible discrepancy between what each database contained. I also found his slides comparing the taxonomic accuracy of the different fungal ITS databases as we have some seagrass fungal microbe data to analyze. I think the exposure to the different databases was helpful to my evolution as a microbial ecologist as it made me start thinking about which database I’m using for my analyses and what my biases these databases might introduce to my analysis. Some helpful questions to keep in mind when looking at different databases are laid out in this EDAMAME tutorial.

Track 5: Don’t You (Forget To Visualize Me)

Humans are very visually oriented creatures and having visually appealing, statistically accurate and reproducible graphs can really help a presentation succeed. A strong knowledge of R (which I someday hope to have) can help you achieve such graphs. We walked through several different R tutorials relating to microbial ecology at EDAMAME which I thought were helpful when combined with EDAMAME’s beta diversity and hypothesis testing lectures. These R tutorials were also specifically aimed at utilizing OTU tables which helped me think about how I might apply what I was learning to my own data analysis. We were also introduced to a vast array of data visualization and exploration tools (see this lecture).

Bonus Track: Hooked on Microbial Ecology (because if I hadn’t been hooked on microbial ecology before EDAMAME, I sure as would be now!)

BvIOe_eCQAI9Ddj
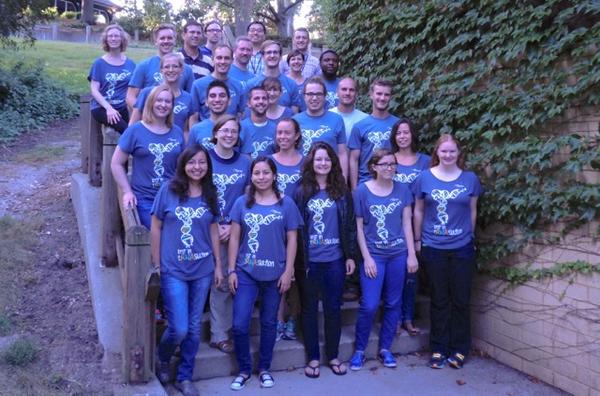
EDAMAME Class of 2014 in our MoBio T-shirts!

All of the workshop materials for EDAMAME 2014 can be found on their website and there is also a storify of all the live tweeting that went on throughout the EDAMAME workshop using the hashtag #edamame2014. Also, look out for a future guest post on MoBio’s blog, The Culture Dish, about seagrass microbes!

Even More Adventures with Winogradskies

It is time again for a Winogradsky column update! It has been three weeks since we last shared with you our Winograsky column progress. If in that time you’ve forgotten what a Winogradsky column is and our goals for them I urge you to visit: Adventures with Winogradskies and Further Adventures with Winogradskies to refresh your memory.

After 7 weeks:

IMG_20140821_140956

We are finally starting to see some pretty pink layers! Many of the darker colored bacteria from week 4 are gone from these columns… could it be that our columns are undergoing microbial succession?? Could Winograsky columns be a good model system for studying microbial succession?

IMG_20140821_141123IMG_20140821_141221IMG_20140821_141404

Strangely (or not so strangely?), it is our large containers that show the most variation between replicates from the same sample location. We have everything from green-as-grass and pretty-in-pink to black-as-coal microbes. The container above on the far right is the one that we’ve been simulating soil conditions in by covering the bottom half of the container – could the lack of pink and purple microbes be due to this?

IMG_20140821_141517IMG_20140821_141540

Above you can see the variation in vials taken from different sampling locations. The microbes in these vials seem to be growing at a slower pace than those in the large container – we also see this with our small micro-centrifuge tubes (not pictured) which haven’t changed significantly form week 4.

Experimental Tubes ( (where we added either Potassium Nitrate or Ammonium Acetate) – After 6 weeks:

IMG_20140821_141640IMG_20140821_141611

On the left are the tubes we added Potassium Nitrate too and on the right are the tubes we added Ammonium Acetate too. The Potassium Nitrate tubes have green microbes growing in firework like patterns up the sides of the tubes! The Ammonium Acetate tubes have pinkish-brown microbes clouding them up! It is amazing how different the Potassium Nitrate and Ammonium Acetate tubes are given that they came from the same original sample!

IMG_20140821_141751IMG_20140821_141840

The two above tubes were kept in the dark via aluminum foil. The left tube has had Potassium Nitrate added to it and the right tube has had Ammonium Acetate added. It is hard to see but the Potassium Nitrate tube has a lot of gas bubbles in the diatomaceous earth in the bottom of the column.

 IMG_20140821_141935 IMG_20140821_141818

Left to Right: Ammonium Acetate Added (Kept in Dark), Ammonium Acetate Added, Nothing Added – Potassium Nitrate Added (Kept in Dark), Potassium Nitrate Added, Nothing Added

The differences between the different treatments (light with chemical vs. dark with chemical vs. no chemical ) is most significant when you observe the tubes right next to each other. It will be interesting to investigate the community composition differences between all these tubes! I wonder what types of communities we’d see with different pH’s, salt concentrations or other added chemicals… Until next time, stay tuned!

Congratulations Henna!

It has been the privilege for the Eisen lab to host Henna Hundal, a high school senior, radio show host and soon-to-be certified yoga instructor, on a six-week summer research project. Henna was part of UC Davis’ prestigious Young Scholars Program.

IMG_20140715_151631IMG_20140630_125443

For the wet lab portion of Henna’s project, she focused on the Seagrass Microbiome which involved growing and isolating microbes from seawater on LB that she helped collect from tanks of Zostera marina at Bodega Bay.

IMG_20140731_163823IMG_20140731_163908

As part of the Young Scholar’s Program, Henna had to make a scientific poster of her intended project, write a 10-30 page final paper and give a 10 minute presentation on her project. For extra credit (because Henna was magnificently studious) she also turned her powerpoint presentation into a makeshift poster.

The best explanation of Henna’s summer project was the one that Henna gave herself. As an experienced radio show host, Henna was a natural presenter. Henna’s final presentation was recorded and can be viewed: HERE.

As a whole, we are unbelievably proud of the work that Henna did while in the lab and would be happy to have her back anytime! She is an amazing young scientist and effective science communicator and we have no doubt about her future success! So congratulations Henna on being made of awesome!

Further Adventures with Winogradskies

Our Winograsky columns have come a long way from our previous post two weeks ago. To review what a Winogradsky column is and our goals for them please see: Adventures with Winogradskies.

After 4 weeks:

IMG_20140725_174355IMG_20140725_173643

Green layers have started to develop on the top of some of the tubes and to a less visible extent on some of the larger containers.

 IMG_20140725_174026 IMG_20140725_173721

In some tubes we are starting to see defined layers. Layers seem to vary between tubes containing seawater from different sample locations as well as between tubes with water from the same location.

IMG_20140725_174437

Unfortunately, our tiny microcentrifuge tubes haven’t changed much in the past two weeks.

4 Weeks vs. 1.5 Weeks:

IMG_20140725_17350420140709_115336

Definitive layers are less visible in our large containers (perhaps due to their non-cylindrical shape?), but there is significant visible growth compared to the containers at 1.5 weeks. Additionally, upon closer inspection both red and green splotches can be found in the container.

Simulating Soil Conditions – 4 weeks:

IMG_20140725_173547IMG_20140725_173556IMG_20140725_173609

At first glance, the container that we covered to simulate soil conditions looks similar to the uncovered columns. However, there is a small white strip at the top of sediment that we don’t see in the uncovered columns. There also appears to be a biofilm growing along the sides of the container.

  IMG_20140725_173615     

As well as the beginning of a layer floating on the top of the seawater in the container.

Experimental tubes at 3 weeks (where we added either Potassium Nitrate or Ammonium Acetate):

IMG_20140725_174116IMG_20140725_174052IMG_20140725_174128 

From left to right: Ammonium Acetate Added, Potassium Nitrate Added, Nothing Added

IMG_20140725_174155

We decided to keep one vial where Ammonium Acetate was added and one vial where Potassium Nitrate was added in complete darkness.

IMG_20140725_174250IMG_20140725_174332IMG_20140725_174344 

From left to right: Dark Potassium Nitrate Added, Light Potassium Nitrate Added, Light Nothing Added

Notice the difference in the amount of bubbles between the vials under different light and chemical conditions. All three of these vials have seawater from the same location.

Adventures with Winogradskies

Often when microbiologists begin to explore an unknown (or relatively unknown) environment, they begin by using classical microbiological techniques to try to characterize the communities of microbes living in that environment. These classical techniques are often referred to as “culture-based” because they are oriented towards the goal of trying to grow (or culture) microbes in the lab. Although culture-based techniques can be limiting (it’s nearly impossible to culture every single organism in any given environment), they are very useful for laying the foundation for the non-culture-based techniques the Seagrass Microbiome project will be using.

As a result, we in the Eisen lab have been playing around with some classical microbiology techniques alongside our non-culture-based explorations. One of the coolest techniques we’re using is Winogradsky columns. Winogradsky columns are essentially microbial terrariums. The basic recipe is as follows: take a clean tube, add a few essential chemicals, spike in some wild microbes, close the lid and let natural nutrient cycles take over. If you’ve done everything right, in a couple of weeks, you should start to see layers of microbes each living in a different mini niche within your mini ecosystem.

Two weeks ago we did just that. We’ve been following the progress of the tubes on the side as we pursue other non-culture-based projects. We’ve also been exploring different ways of making the columns to figure out the best way to get clean layers while still preserving the integrity of the column. Below are some pictures of our progress to date:

Two Days in:

20140702_171525
Two days into the experiment bubbles started to appear.

One week in:

20140707_101527
One week into the experiment, brown patches appeared on the surface of the jars.


20140707_101942

20140707_102008
The smaller tubes took longer to show brown spots, at one week all they had was bubbles.

1.5 weeks in:

20140709_114539
At a week and a half the brown mat has spread over the surface of each container.


20140709_115336

9 Days in:

20140709_165522
9 days into the experiment, we decided to cover one of the large flasks to simulate soil conditions.

20140709_170102

2 weeks into the experiment: 

20140714_085939
14 days into the experiment dark black splotches appeared under the surface of one of the large flasks.
20140714_090140
Surprisingly, the covered flask also had the same black splotches developing.
20140714_090315
Some of the smaller tubes had them as well.
20140714_090358
One microcentrifuge tube had a beautiful green layer develop.

_________________

20140714_090650
As a side experiment, we spiked new tubes with potassium nitrate and ammonium acetate to see if the presence of nitrogen changed anything about the development of the flasks. These tubes were created a week behind the others.

Visit to the Smithsonian Marine Station

Armed with some instructions for where to find a few different seagrass species and a couple of names to ask for, I headed to the Smithsonian Marine Station (SMS) in Fort Pierce, FL on Thursday, April 17th.

The SMS was kind of deserted, but there was a behind the scenes tour scheduled for 2pm, so I waited around for that. In the meantime, I went to meet with Bill Hoffman, the Exhibit Manager at the St. Lucie County Aquarium, across the street from the SMS. He shared with me his experience with setting seagrasses up in his aquarium there. He said that at first, he would try to lay a patch of seagrass, with surrounding sediment into the tanks (like sod,) but that they kept dying. Eventually, he had success when he planted the plants into the tanks that contained the dead “sod.” But still, not every species he tried will grow in the tanks.

Bill loaned me some snorkeling gear so that I could go hunt down the seagrass beds that Robert Virnstein described to me. My only experience of seagrass is the Zostera marina at Bodega Bay, so I was interested in laying eyes on some other species. I found the dense Syringodium bed next to the boat ramp at the end of the Aquarium’s parking lot. It was remarkable to me how variable the density of both the seagrass as well as the algae were over a really small area. Sometime, the algae was so abundant and dense that I couldn’t even see the seagrasses. Other times, it was easy to see individual seagrass shoots poking out in the sandy sediment. Syringodium has cylindrical leaves, so that was different. The leaves were only about 8 inches long, and the rhizomes were very delicate compared to Z. marina.

Then, I went over to Chuck’s Steak House. There, I found a mixed bed with two kinds; I think Halophila and Halodule. They were about the same size, but their leaves were shaped differently. These were remarkably tiny! I will definitely have to re-write the sampling protocol for these.

The three species I found in Indian River Lagoon. My guess is Top: Halodule, Right: Syringodium, Bottom: Halophila

After my little snorkeling adventure, I went to the SMS “Behind the Scenes” tour. I learned a lot about the Indian River Lagoon, which has significant temperature and salinity gradients, making it an incredibly biodiverse ecosystem. The tour was useful and interesting. Especially, the Mangrove experiments – couldn’t help but wonder about the phylosphere microbial communities on these salty leaves.

Baby Mangroves! Some deal with salt by excreting it from the leaf surface, others have specialized salt excretion nodules at the base of the leaves.

Eventually, I connected with Niclas Engene, who is interested in collaborating with us on a GoLife proposal to do Cyanobacterial genome sequencing/phylogenetics. I also chatted with a few people, including Jenny Sneed about which would be the best primers to use for algal diversity surveys. No one seemed to know, but at least I’m not alone in my uncertainty. I gather that the person I really needed to talk to is Justin Campbell, but he was probably on a plane coming back from Belize while I was there. Oh well.

When life gives you a failed rocket lauch…

Make fieldwork!

I was in the Cape Canaveral area to view our Space Microbes getting launched to the ISS this past Monday, April 14th. Unfortunately, the launch was canceled due to a helium leak in the SpaceX Falcon 9 rocket. The next launch was scheduled for Friday the 18th, so we decided to stick around and wait for it. Jonathan suggested that I rent a car and head down to the Smithsonian Marine Station in Fort Pierce.

That’s where Valerie Paul works, and we’ve been talking to her about incorporating a microbial sampling component in the Thallassia Experimental Network that she’s currently setting up. This is modeled after ZEN, and they will be doing experiments in which they will be modifying grazing and nutrient levels at four sites (Indian River Lagoon, FL Keys, Carrie Bow Bay in Belize, and Bocas del Toro in Panama.) Unfortunately, Valerie is in Belize right now, so I scrambled to find other contacts in the area, or at least get some tips about where I could find some seagrasses. I decided to post some of the information I got here.

First, from Jay Stachowicz:

“I checked out google earth and it looks like there might be some patchy seagrass beds just north of the Cocoa Beach causeway that you might be able to see from the beach or walk out to if the water is super shallow if you are feeling adventurous. Looking on google earth, the large dark areas look to me like deep water and that there are some small greenish dots that look like clumps of seagrass potentially.”

Cool! I would NOT have thought to use Google Earth for this purpose.

Then, Pamela Reynolds suggested that I contact Erik Sotka (who I’d met at the ZEN pertners meeting in March) and he wrote:

I know a few seagrass beds in the Indian River lagoon (south of Cape Canaveral). I’ve collected amphipods from seagrass beds at the park across the road from the Smithsonian Marine Station. That’s a good place to start. Another place with accessible seagrass is at the Jaycee Park boat launch on the outer barrier island near Fort Pierce. Val (and some of her postdocs and staff) will know other accessible locations. Other seagrass specialists in Indian River Lagoon to ask:
– at harbor branch marine institute (~20 miles from SMS), you can try to contact Dennis Hanisak
– Robert Virnstein, Seagrass Ecosystems Analysts, seagrass3@gmail.com (386-546-0204)

Also, see some other contacts within this PDF of abstracts from a recent conference (http://www.unf.edu/uploadedFiles/aa/coas/biology/BENTHIC/BEM2014OralAbstracts.pdf). Download and search for “Indian River”

as a side note, if you want to goto Tampa Bay, I can point you to good, walkable sites for seagrass.
good luck seagrass-hunter.

Awesome! So, I contacted Dennis and Robert and (per Jonathan’s suggestion) a postdoc of Valerie’s (Justin Campbell).

I got this from Robert Virnstein:

Attached is a map with some labels.

At the “SI” site, where the Smithsonian Marine Ecosystems Exhibit is, there are grassbeds that extend about 40 m offshore. Most/All will be Halodule wrightii. You should be able to wade most of it. The Smithsonian lab/office is 250 yards east of the exhibit. And 560 yards east of the exhibit is Chuck’s Steak House (“SI2”), the first building on the left. From the restaurant parking lot should be better grassbeds. On the flats look for Halophila johnsonii. It might be only 1-2 cm tall, so look closely.

On the North Causeway (A1A North) stop at the first park/boat ramp you come to. There may be some grass there. For really good grassbeds, scramble south through the mangroves. There is a huge flat that has Halodule, Syringodium filiforme, and some Thalassia testudinum if you look hard, but you might have to wade/swim south about 100 m. Look at the Google Earth imagery and go back one time step to 2010.
Or you can swim straight out from the boat ramp, across the narrow boat channel, and 50 m from the boat ramp you should find dense grass beds, dominated by Syringodium.

At the “3a” and “3b” sites, if you can get south of the marina onto flats, I feel confident you will find Halophila johnsonii, a federally threatened species listed under the Endangered Species Act.

Or, if you go to the SI lab/office and can find Sherry Reed or Woody Lee, they have worked there for decades and really know the Lagoon. They know where everything is. Tell them I said hi.

SMS_seagrasses

Are you kidding me right now? How amazingly helpful everyone has been! So, tomorrow, I’ll head over to the SMS and try to find Sherry and Woody. Hopefully, they can lend me some snorkeling gear so I can go check out all of these sites. Hooray for fieldwork!